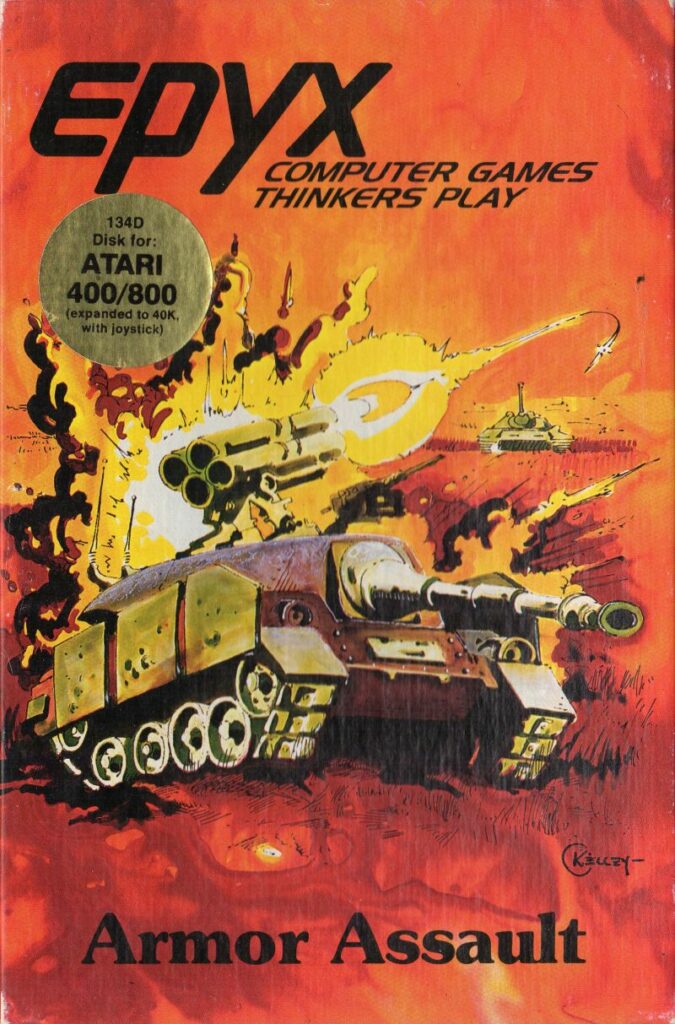
Lieutenant Narwhal – what do you expect from a modern tank ?
Decent armour. Good gun. ATGM, too. And obviously, being able to ram the enemy!
The year is … unspecified. The Russians have taken position near an unspecified river. My objectives are clear : with my small force of 6 unspecified NATO tanks (2 heavy, 2 medium, 2 light), I must either destroy the enemy HQ or more simply destroy every single Russian tank.
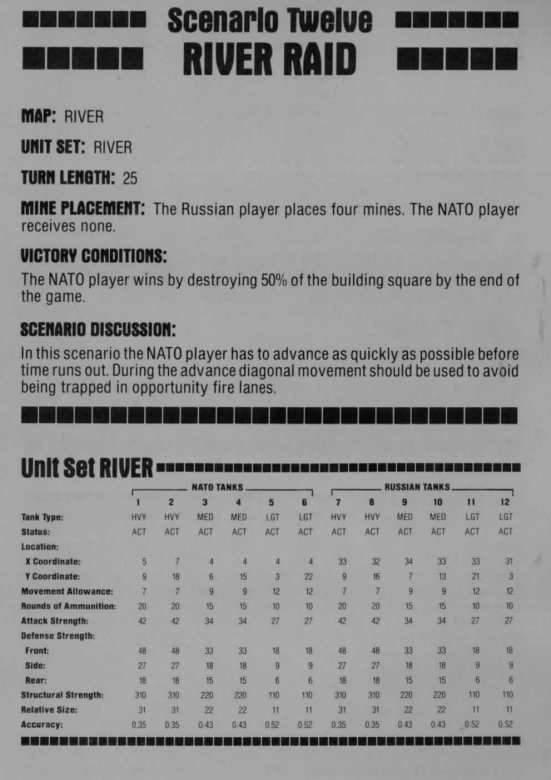
Contrary to what the briefing states, there are no mines, because the AI does not know how to place mines on the ground. Both sides are balanced, with exactly the same combination of vehicles :
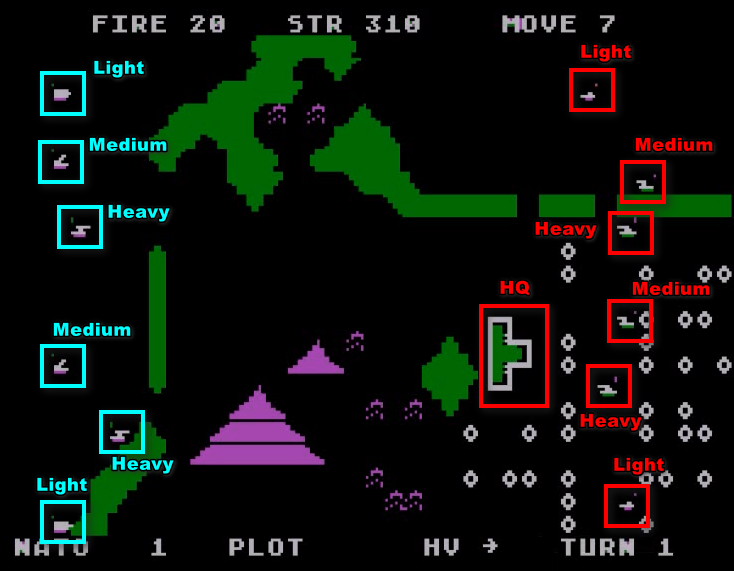
My strategy is to totally ignore the enemy HQ despite the advice that I should advance on it “as quickly as possible“, and focus on the enemy tanks, because the Russians are actually terrible at tanks.
Now, let’s talk about my plan. You will see, it is great plan. The greatest plan in the history of planning ! In the North, the light & medium tanks will fire missiles at long range while my heavy tank will move forward – it has low accuracy so I don’t trust it at long range, but it also has a strong frontal armour so I prefer the enemy to focus on it.
In the South, I will cross through the narrow passage as soon as possible, take a defensive position in the pink mountain and shoot at everything that approaches.
Perfect plan, I told you. What could go wrong ?
The game is turn-based with simultaneous resolution, but for the turn resolution to make any sense, you should know two things :
- In the battlefield of the future, tanks can only shoot in straight in front of them, or precisely 45° to the left or to the right. If the enemy manages to be 30° to your right he is protected from you. But then he cannot hit you either.
- There are two types of attacks, with each tank only able to do one every turn :
- “Offensive fire” starts when your tank has stopped moving. A line is drawn in one of the 3 available attack directions, and the tank will try to shoot every impulse at whatever hostile target stands in that line. For clarity, I will call this “Overwatch” or “Opportunity attack” from now on. Overwatch can consume a lot of ammo if the target is hard to hit, but missed shots just vanish and don’t hit anything else.
- “Defensive fire” happens at the end of the turn. It is actually a missile that flies straight for 6 tiles and then can veer off. For clarity I will call these “Missiles” from now on. Missiles can hit anything on their way and inflict 25% more damage than overwatch attacks.
If shooting is too complicated for you, you can also save ammo and ram the enemy like in World of Tanks.
Anyway, my GREAT plan did not go as planned :
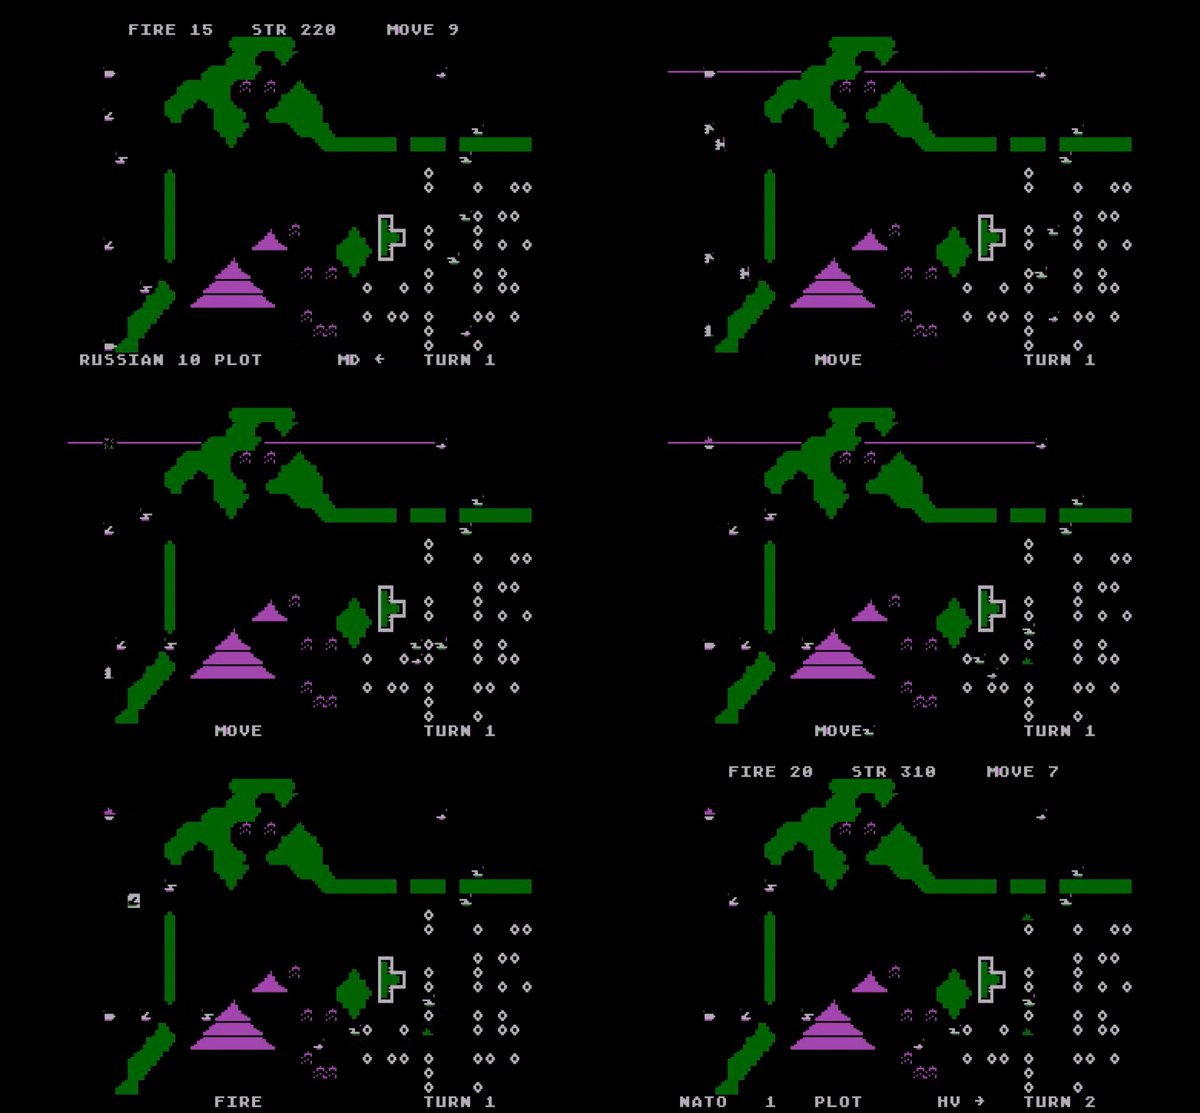
The northernmost light tank stood its ground and decided to overwatch. Since my opposing light tank was also standing its own ground and waiting to send a missile, it received several opportunity shots and got easily destroyed. At least, it was able to send a missile (destroyed vehicles can complete their pre-planned missile attack), causing some HP loss to its killer.
But the following turn, I retake the advantage with the destruction of one of their light tanks… by one of its Russian “comradse”.
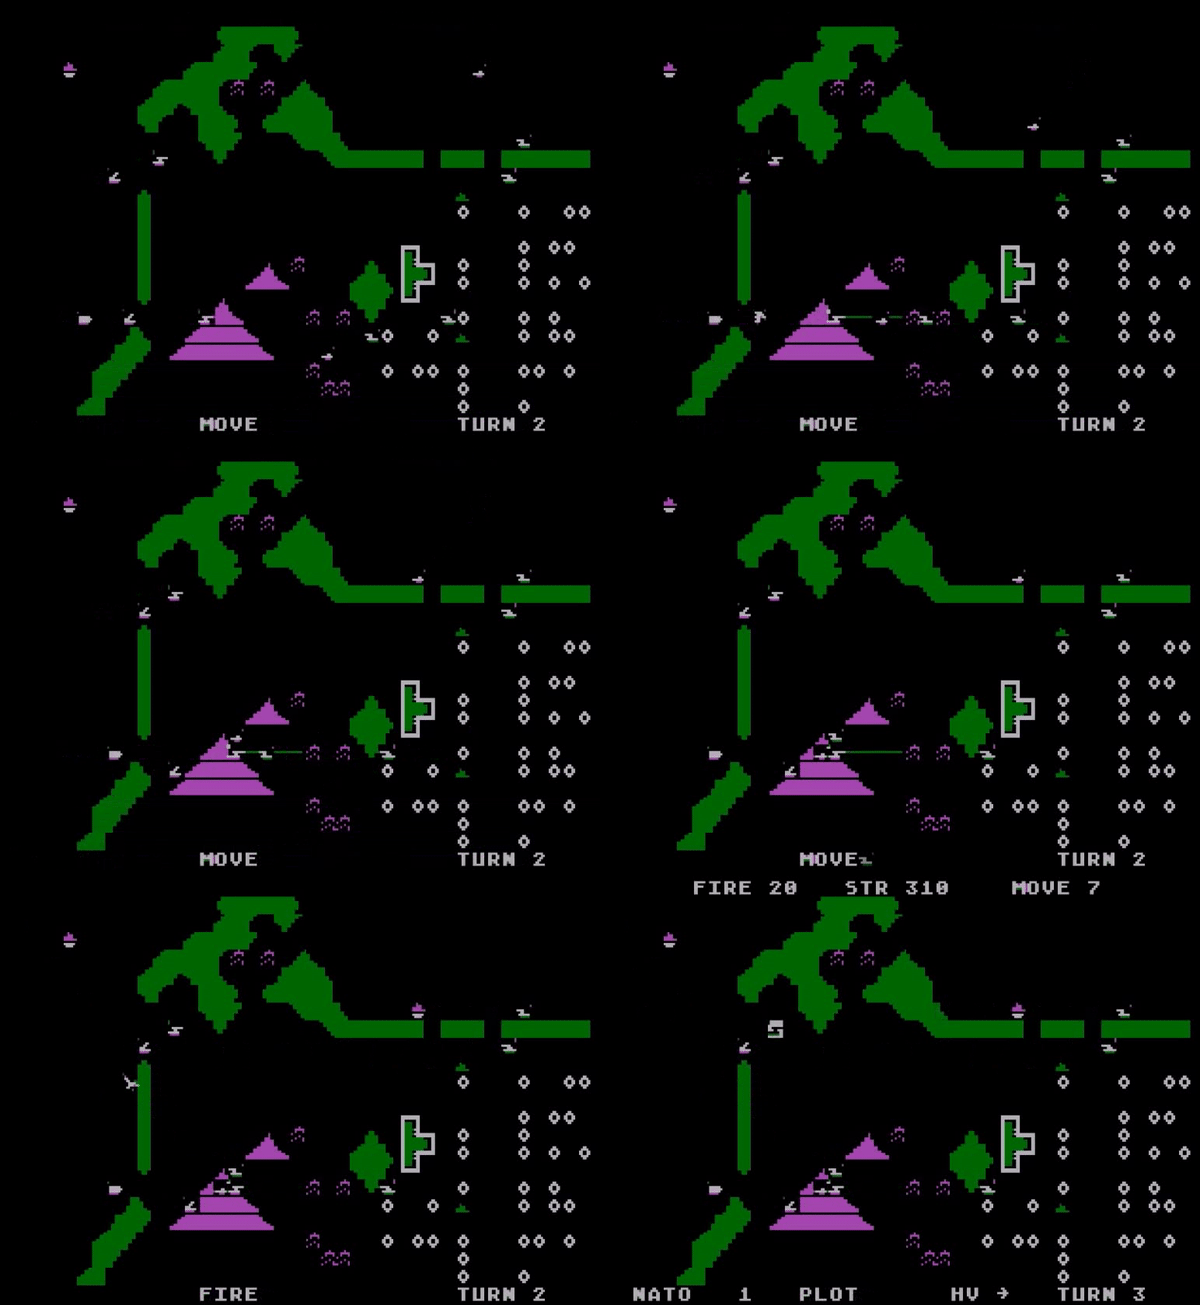
Let me show that again, in slow motion :
The situation around the South-Western mountain is complex. My tanks arrived first, and managed to send a few opportunity shots, but now the Russians have arrived. I have no idea where the enemy wants to go next turn, so I will cover the area with overwatch and hope to catch them somewhere :
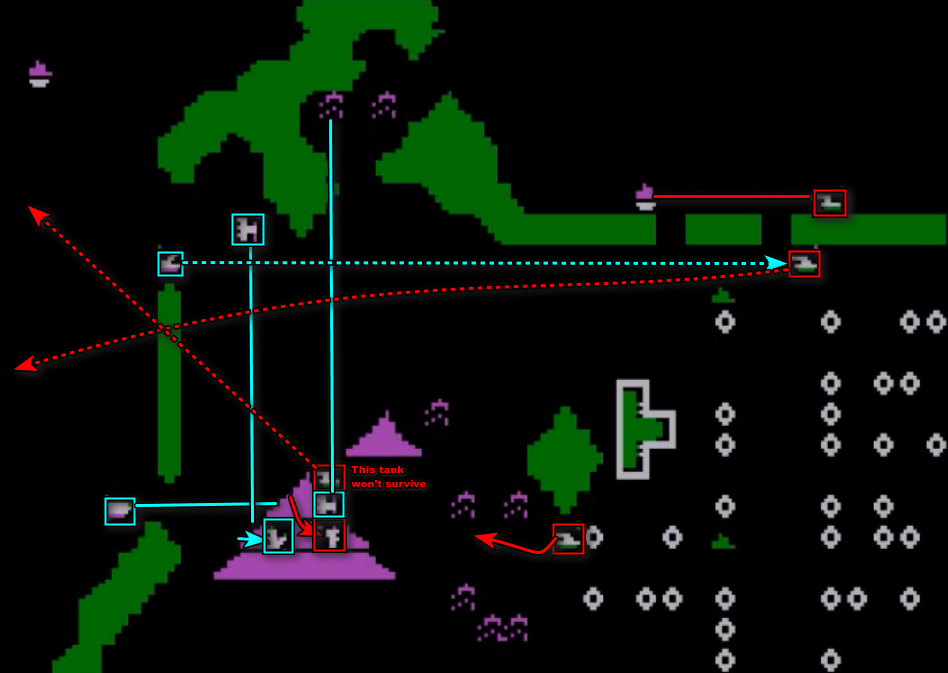
It turns out that the enemy medium tank did not move and remained a full turn right in front of my tank. It received opportunity attacks again and again until it exploded.
In the next turns, I regrouped as much as I could in the mountains, with the remaining enemy light tank doing God-knows-what there as well. Mountains stop projectiles fully, so my best chance was to ram it – but it evaded me turn after turn.
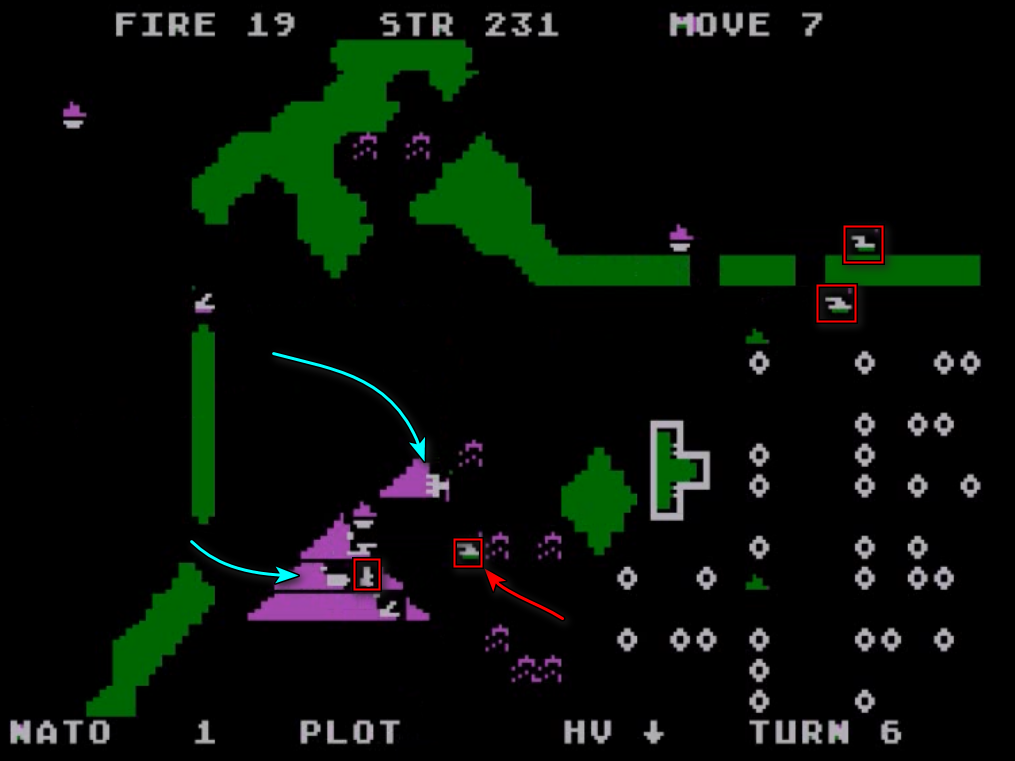
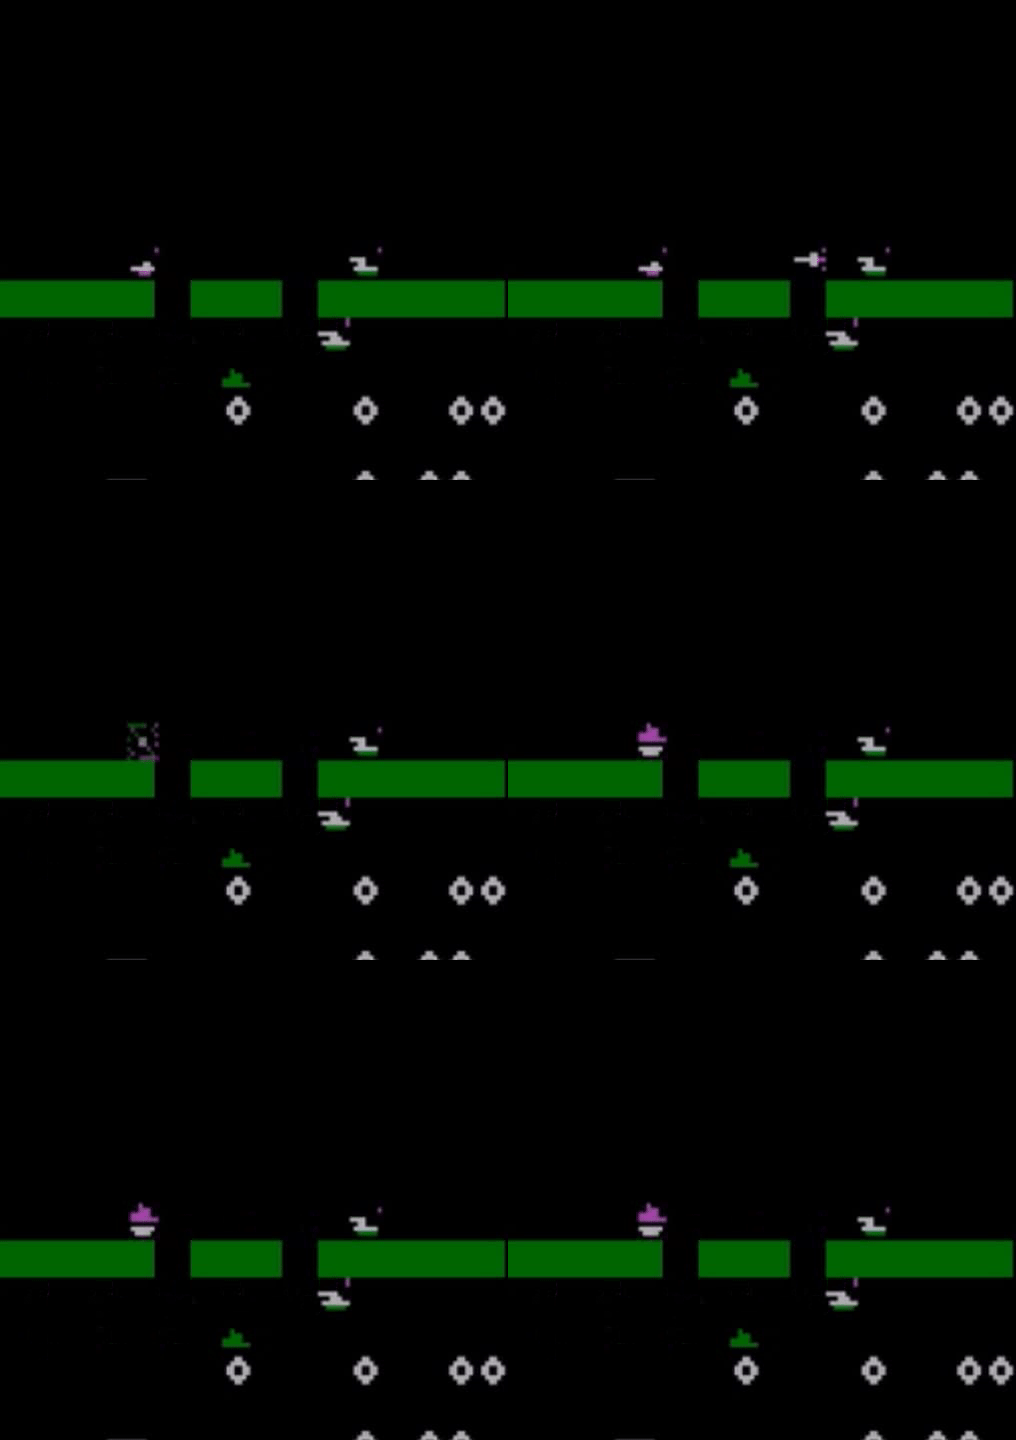
Turn 7, I managed to get rid of that additional enemy tank heading towards the mountain :
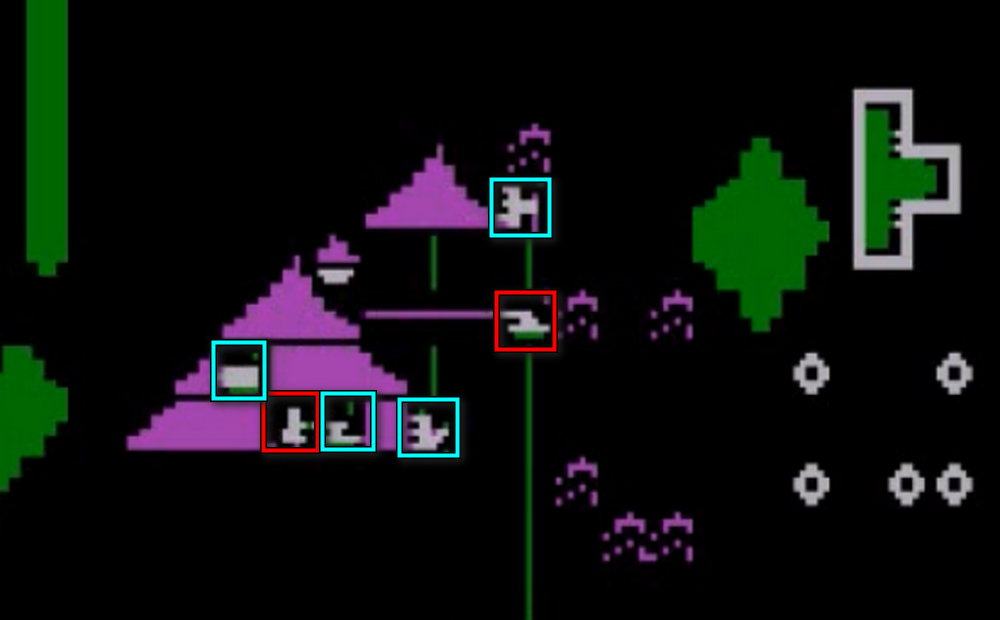
Turn 8 I finally rammed and destroyed the mountaineering light tank. Meanwhile, at the top of the map, my medium tank and the Russian heavy tank are exchanging missiles. I hit them most of the time, they don’t.
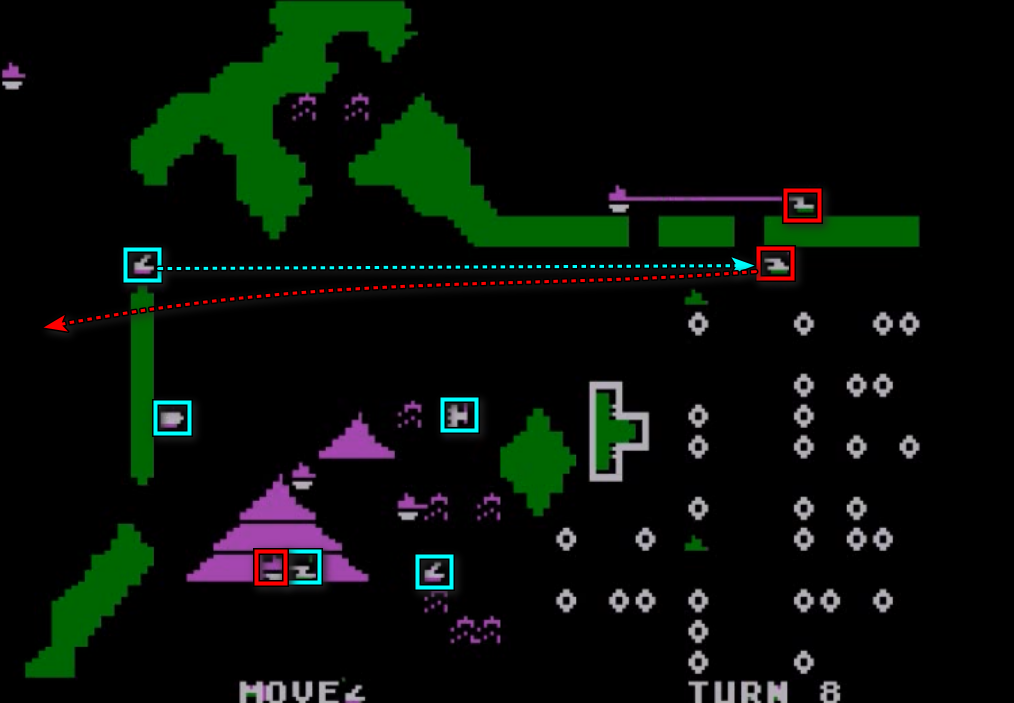
Sadly, my tank at the top of the map is killed the following turn by an overwatch attack :
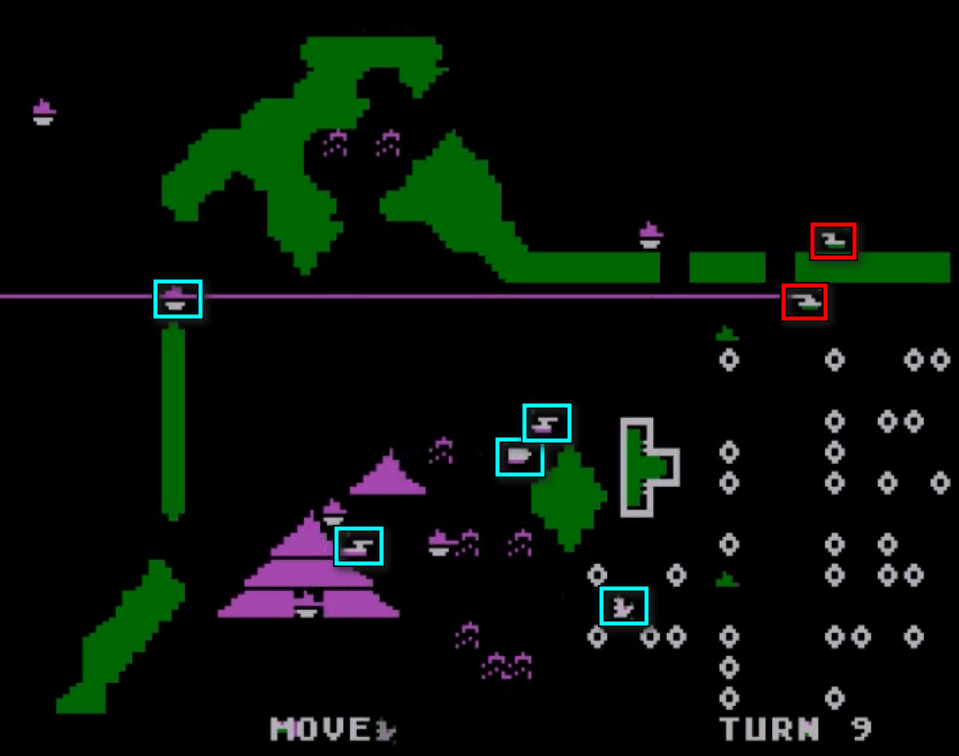
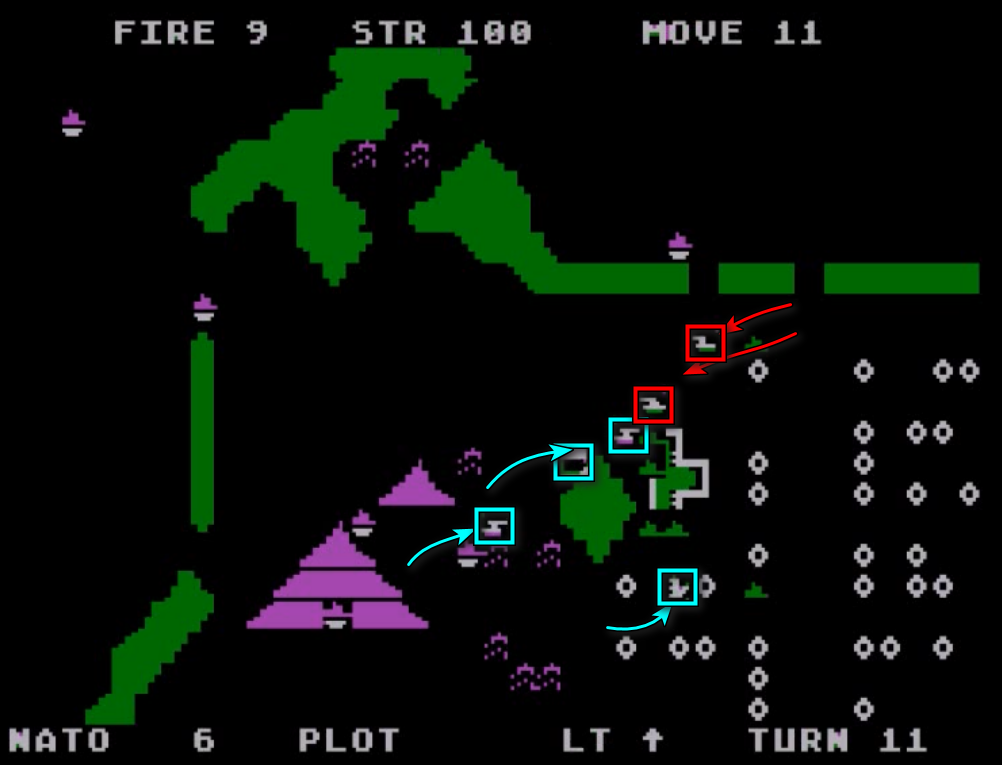
Anyway, with 2 enemies left and the bottom of the map cleared, I move toward the enemy HQ. The remaining enemies finally start moving in my direction :
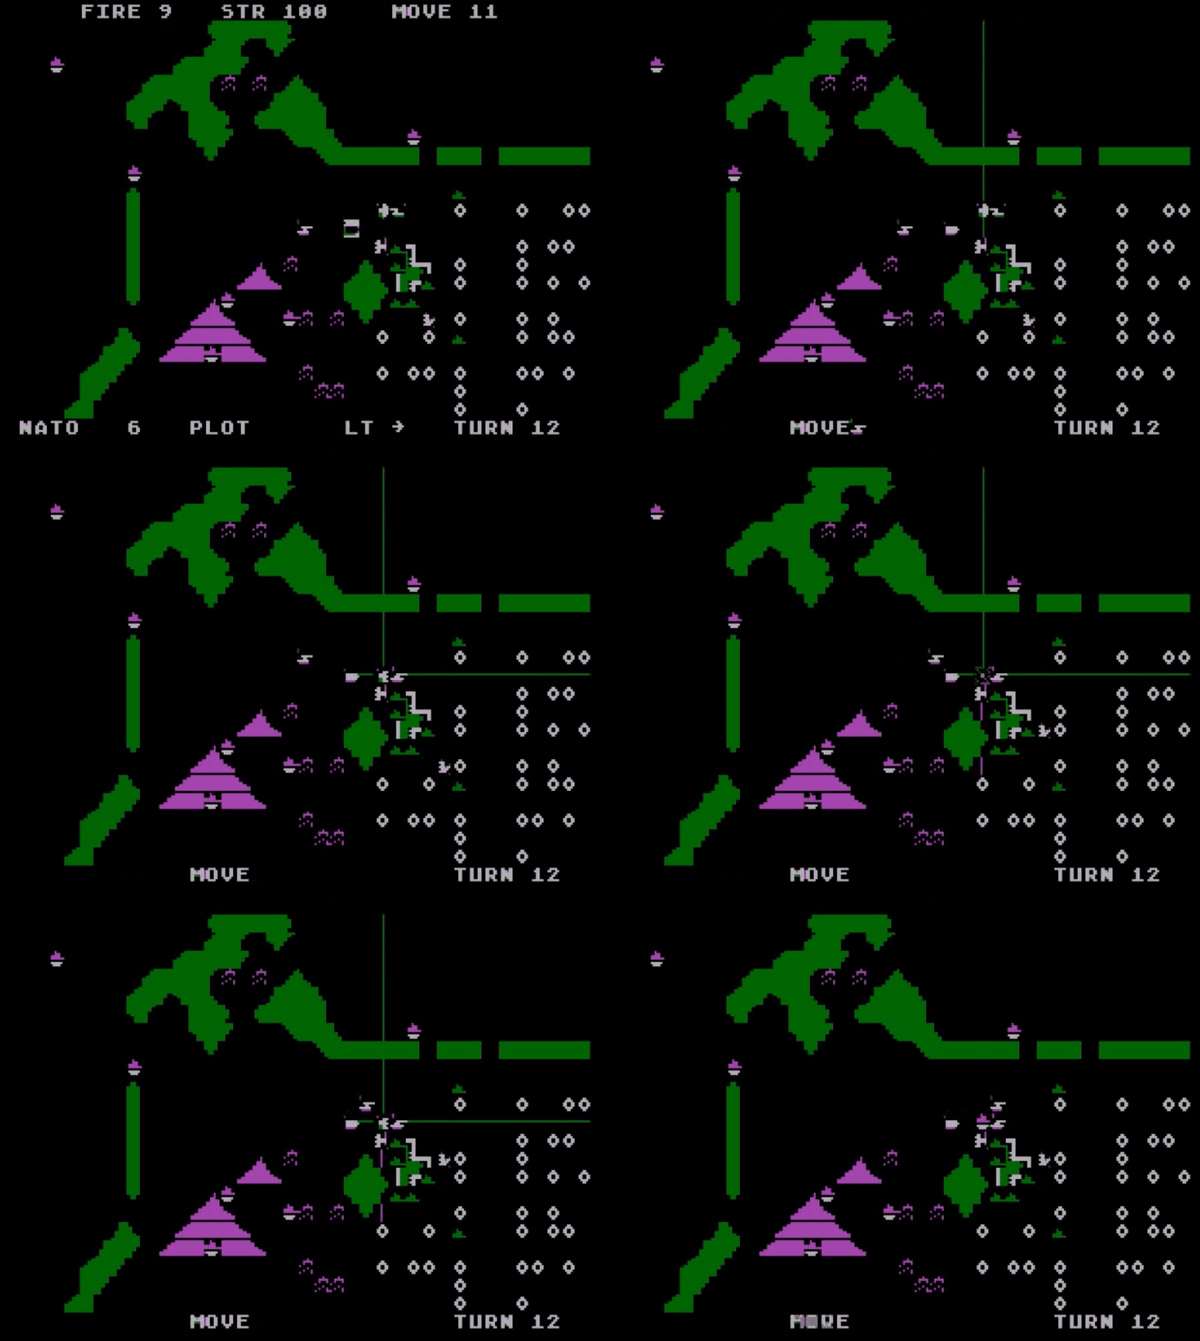
The last turns are confusing. I destroy one of the remaining tanks turn 12 :
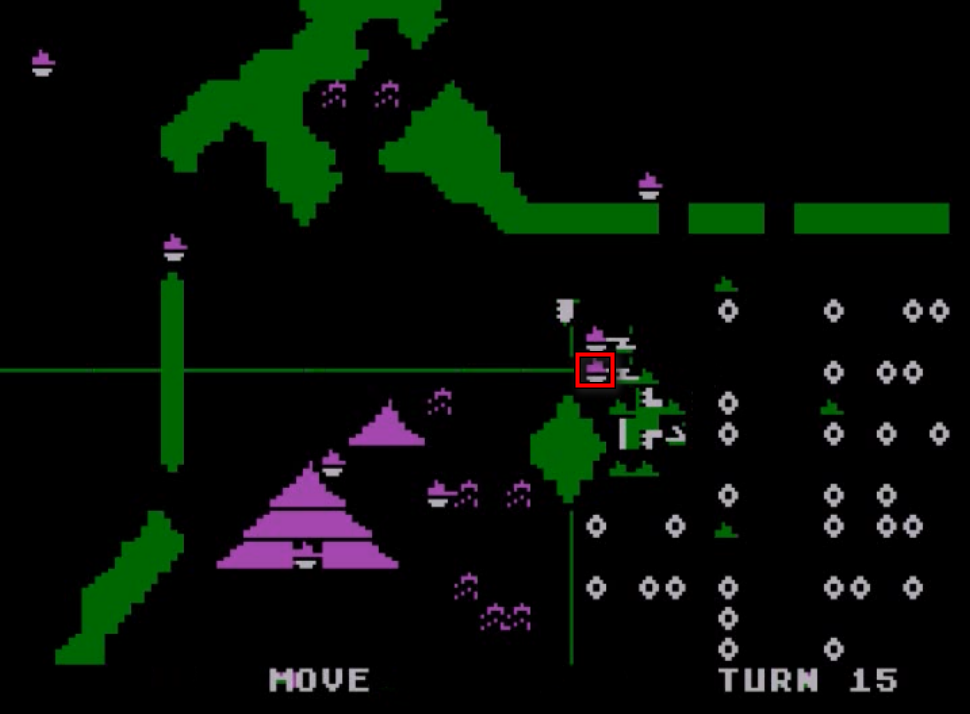
The last enemy tank is out of ammo, so really now it is more safari than war. It evades me a couple of turns, until finally turn 15 :
Final points :
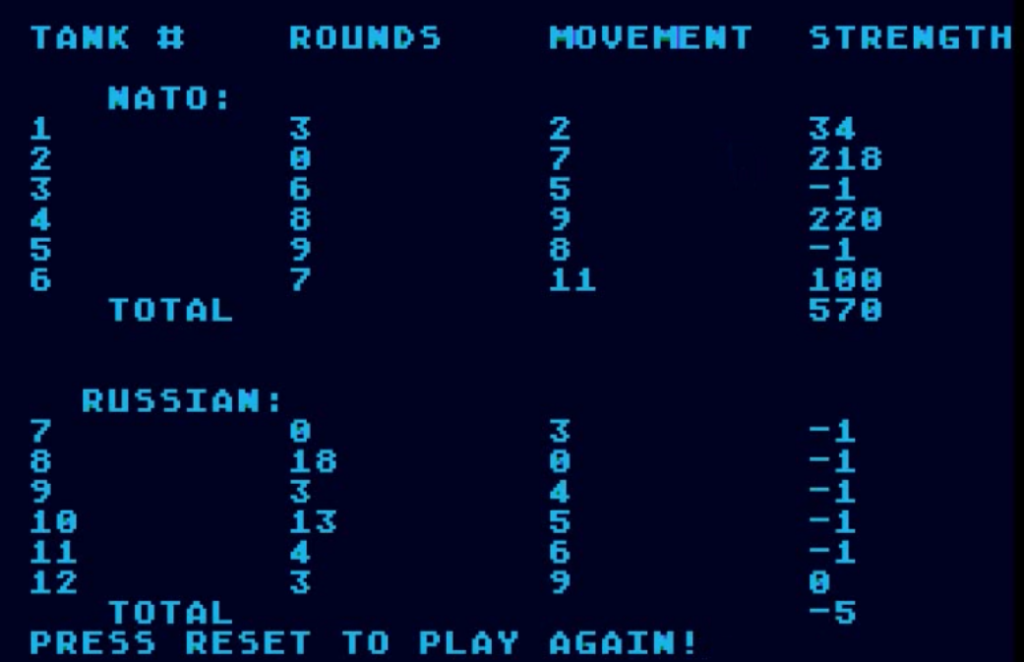
The manual recommends a 400 points handicap in solitaire, but even then it is a total victory.
Rating & Reviews
Armor Assault by John Weber, published by Epyx
First release: Late 1982 on Atari 8-bits
Tested on : Altirra (Atari emulator)
Total time tested : 3 hours
Average duration of a battle: 20 minutes
Complexity: Easy (1/5)
Would recommend to a modern player : No
Would recommend to a designer : No
Final Rating: Totally obsolete
Armor Assault is the second wargame or war-adjacent game published by Epyx in the short period when Jim Connelly tried to steer Automated Simulations / Epyx alone. John Weber is not credited on any other game, so there’s not much to say except that Armor Assault was coded in BASIC and released on Atari 8-bit only.
A. Immersion
Absolutely none. Even your tanks don’t do the minimal effort to be turreted, and before you bring the Stridsvagn 103 into the discussion : no, Sweden is not a faction.
Rating : Terrible
B. UI, Clarity of rules and outcomes
Movement is plotted exclusively with the Atari joystick. Moving your tank takes one impulse for one move. You can even choose to display a map with a “dot” in each tile to easily navigate (useful in the city maps). On the other hand, shooting is weird and counter-intuitive. Instead of button + direction, the game uses successive button taps :
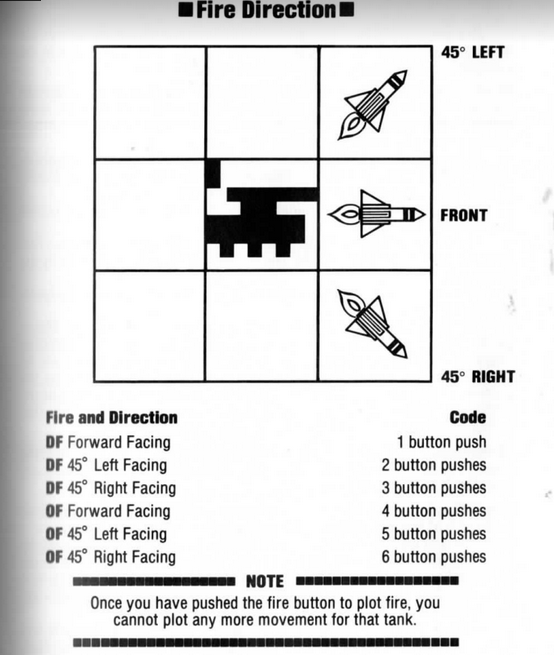
Surprisingly, it works, and I quickly got used to it.
Nonetheless, the game has a lot of UI issues : you cannot preview what your movement will be and you cannot cancel any movement. So I can tell you I ended up colliding with a lot of buildings in urban maps.
The manual is clear enough, but does not give any information on how damage is calculated, even though it gives an attack value and an armour value. In the thick of the action, it does not matter very much. More frustratingly, you have to play your units in a specific order, and there is no way to check the status of a unit when it is not its turn. It can become catastrophic if your units are one after the other, and your front tank received damage reducing its movement speed. Similarly, you can see the stats of the tanks of the other player… but only when the other player (including the AI) is plotting their movements.
Rating : Very poor
C. Systems
Tanks have 7 statistics :
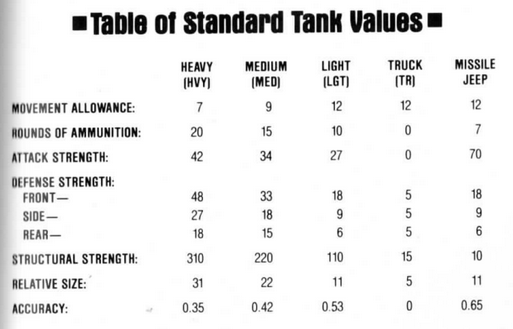
- Movement is pretty obvious ; it can decrease down to zero when receiving damage,
- Ammunition is how many attacks can be made in a battle. At +25% damage, missiles are more efficient, but you can only send one every turn, and your target may very well have moved. In my experience some of your tanks will run out of ammo before the end of the battle, after which tanks are only good for ramming,
- Attack strength – obvious,
- Defence strength on front/side/rear – obvious as well, sadly how the damage is calculated is not mentioned in the manual either, so I am not sure how the missiles’ 25% damage bonus translates in effective damage,
- Structural strength is HP… and final VP awarded at the end of the battle,
- Relative size is basically the attack strength when ramming,
- Accuracy is a percentage of chance to hit, or for the missile to fly straight. Range does not seem to have an impact for opportunity fire, but missiles can veer off at range above 6, though here again the exact rules are unknown,
Terrain in the game has 2 effects :
- It slows you down, obviously,
- It stops opportunity fire and decreases the chance of missiles of hitting you – if an enemy is on the same mountain as you the best way to kill it is probably to ram it – provided you are heavier.
Overall, the game plays like a weird turn-based arcade game. There is a bit of tactic, and a lot of second-guessing where the enemy will end his turn so you can line up the most perfect shot ; very little long-term planning is needed, especially against the AI. This is never so obvious as when tanks are close to each other, in which case it is very easy to ram the enemy by mistake (or not), or to overshoot it and overwatch in a direction opposed to it.
There is a severe lack of diversity in weapons – all vehicles pretty much play the same, except the missile jeeps (devastating damage, but killed at the first hit) but these are rarely used.
Rating : Poor
D. Scenario design & Balancing
The game comes with no fewer than 12 scenarios, though only 3 are recommended for single-player. The AI is beyond terrible. It does not know how to deploy mines (even in those recommended single-player scenarios), it sometimes shoots at its own units, or collides with obstacles, and it is in general very predictable.
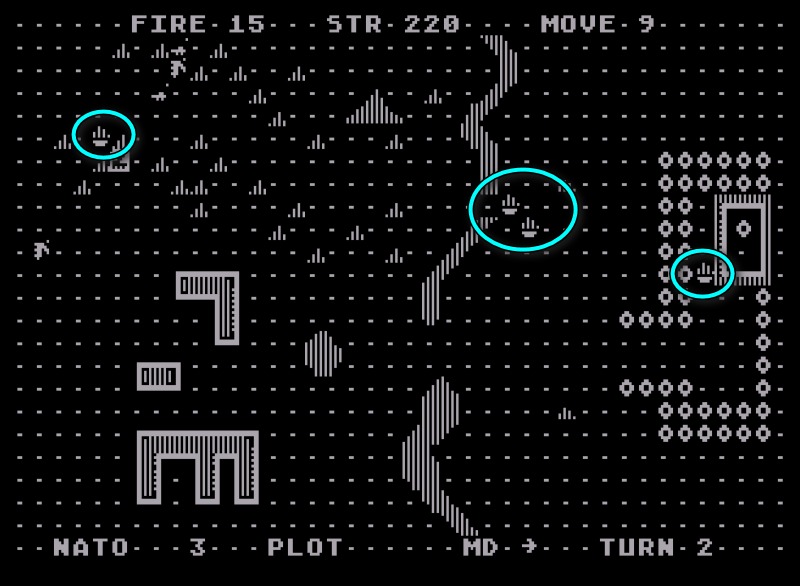
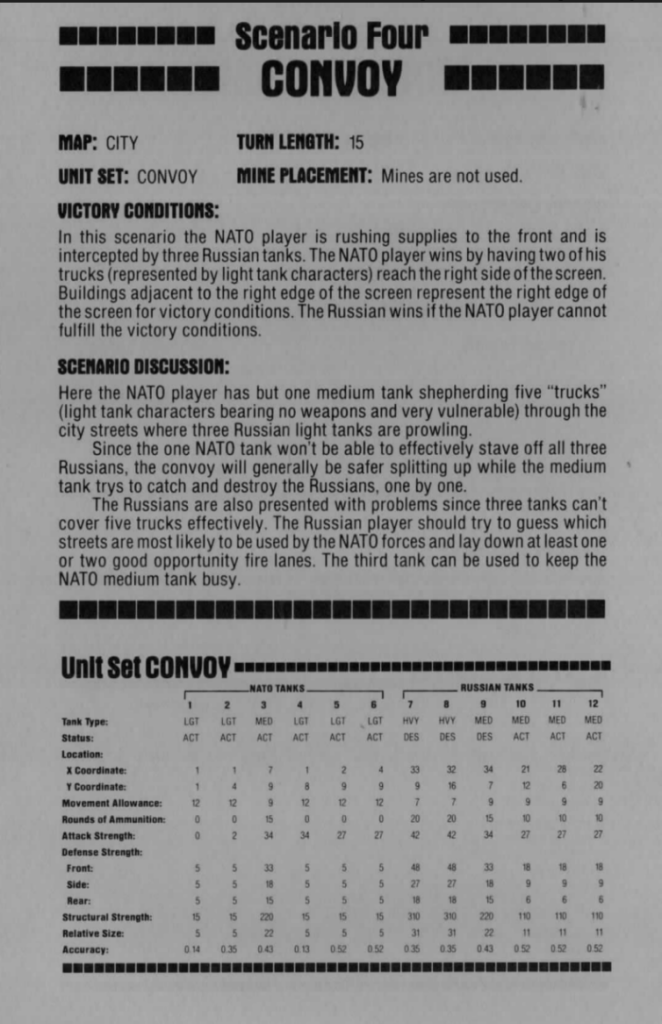
Most of the scenarios have objectives like “destroy a building” or “occupy these tiles” or “escort those vehicles” – that’s nice but the AI totally ignores these objectives. This is because, from the point of view of the game, each “scenario” is a map + “unit set” chosen at the beginning of the battle out of 11 available. The objectives are in the manual, but nowhere in the code – the player or players must end the battle themselves when the last turn (according to the rules of the scenario) is over and then check themselves who won and who lost if the objectives are not point-based.
Here is for instance one of these special objectives …
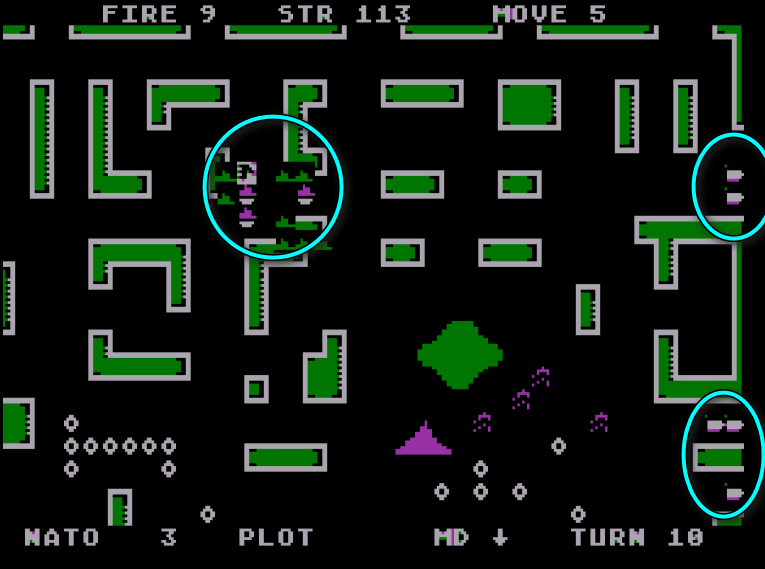
… and how I just destroyed all the enemy tanks with the only defensive unit allocated to me anyway because the AI is that bad :
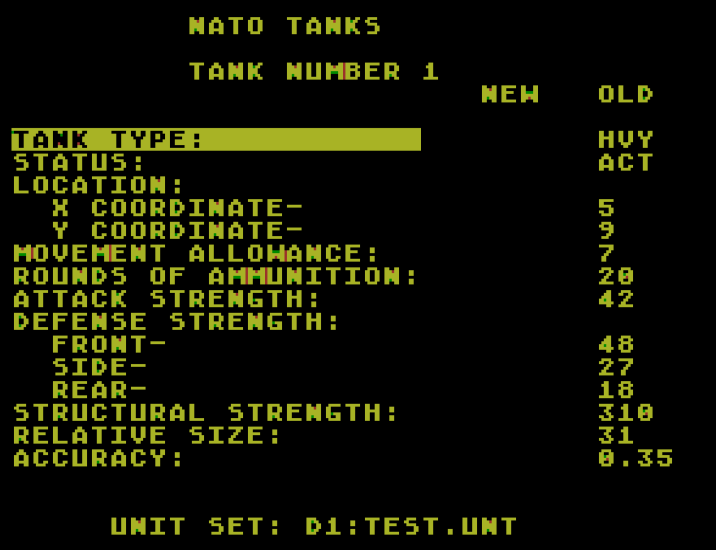
The game comes with a scenario editor, or more specifically a unit set editor and a map editor :
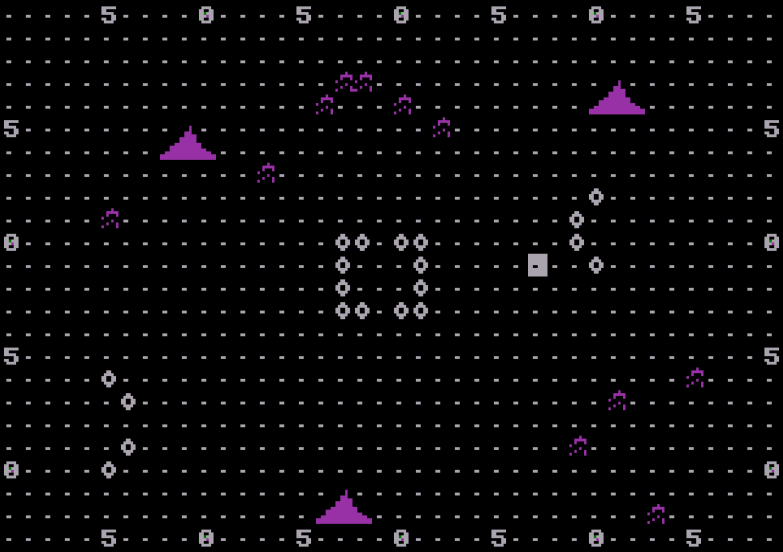
It is something I can imagine using if playing a lot with a friend or a sibling, but I don’t think the solitaire player would use it much.
Rating : Terrible
E. Did I make interesting decisions ?
No
F. Final rating
Totally obsolete as a solitaire game. Back in the 80s, it was probably fun to play in multiplayer, though.
Contemporary Reviews
Probably because it has tanks, Armor Assault received a review from Computer Gaming World as early as January 1983. Floyd Mathews’s “Review and Analysis” is amusing. After describing the game in the first half of his review, Mathews states his real issue with the game : “it is not a very realistic simulation of modern armor warfare.” If that’s not a problem for you – fine. But if it is, well, the second half of the article is for you. Mathews has a long list of house rules you should apply to represent the high penetration of modern tanks, fog of war, infantry (“with lots of structural strength, no armor, little movement and limited fire-power“) or anti-tank gun units (“small structural strength, no armor, zero movement and large firepower”). But even that will not be sufficient, because Mathews laments that the game “fails to recreate the “feel” of the most interesting feature of armor warfare […]. Unfortunately, the map in Armor Assault is only one screen large. This limited space is simply too small for realistic flanking and enveloping manoeuvres. A multiple screen scrolling map, as in the classic Eastern Front, would be greatly preferable.”
Worry not though, because, what do you know, according to this review in Computer Gaming World, Armor Assault is the best game to simulate non-Armor Assault : “For example, if you design a new scenario using only infantry units as discussed above, you can develop a very realistic infantry street-fighting game reminiscent of World War II struggles in Stalingrad and Berlin. Even the unrealistic multiple opportunity fire and “vehicle collision” features of this game seem realistic in an infantry close assault situation.” But wait, there is more : “Additionally, many features of this program are reminiscent of tactical Civil War naval engagements in the era of the first ironclads.” Mathews finally concludes : “Armor Assault is a game with many good features, the best of which are the […] wide range of scenarios and the inclusion of simultaneous movement and opportunity fire.” It just feels like Mathews wanted to play a totally different game that day.
I could only find two other reviews for Armor Assault :
- Electronic Fun with Computer and Games (July 1983) focuses on what the game is, and of course the more generalist publication is not looking for realism. The game has “excellent graphics” (!) but it is “as complex as chess (…) figuring out how to play it can take a long time. But if you are willing to make the effort, the game is truly rewarding.“
- Softline in January 1984 also liked the game as is, calling it a “valiant attempt” to simulate small-scale armored action, whose “conceptual excellence” is ruined by its limited graphics, imprecise controls and more importantly by how slow the game is : “because of its reliance on BASIC, Weber’s program runs much like the lumbering tanks in his game“
I don’t know how well the game sold, but it cannot have been great : 1982 was a terrible year for Automated Simulations / Epyx as it apparently lost 500 000 USD that year. This prompted investors to ask Connelly to onboard new managers : Robert Botch as director of marketing (December 1982) and Michael Katz (February 1983) as President. Jim Connelly would eventually be pushed aside by the same people he brought in to turn around the company, but this will not concern us anymore : to my knowledge Epyx would not produce any other wargames or wargame-adjacent games for more than 10 years – but worry not, we still have plenty of SSI and Avalon Hill games to cover !
My thanks to Hoeksma from Mobygames for providing me with a copy of the manual.