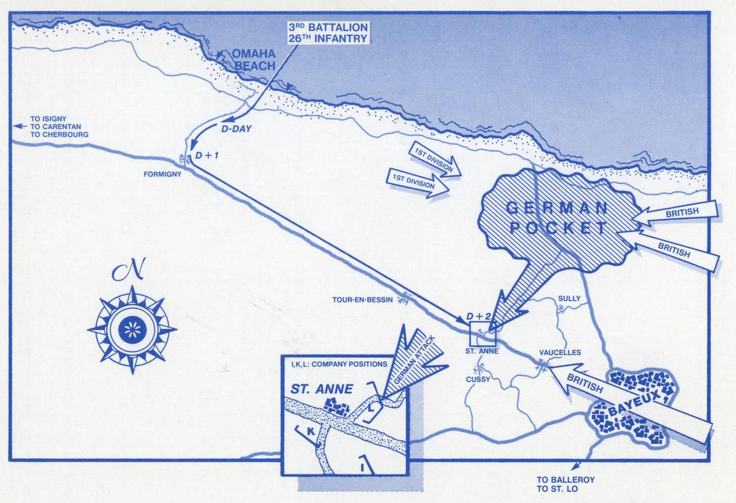
The Battle of St. Anne was a minor engagement within the Battle of Normandy, which was represented in Field of Fire, among other reasons due to the participation of Linwood Billings, uncle of SSI’s founder Joel Billings. The town was crossed by a road along which the Germans were expected to retreat, and the 1st Division was tasked with taking the position and blocking the Germans long enough for the British to arrive.
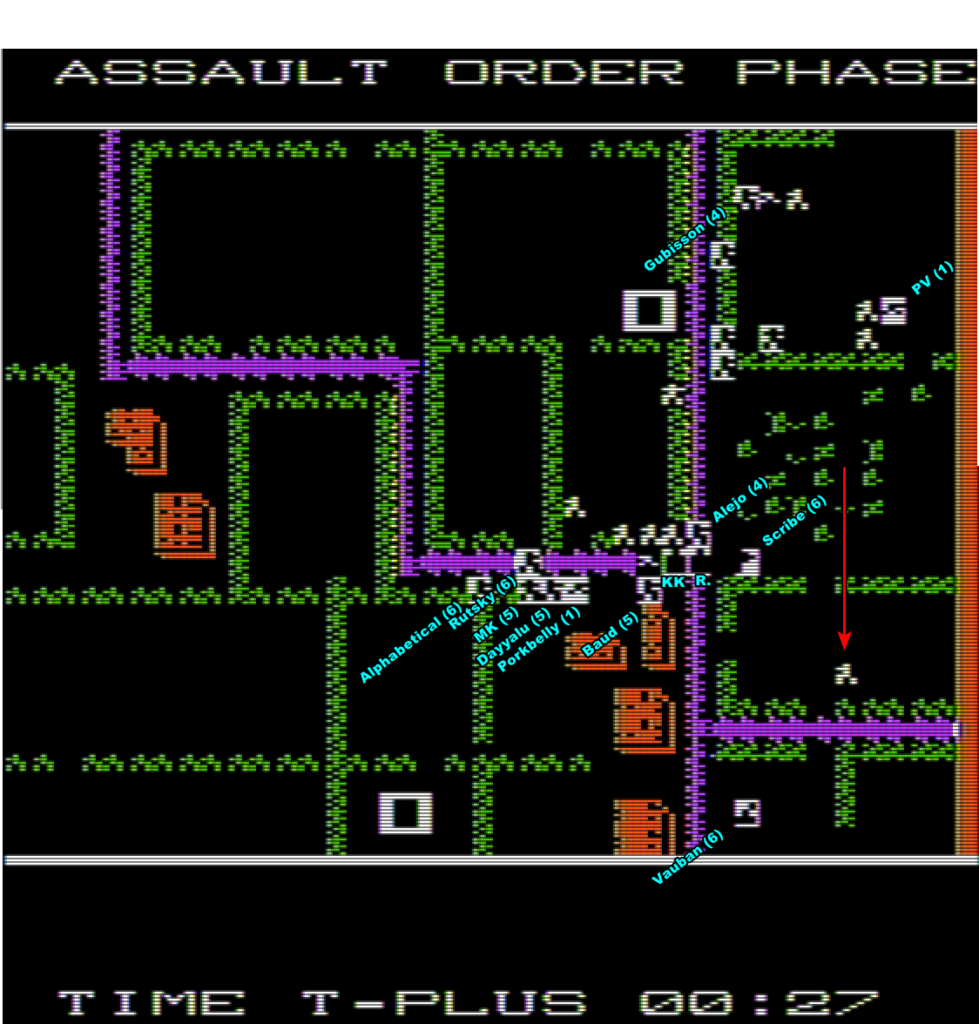
My objective is to prevent the enemy from retreating either South or East. The manual does not specify it, but I surmise the exit routes are where the purple roads leave the map. The enemy tanks can’t cross the hedgerows on this map, so they will have to either follow the road or cut through the openings in the hedgerows West and a bit South of my position. Additionally, it is night: enemies are hard to se and the engagement range is extremely small – maybe 4 squares for both. If I want to make sure I detect the enemy, I need to be directly in its way.
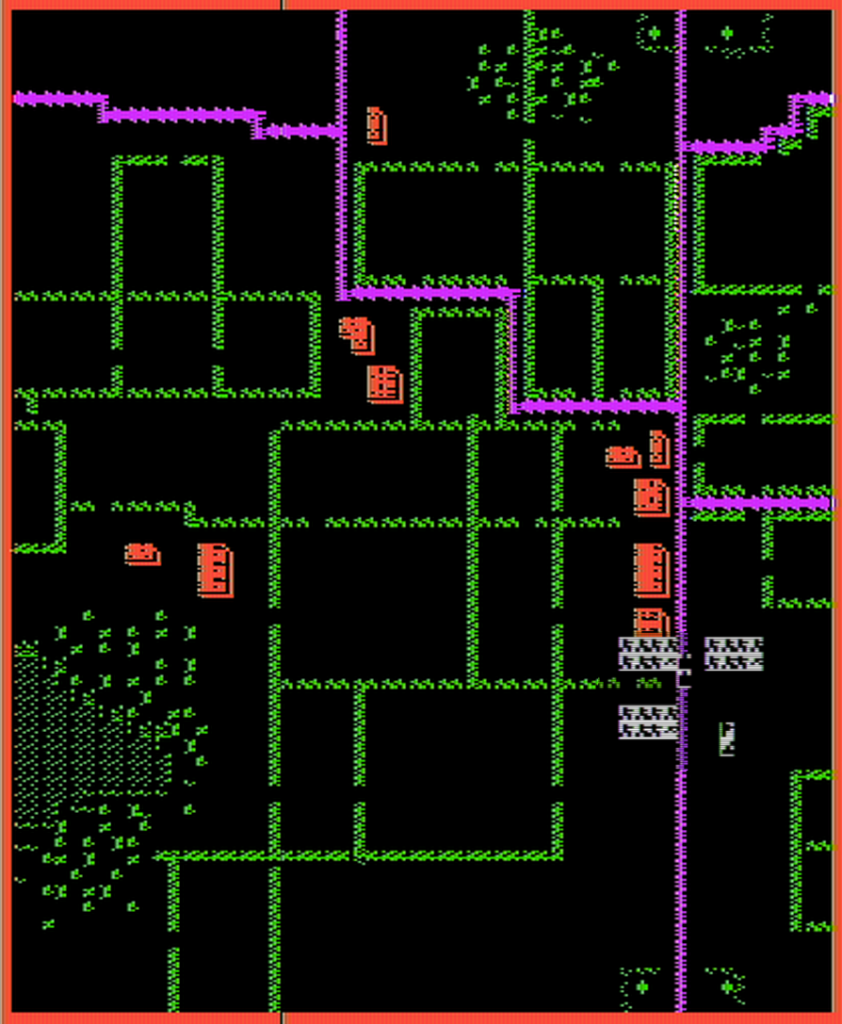
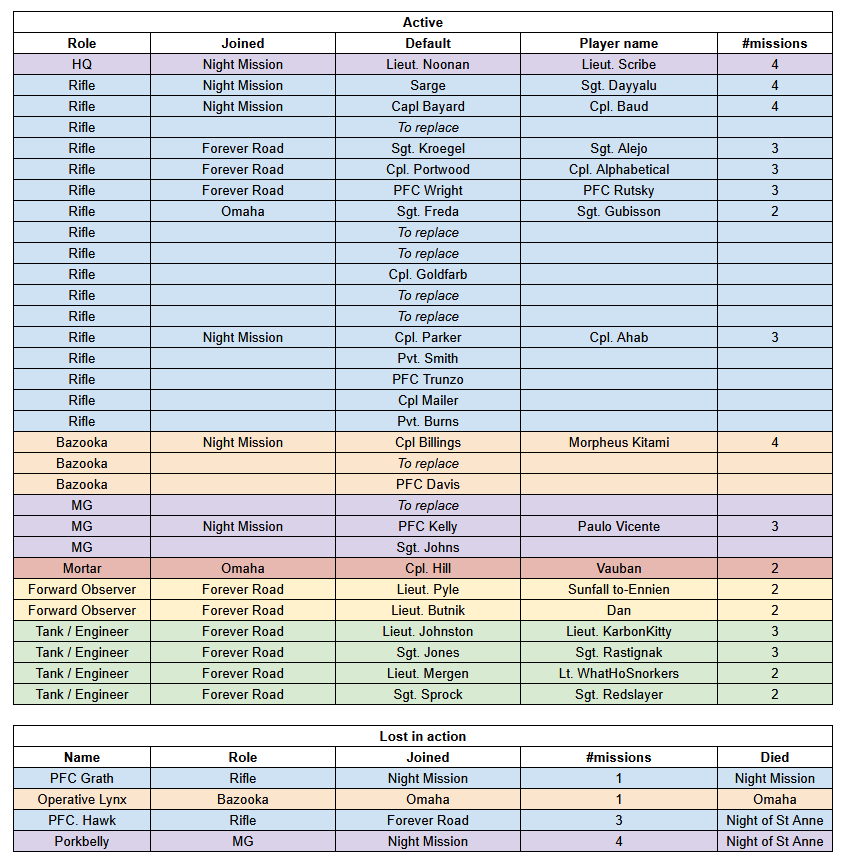
I start with fifteen grunt squads, three MGs, three bazooka teams, two tanks, one mortar team and my own HQ team.
The manual advises splitting the starting force into three groups until the direction of the attack is clear, and I am going to follow this advice:
- a group (the one with most of the named squads) will take control of the building at the top of the village, controlling the two crossroads,
- a group (the one with Gubisson and Paulo Vincente) will beeline for the top-right corner in case it’s an exit route,
- a last group (Ahab’s) will occupy the two buildings in the west in case the Germans try to avoid the main road,
- The two tanks and I occupy the first crossroad, ready to move in support where needed.
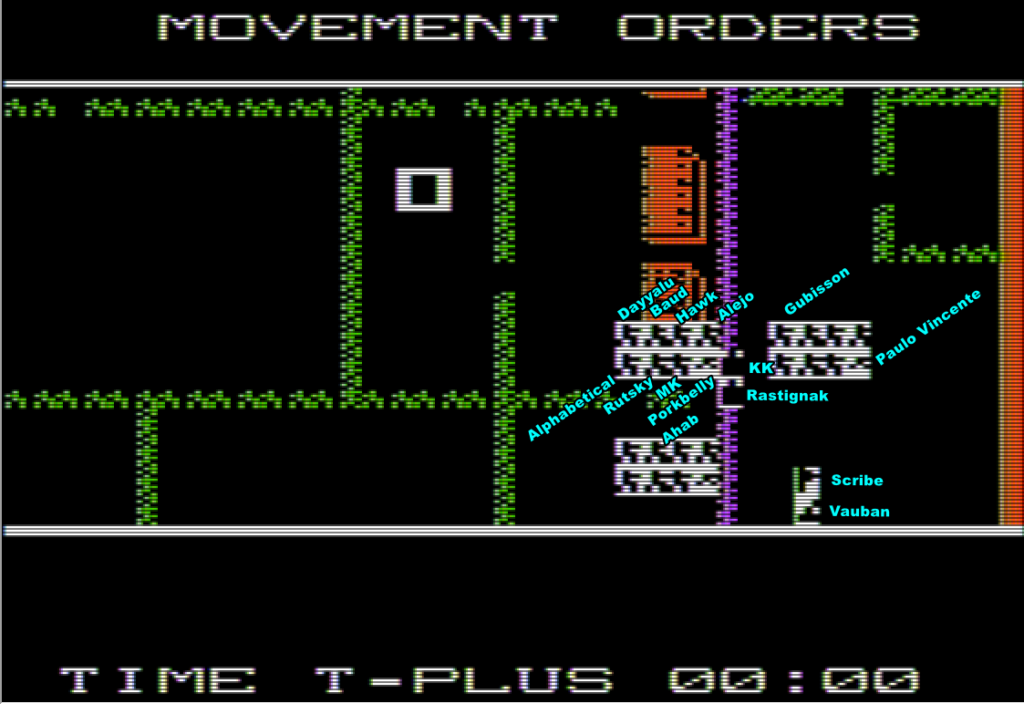
You can already forget Ahab and his group: they will not see any enemy and will not have the time to return to where the action is before the battle ends. The other groups steadily march North, and I don’t interrupt them: in Field of Fire, the computer has a chance to play its turn when you stop the action to give new orders, so my initial set of orders is as final as it could be.
After 10 in-game minutes, the Gubisson/Paulo Vincente’s group is still on the move but the group going for the village is in position. That’s when the Germans finally interrupt my movement to make their moves, and they bump straight into Gubisson’s group.
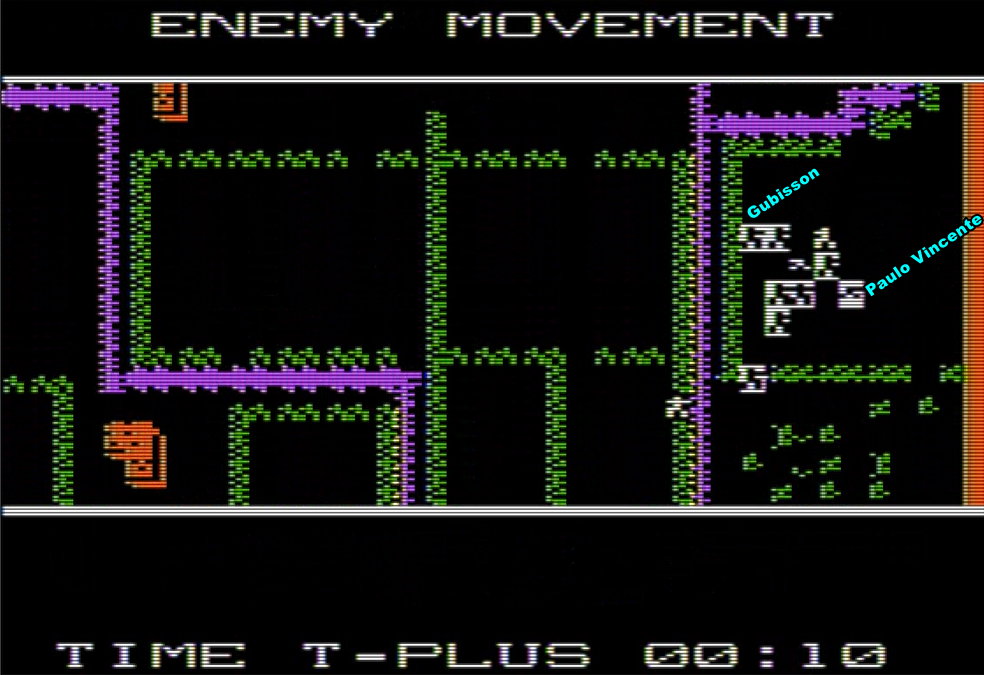
I see only three enemy squads, but I know there must be a lot more hidden in the dark. I focus fire on the two enemy squads in the middle of my lines and then assault them. Doing so, I eliminate them, but let the computer move again – revealing more enemies. Gubisson jumps to the cover of the hedgerow, only to discover two Panzers on the other side. Ooops.
No problem – the manual mentions that infantry can assault tanks to destroy them, and that it is the only way rifle squads can destroy tanks. Gubisson and an unnamed squad do exactly that, and the two tanks are destroyed within a minute of their discovery.
Unfortunately, after an assault the computer gets a full round of fire (presumably to compensate for the “free one-tile movement” it can give the player) and then its usual weird movement. It uses both at the fullest, I start to realise that there are a LOT of hostiles in the area; some of them I see directly, some others I only know about when they shoot at me.
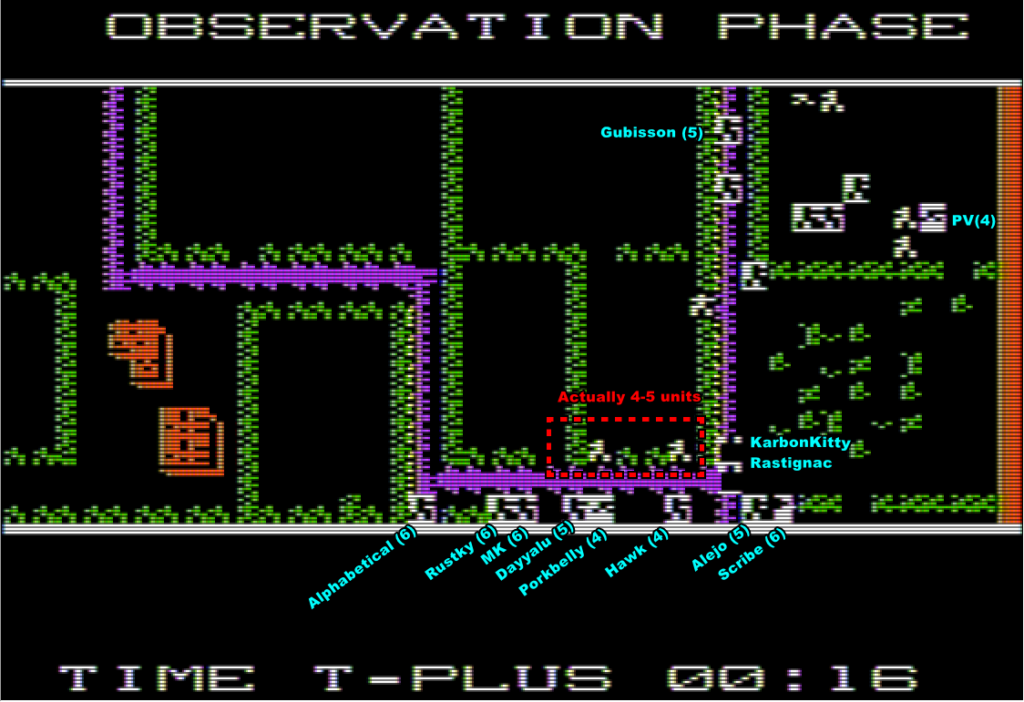
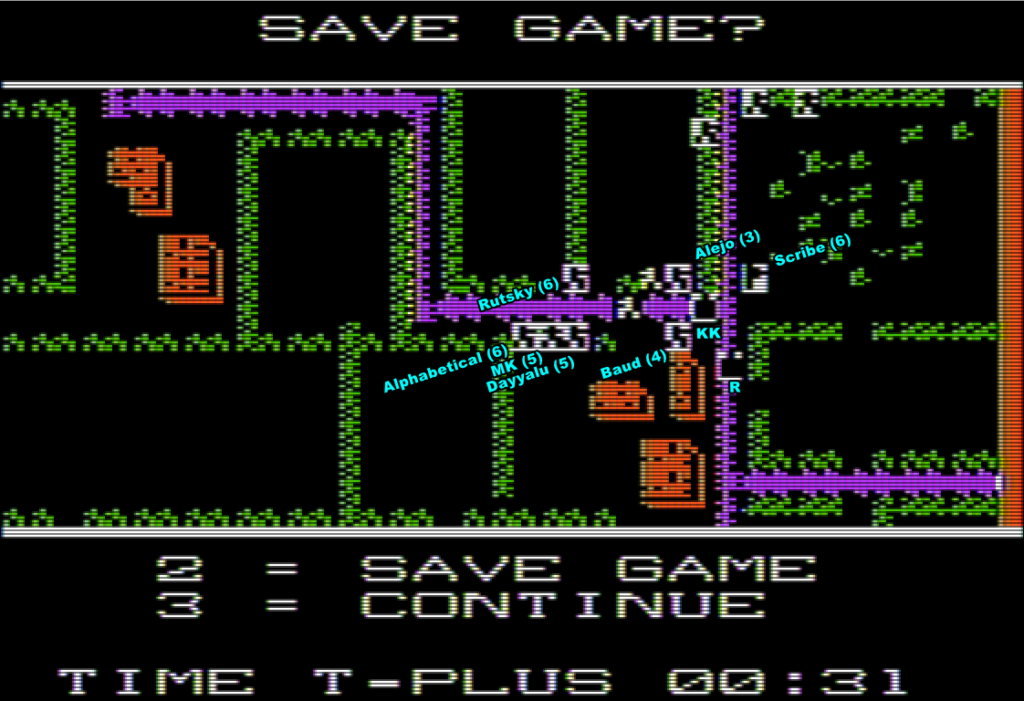
The situation for the Gubisson / Paulo Vincente is difficult, with Paulo Vincente in particular suppressed and losing most of his squad. However, the situation is worse in the village. For the first time in the campaign, the Axis has concentrated massive firepower. Of course, my own men are grouped as well, but the men on the edge (Alphabetical and Alejo) can’t see the Germans in the night. Porkbelly and Hawk are totally suppressed, while others like Baud or Dayyalu are pinned down and return fire ineffectively. The only units returning fire effectively are Morpheus Kitami and the two tanks.
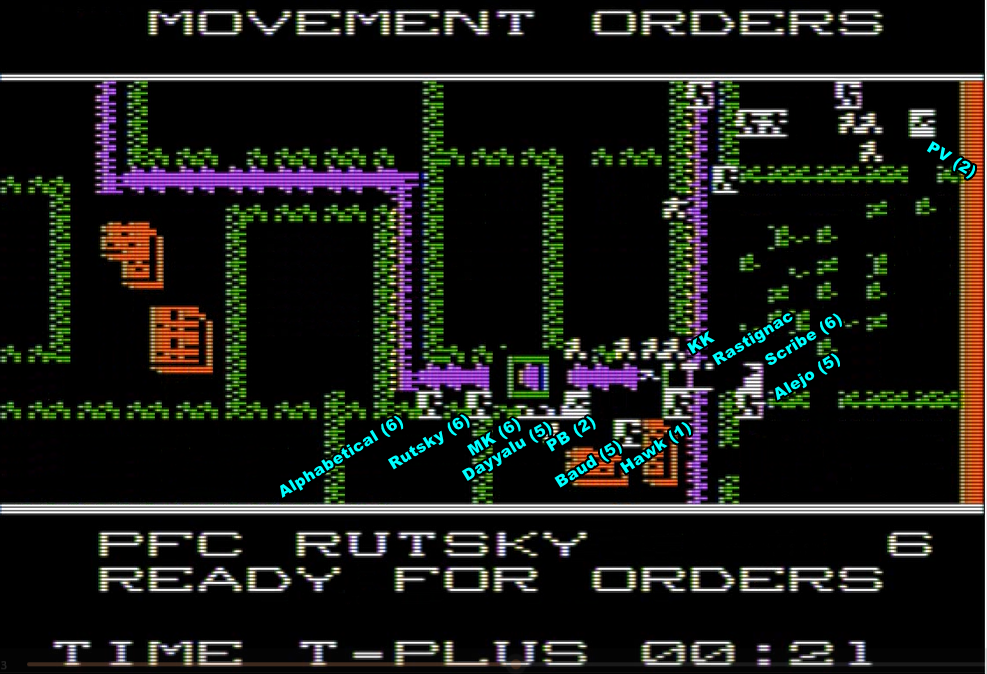
This is dire, and I order Alphabetical, Rutsky and Alejo to rush with me to the rescue. Meanwhile, Vauban pounds the enemy machine gun from the sky.
In the minutes that follow, a lot happens:
- Hawk dies, with four different squads of Germans able to claim the kill,
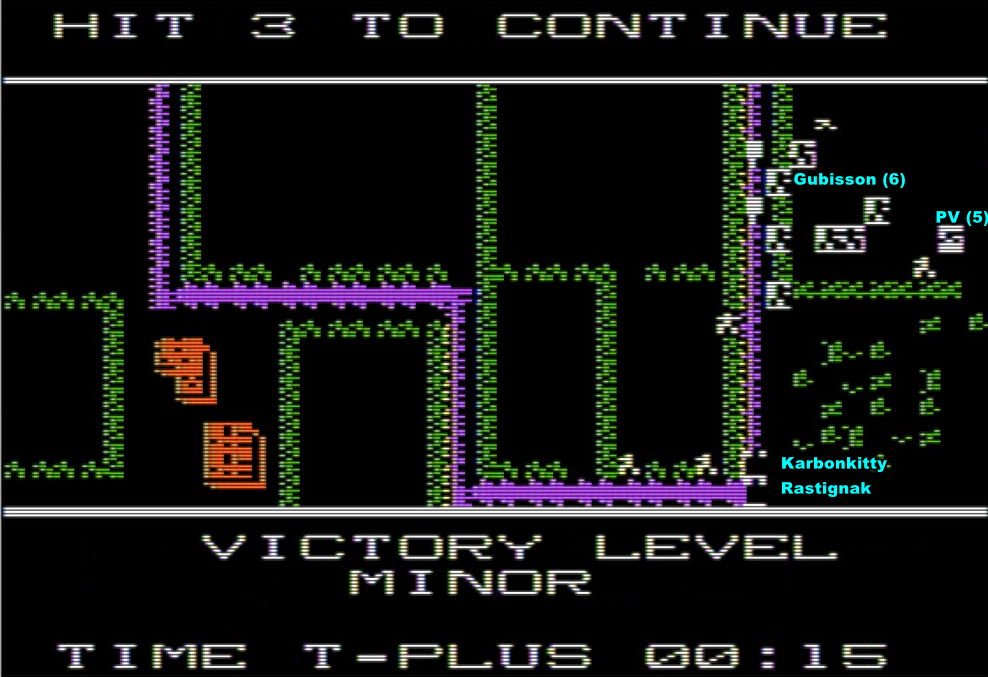
- At the top of the map, it’s Gubisson and another squad against a machine gun and riflemen. The machine gun is either pinned or suppressed, but it won’t remain so and then Gubisson is in trouble, so it’s assault time,
- Just below, the soldiers who shielded Paulo Vincente all died, so now Paulo Vincente is under fire again. He is alone now – all his buddies died…
- … though one of the German squads in the arena decided to move South rather than finishing him off. I am still not sure Paulo Vincente has a chance,
- Further South, in the village, the ratio of bullets flying my way compared to the ratio of bullets flying in their way reverses. While I lost Hawk, I may still have a chance to save Porkbelly, the last survivor of his squad, and now the focus of the enemy – here again my solution is systematic assault, this time led by Alejo and Baud.
In the North, a miracle happens: Gubisson wins two assaults in a row, though he stands alone without squadmates after the second one. Even more surprising, the two squads firing at Paulo Vincente disappear in a minute, presumably because both were down to one or two men.
In the village however, while the assaults are also successful (10 successful assaults this battle!), they happen too late to save Porkbelly, who falls to the enemy. A few minutes later, the last of the Germans falls…
Well, not entirely. A small squad of indomitable Germans is still trying to cross the map, and the number of interruptions I had to do to solve the situation near the village allowed it to almost reach the bottom of the map.
Alas for those Germans, I don’t need to interrupt the battle anymore, which means it can’t move anymore. The tanks are coming, but before they reach them, several minutes of mortar attacks from Vauban kill them all, ending the battle.
This was a short and confusing melee, which cost me almost as many men as Omaha. I lost 4 squads in total, including Porkbelly’s and Hawk’s – and it’s pure luck I did not lose Paulo Vincente and Gubisson as well.
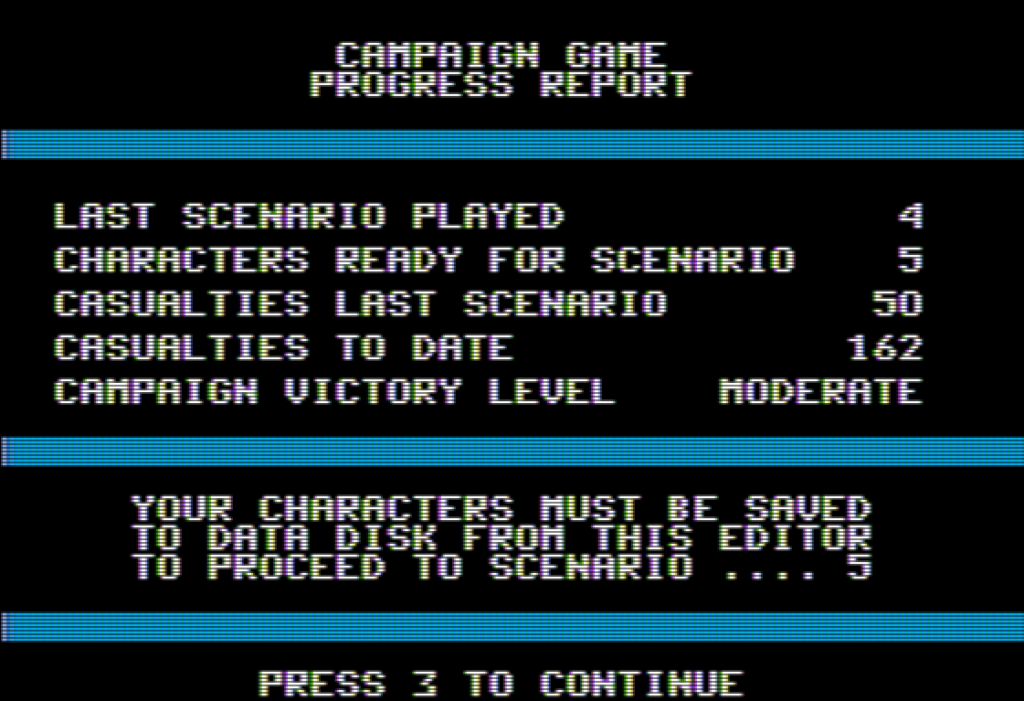
If anything, my battle of St. Anne was less chaotic than the real one. The manual of Field of Fire includes a real-life After Action Report of the Battle of St. Anne by Linwood Billings. I have read testimonies focusing on the heroic or on the horrors of the war, but none on the utter confusion of it all, so I copied it to another page so you can read it.
If you haven’t done so yet, you may also want to add your name to the list. Casualties are starting to pile up.
“Hey, it’s Ahab. Did you guys hear those gunshots? Do you have any idea where they come from?”
6 Comments
Night combat must have been terrifying, and so so confusing. Congratulations on your victory!
I wonder how difficult it must have been to design this scenario since the engine doesn’t really allow to convey that level of confusion on screen.
It’s starting to seem that as important as the battle tactics is the meta game, how to take advantage of the game systems, especially those enemy turn rules. Do I interpret the situation correctly?
Yes, exactly. I played my turns knowing that if I interrupt, my opponent will move. I had to wait a bit sometimes before doing assault or similar so all my folks were in position. However, it was the first scenario where it was a significant issues, in the other ones the enemy did not have to cross the map.
Night combat is interesting, but I think this engine just doesn’t have the detail to show that properly. If you’re adjusting the field of vision like that you kind of need something that actually shows how much vision you have.
Between grounding my trireme and manning a dead observation post, I seem to be very adept at avoiding conflict!
I’m reporting for duty ! I would like to serve with Easy company 🙂