[SSI, Apple II]
WW2 military generals have been unequal in preserving their legacy by anticipating future wargames when planning their campaigns. I already mentioned it, but whoever planned the operations of Army Group Center was a shoddy designer: its early battles are only about pushing units East to West on a featureless terrain, and then you’ve got a set of horribly grindy missions, culminating with the Battle of Kursk in 1943. By contrast, Montgomery was up to the task, with design masterclasses like Operation Husky [Sicily], Operation Baytown [Italy] and of course the most famous of them all: Operation Market Garden.
I am not sure I need to introduce Market Garden on this blog, but just in case: the daring operation aimed at capturing a series of bridges in Netherlands to bypass the main German line of defence and fall on Germany from the North. The first part of the plan, “Market”, was an air assault by British, Polish and American troops to capture the bridges before the Germans could blow them up. The second part of the plan, “Garden”, was a ground push by the British XXX Corps to relieve the airborne forces and actually pass the bridge with armour before the Germans could regroup.

Historically, the British paratroopers and glider troops from the 1st Airborne division failed to secure the city of Arnhem and its “bridge too far” as the Germans reacted faster and more decisively than expected. Meanwhile, the XXX Corps progressed slowly along the roads, and while they would reach the Polish and the Americans paratroopers on time, by the time they reached Arnhem, the 1st Airborne had been forced to surrender.
SSI’s Operation Market Garden is about succeeding where Montgomery failed: take and keep control of the Nijmegen and the bridges in and out of Arnhem, control as many villages as possible and avoid the destruction of my paratroopers. The game starts the 17th of September 1944 and lasts 10 turns/days – in the interest of brevity I will report every two days. For the record, I did not play it in ironman mode for a reason I’ll explain after the AAR: I seriously optimized my movement through trial-and-error, though I went with whatever battle result I obtained.
September 17th (turn 1)
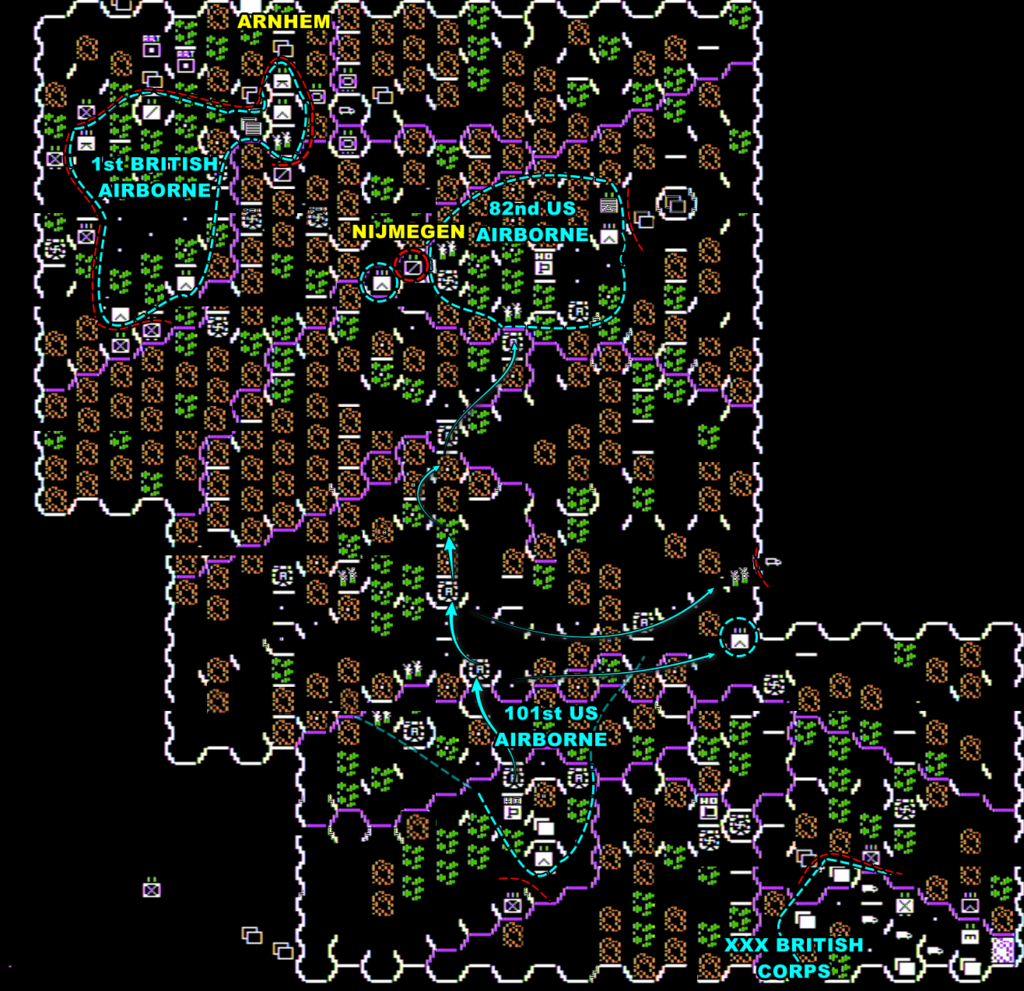
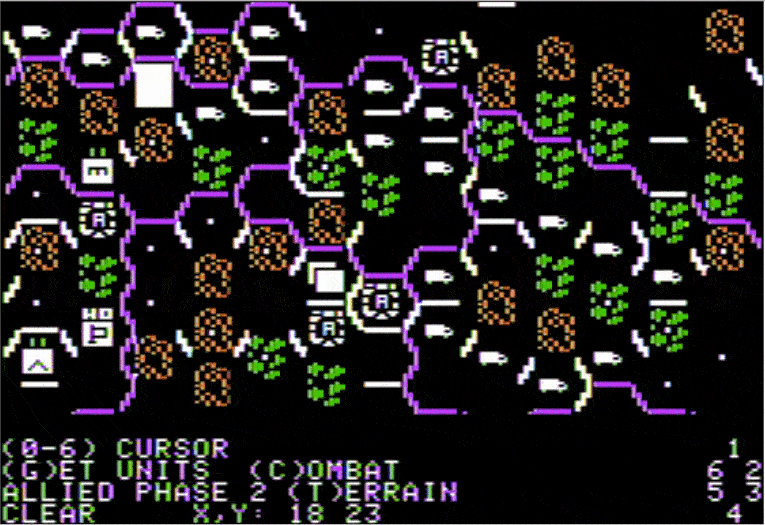
The campaign starts with British and American paratroopers on their drop zones, and the British XXX Corps entering at the bottom-right of the map. Some Germans are blocking the XXX Corps, the rest of them are spread out on the map, or more frequently – not there yet.
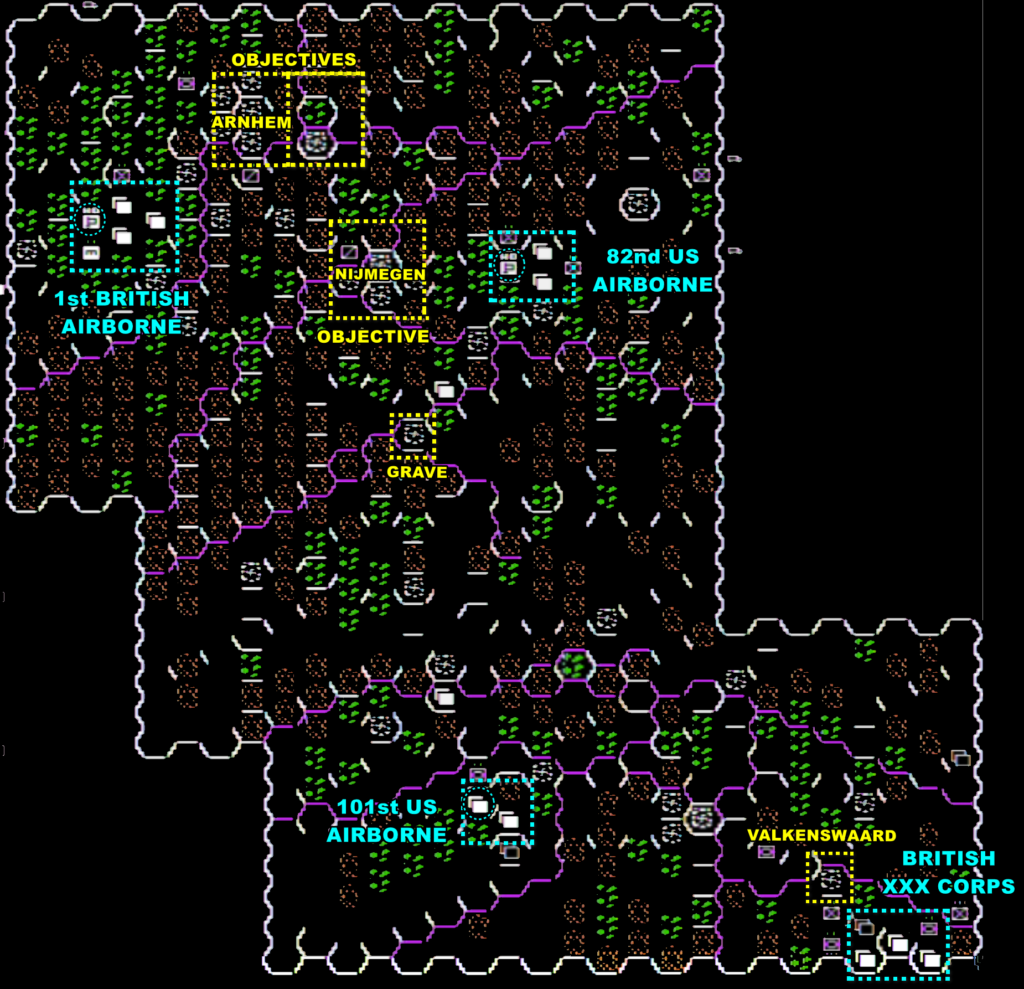
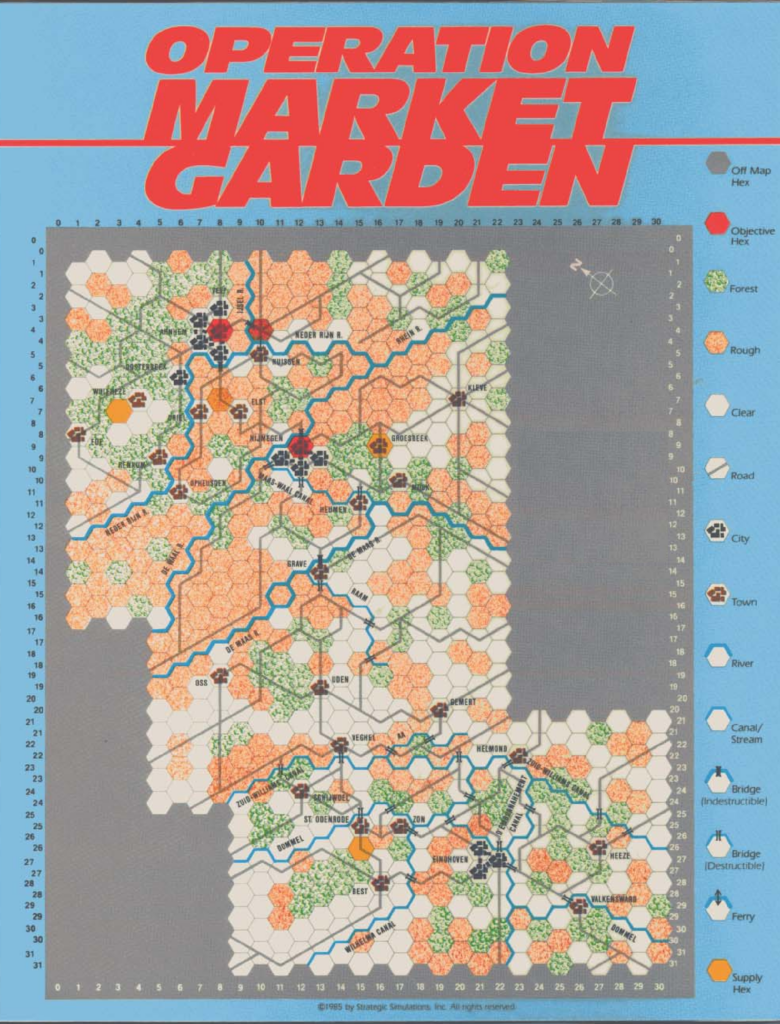
The map is hard to read, but really it is divided in 5 different sections each separated from the next by only one bridge:
- In the bottom-left corner, a small piece of land where the British XXX Corps starts – with German units immediately blocking the way. The only way North is through a bridge at Valkenswaard,
- The next area is the largest – it is segmented by several rivers, but each of them has several bridges so there are no obvious choke points until Grave which has the only bridge to the next area. This bridge is going to be one of the two targets of the 101st US Airborne which landed in the South-West. The second objective, of course, is to march as fast as possible toward Valkenswaard to surround the Germans facing the XXX Corps cross.
- The third area is narrow, the only point of access from the South is Grave and the only way to go further North is Nijmegen – that’s for the 82nd US Airborne.
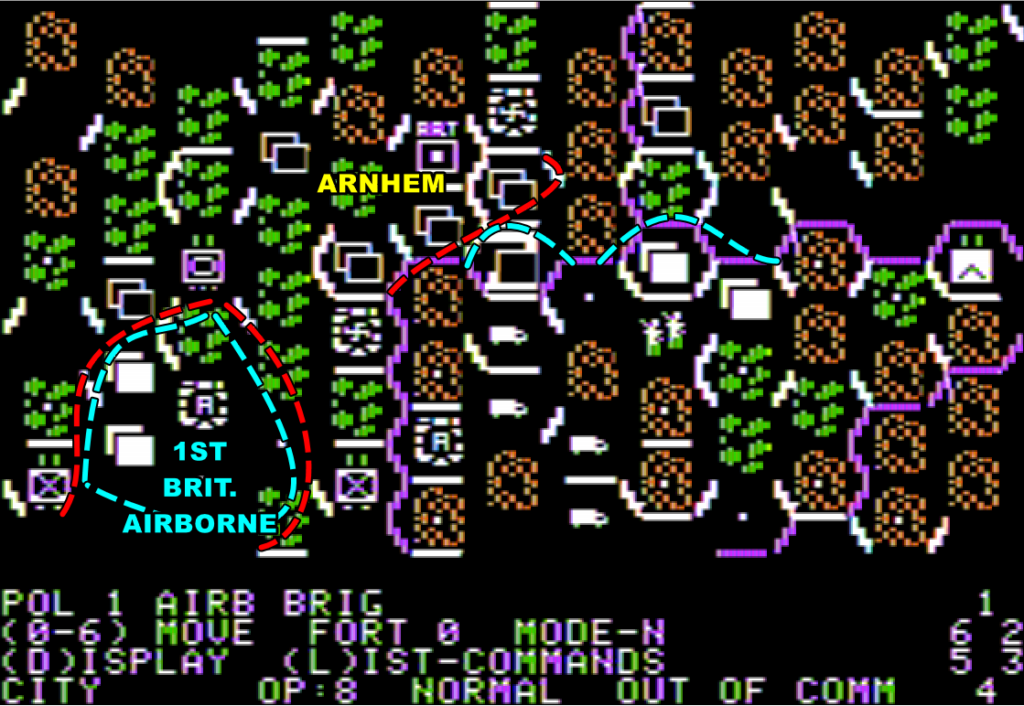
- The fourth area between is the one between the bridge of Nijmegen and the one of Arnhem. It will be an area covered by the 1st Polish Airborne, which has not arrived yet.
- Finally, the last area is everything North of Arnhem. Crossing Arhnem’s bridge from the South is going to be challenging if the enemies are waiting for us, given it’s all buildings North of the bridge, and those are easy to fortify – that’s why the 1st British Airborne will strive to occupy the city before the cavalry arrives.
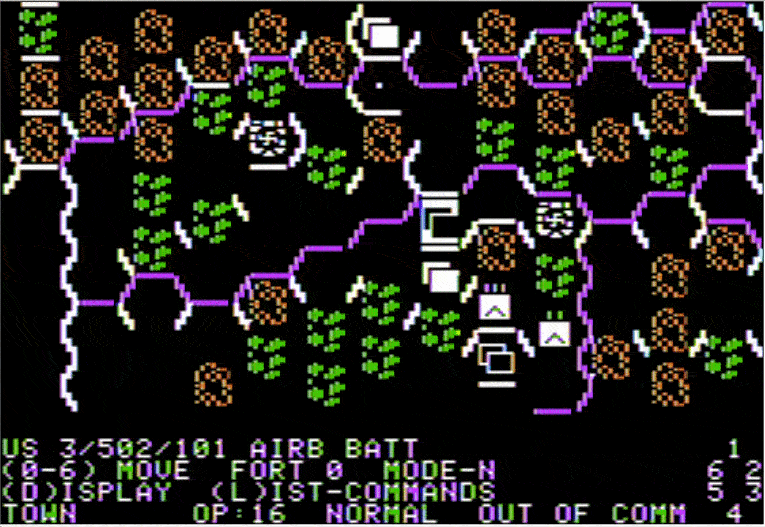
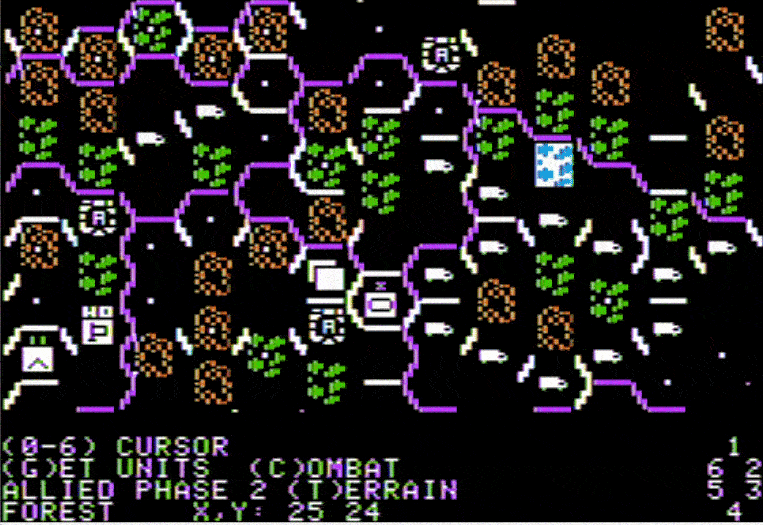
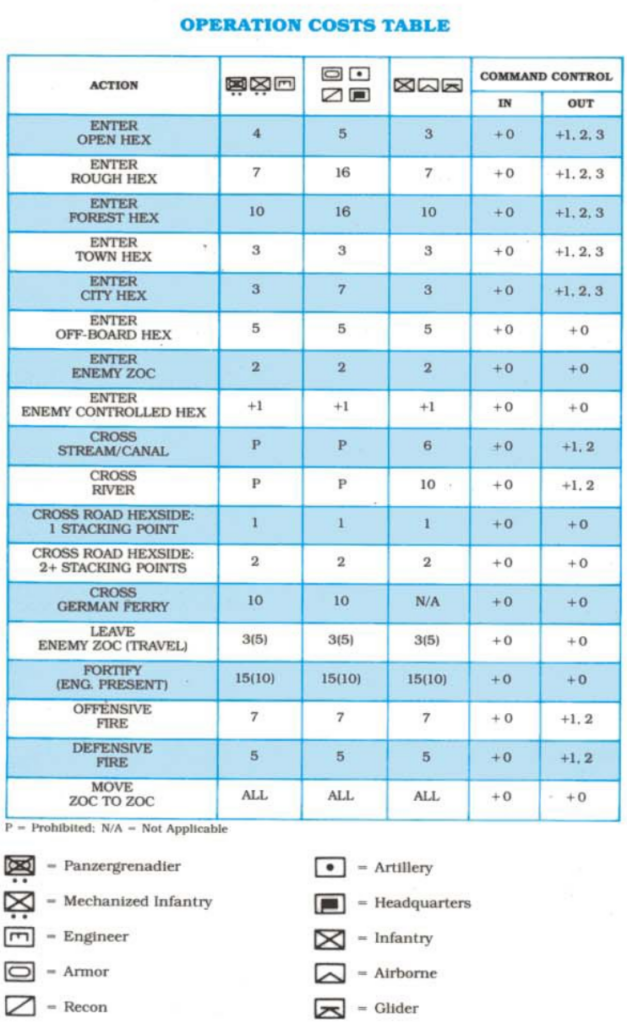
The game recycles SSI’s Breakthrough in the Ardennes, so flow and movement rules are fairly similar. After an air phase in which I can either attack individual units (provided they are near the XXX Corps) or launch “interdiction” missions that remove enemy operation points. I move my units and prepare attacks that are only resolved during the combat phase:
After this initial attack, covering my fronts starting with the South:
- In the South, the XXX Corps easily overcome the Germans in the deployment zone and exploit an opening in the enemy line to cross the at Valkenswaard. Unfortunately, the Germans pour reinforcements in and I fail to extend the foothold.
- In theory, the 101st Airborne should come from the rear to open the way for the XXX Corps, but there’s a kink: the two bridges leading East are destroyed by the Germans when my units reach them!
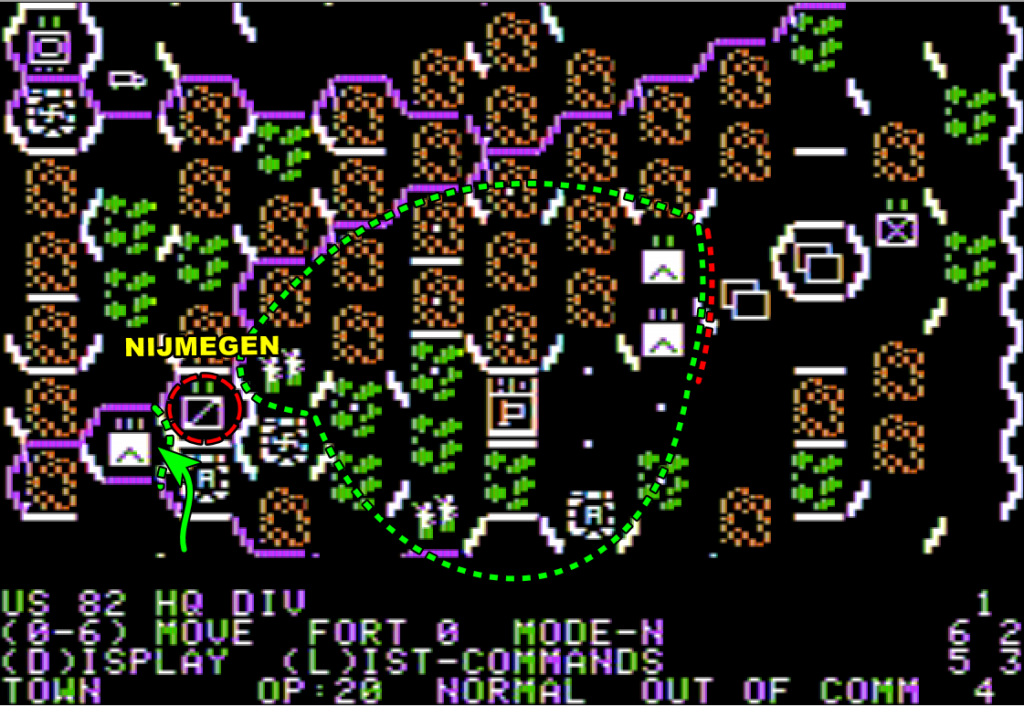
I am way more lucky with my movement North: Grave in the center of the map is occupied without combat, and one of battalions manages to reach Nijmegen by the end of the 18th
- Meanwhile, the 82nd US Airborne, which was tasked with taking Nijmegen, has been immediately put under pressure by Germans coming from the East and South-East. The Germans coming from the South-East are ultimately destroyed on the morning of the 18th, allowing some paratroopers to finally approach Nijmegen in the afternoon:
- Finally, the British paratroopers have it worst – while they manage to reach Arnhem, the Germans are pouring from almost all directions: South, West, North-West, North and East. The British are quickly surrounded and the prospect of securing the Southern bank of the Arnhem bridge becomes remote – the more immediate matter is the one of survival.
September 19th (turn 3)
The 19th is really a lost day: terrible weather means no air support and no paradrop of reinforcement. The XXX British Corps has to grind its way in high-attrition combats and the first British Airborne is losing ground in the North-west.
The situation unlocks on the 20th, with excellent weather allowing the air force to harass whatever units blocked the progression of the XXX Corps. A decisive push by an Armoured Brigade brush the German defenders aside, and the British almost make contact with the 101st US Airborne.
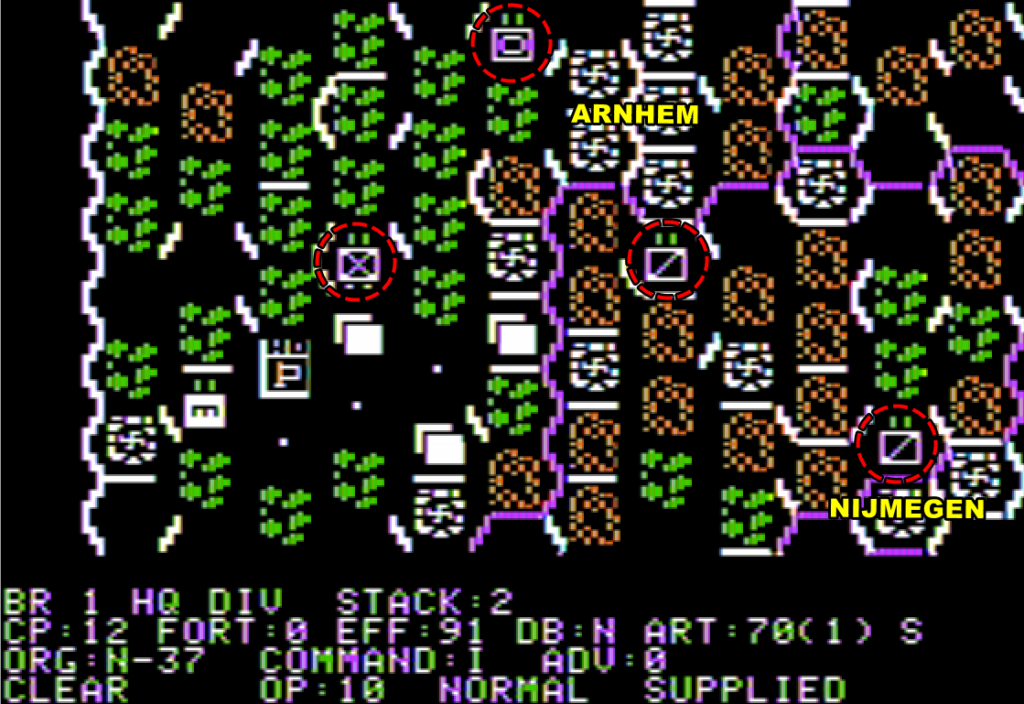
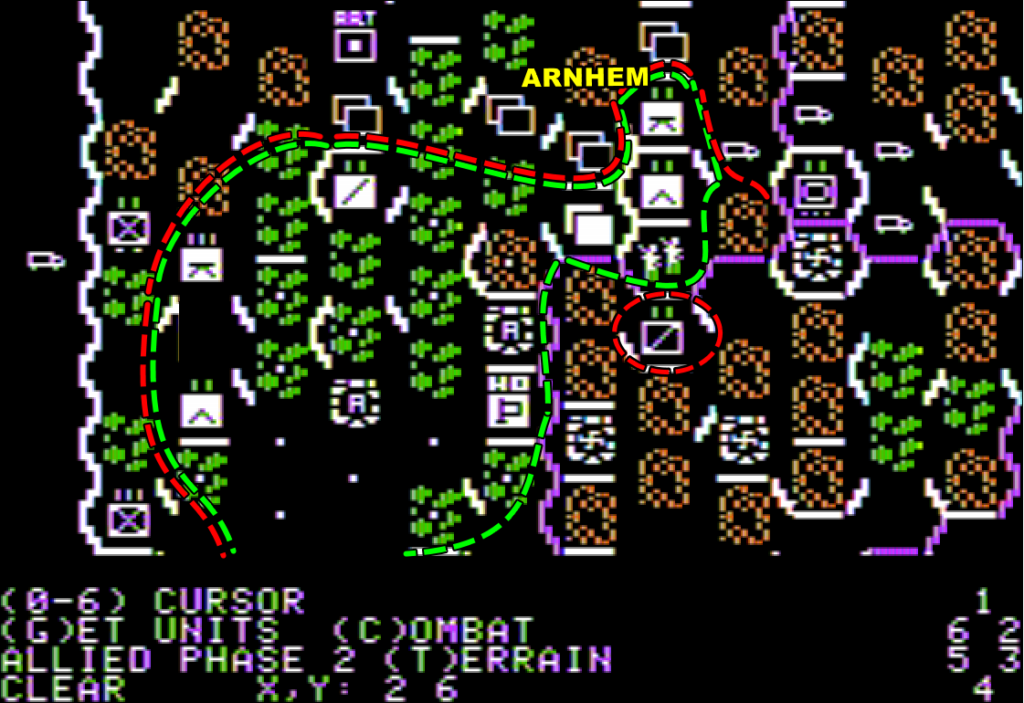
Meanwhile, the 101st US Airborne kept itself busy in securing the main roads to Nijmegen by positioning units on crossroads left & right of the main progression axis. However, Nijmegen itself resists combined attacks from both the 101st coming from the South and the 82nd coming from the East. The most decisive event however is the arrival of the 1st Polish Airborne which lands just South of the Arhnem’s bridge. They immediately attack the garrison with the support of the British of the other side, and occupy the position by the late afternoon.
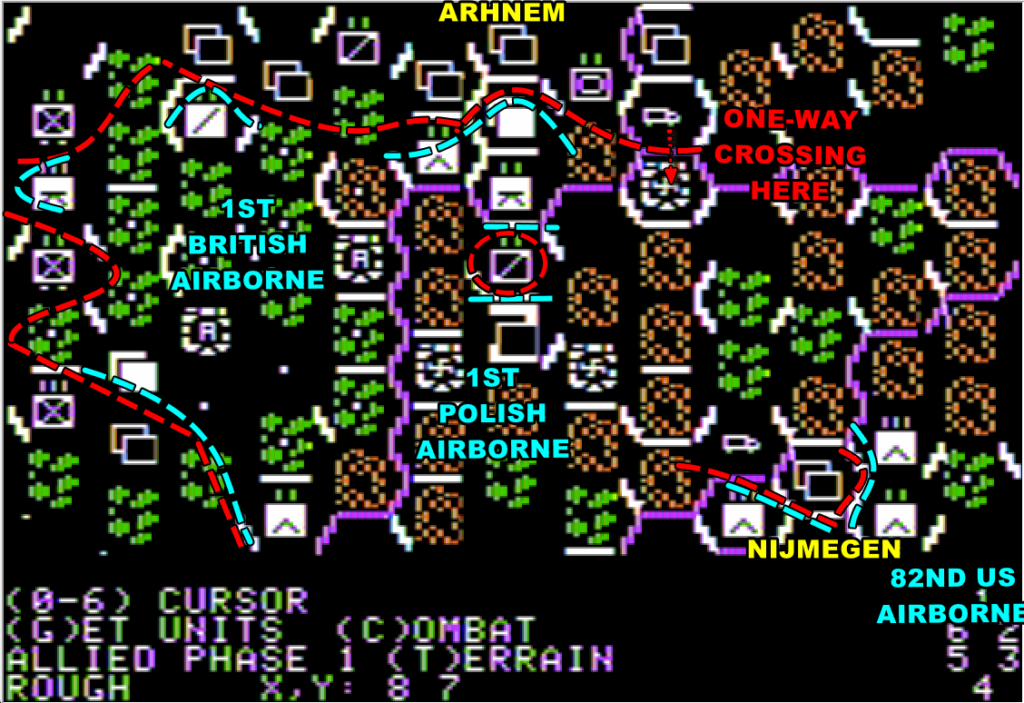
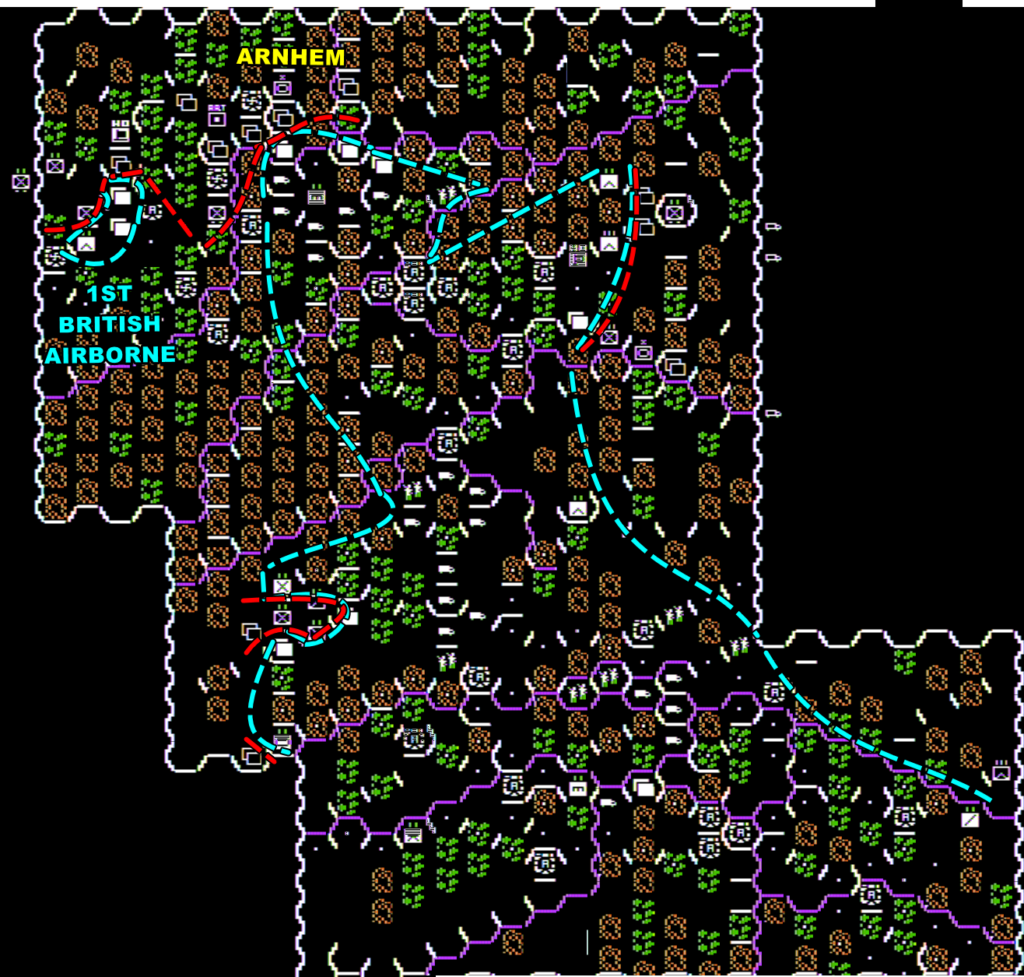
This happened not one minute too soon: the British of the other side were at that point completely overrun. With the exception of a few survivors holding the other side of the bridge, all the British units in Arnhem had been destroyed and the rest of the first British Airborne largely scattered in isolated groups, except for two battallions and the division’s HQ still holding the landing zone: it would be a huge source of victory points for the Germans should they take it.
September 21st (turn 5)
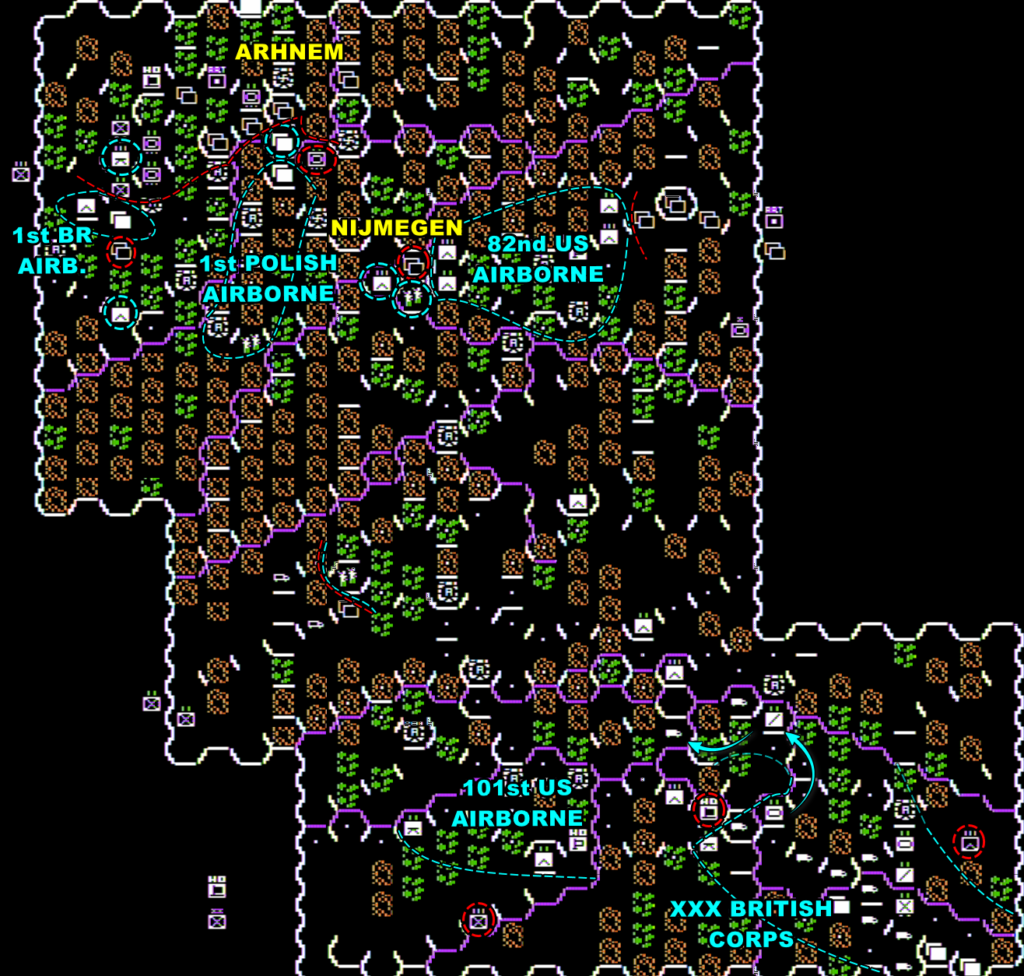
Theoretically, this type of scenario should increase in tension over time as the main force is more and more behind schedule. In this case, well, I am pretty serene because the XXX British Corps broke through and connected with the 101st US Airborne which already opened the rest of the road up to Nijmegen. The route is serpentine and there is a bit of a sliding puzzle to make sure my fastest units are at the front of my column, but in perfect circumstances my lightest units can cross up to 40 hexagons by day so by the morning of the 22nd a good chunk of the British XXX Corps is waiting in front of Nijmegen.
Speaking of Nijmegen, the city holds against all odds the 21st, and only falls the morning of the 22nd, allowing me to connect the 1st Polish Airborne and the 82nd Airborne with the XXX Corps. This allows to give full supply to those units (supplies sourced from airdropped depots only let you use 80% of your units’ operation points).
British troops from the XXX Corps pour into the Polish drop zone, ready to relieve the Polish paratroopers who had crossed the bridge the previous day to maintain a foothold on Arnhem.
September 23rd (turn 7)
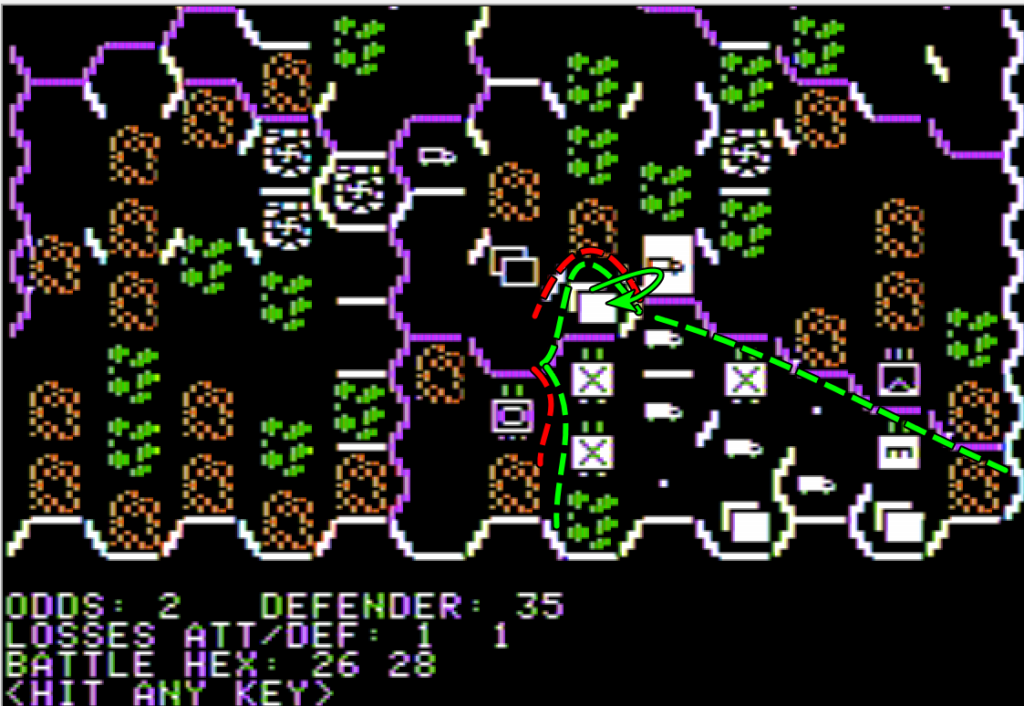
There are 4 days left, but it is the end of the game, and the only area with interesting action is around Arnhem. Everywhere else, I am just destroying German units with superior numbers.
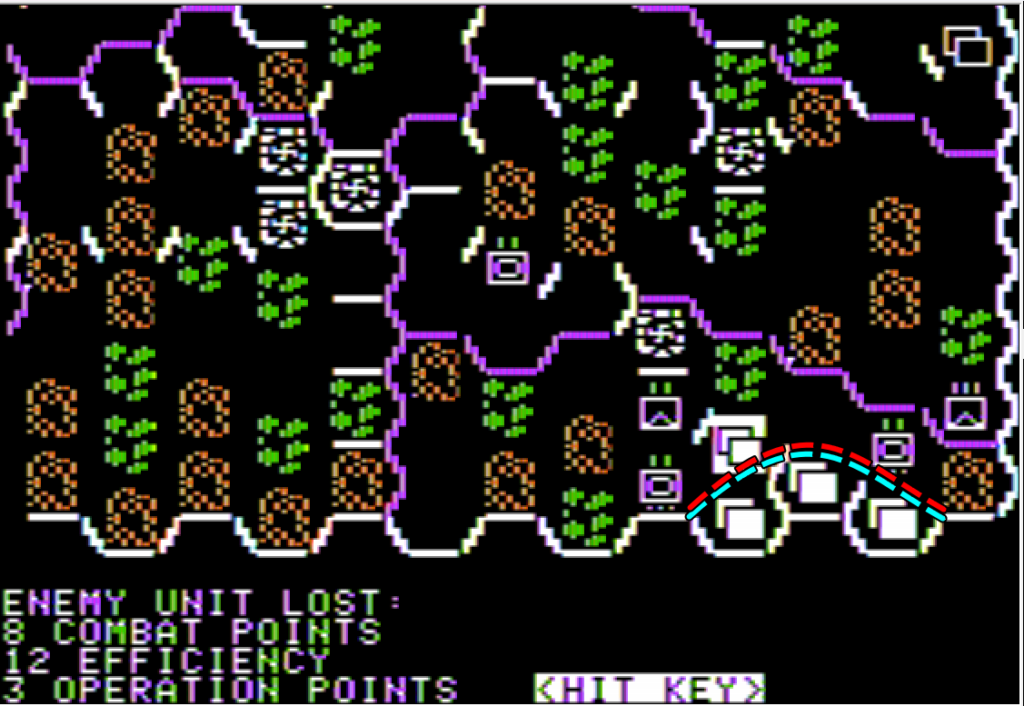
My approach is to increase my frontage for my attacks, both by infiltrating units through my foothold and slowly crossing the river East of Arhnem with the help of engineers. The support of air power and massive artillery in the back (the “HQ” icons) make the final difference and I liberate the entirety of Arhnem:
Well, not entirely… One small hex of indomitable Germans still holds out against the liberators. I need that hexagon to achieve all my objectives, and in the last turn I go absolutely all-in in the last operating phase…

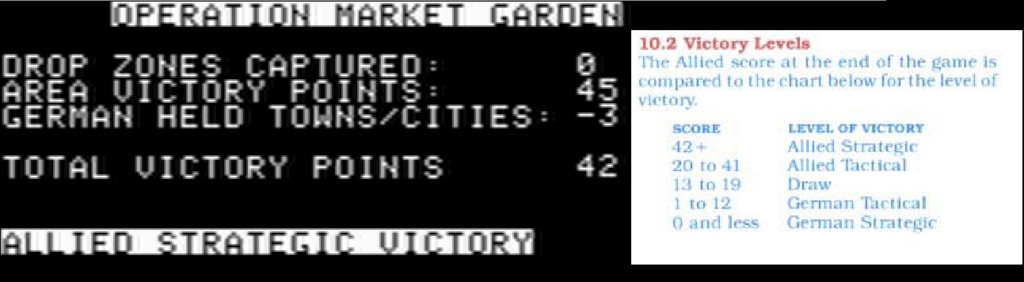
… to no avail. The Germans hold- depriving me of the precious VPs.
It still ends as a strategic victory – but that was close.
It was a pleasant experience, though never really tense from the moment I breached in the South-East.
Ratings & Review
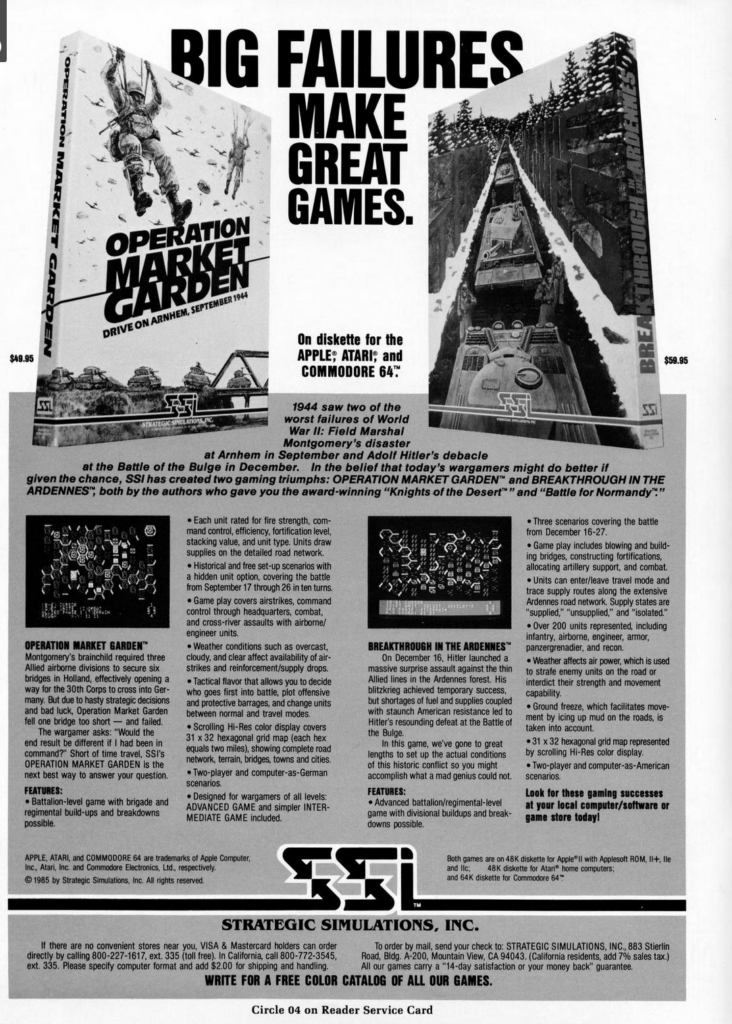
Operation Market Garden by David Landrey and Chuck Kroegel, published by SSI, USA
First release: March 1985 on Apple II
Genre: Land Operations
Average duration of a campaign: Around 6-8 hours
Total time played: Around 6-8 hours
Complexity: High (3/5)
Final Rating: ☆☆
Context – By early 1985, Dave Landrey had published five of his games through SSI, with his developer (=producer in modern terms) Chuck Kroegel even joining the company somewhere in 1984. Each of these games had built and improved on the previous one, and Operation Market Garden is no exception, as its engine is the same as the one in Breakthrough in the Ardennes, with a few changes here and there. Unfortunately, I don’t know more beyond this comment from Joel Billings in an email: “[Landrey and Kroegel] were producing game systems that they then used to create many separate games covering different battles or theaters of war. These clone games were quick and easy to produce once the main system was developed.”
Operation Market Garden was first released on Apple II in March 1985 and then on Atari and Commodore 64 in April 1985. An IBM-PC version would finally follow in December. It was sold for $49.95 ($10 less than Breakthrough in the Ardennes) and came with a manual that included a long “historical section” with maps and order of battle.
As a final note, it is the first occurrence of Market Garden in a computer wargame, but back in 1981 Operation Apocalypse had featured separately Market and Garden among its four scenarios.
Traits – As I said, Operation Market Garden largely uses the ruleset of Breakthrough of the Ardennes, whose most unique feature is the complex movement rules and capacity to consolidate small units in large ones or break large divisions into small battalions. I described in my Breakthrough article how the movement rule in particular turned the game into a puzzle due to the sheer accumulation of factors in determining movement cost: unit type and size, on enemy presence nearby, on terrain, on whether the tile was “owned”, on how many units were occupying it and on how many units had already passed through in the case of a bridge. It was also extremely easy to ruin one’s strategy due to having forgotten to break a large unit into smaller pieces [in which case they can’t be turned into transport mode] or worse having miscalculated a movement and left a unit in “transport” mode on a main road [units in transport modes can’t be overtaken by other units in transport mode]. This triggered many, many reloads – until it became a reflex to me, really undermining my enjoyment of the game.
Operation Market Garden addresses some of these issues, first by allowing both an “intermediate” and “advanced” ruleset, and the intermediate one for instance allows units in transport mode to cross each other. Furthermore, Operation Market Garden allows putting large units in transport mode – it may be a detail for you but let me tell you it’s a game-changer. Unfortunately – all those changes are ruined by one baffling decision: unlike in Breakthrough, invalid movements (eg you don’t have enough operation points to do the move your typed) cost you operation points, and those wasted operation points are not returning in the second operation phase if “spent” in the first one! Given how complex the movement rules remained (see below), this is bound to happen often and trigger, in my case, an instant reload! Once the taboo on reloading was broken, well, I started reloading more than just after a failed movement, and now I can’t claim to have won the game in Ironman mode.
There are a few other rule changes, and these are either explained by the specifics of the situation (eg: special supply rules for paratroopers not linked to the XXX Corps) or are a welcome simplification compared to Breakthrough (eg: artillery is now concentrated in dedicated units or HQs, so you don’t have to allocate it at the beginning of each turn). There is also an option to play with hidden units, which obviously I did not use.
Is Operation Market Garden better than Breakthrough then? Well, it should be, but it has one critical flaw: AI. In Breakthrough, the computer followed an hardcoded plan to protect the chokepoints as you progressed, and dynamically fall back on new hardcoded chokepoint hexes as you advanced – and so as long as you did not actually break through the AI looked solid. In Operation Market Garden however, the AI is simply passive. Except for its counter-attack in Arhnem – and even then its tactics were lackluster – the AI barely skirmished with my paratroopers. I did not actively try to surround and destroy my isolated units, it did not try to block the XXX Corps in the middle of the map and it did not even put its artillery in a position to safely attack my troops. It was quite the opposite: a good quarter of the enemy army remained visible but safely “off-map” for most of the battle, and half of the rest just patiently waited behind frontline units when alternative roads were available. I could have cranked the difficulty level a bit, but really the AI behavior felt absurd and unrealistic – and sadly this alone pushes Operation Market Garden back to the level of Breakthrough.
Did I take interesting decisions?– Several in the first third of the game. Much less in the rest of it, due to a passive AI that was unable to punch back; and yes I made a very similar comment on Breakthrough, but the AI held until around half the game!
Final rating: ☆☆
Ranking at the time of review: 38/183 – just above Breakthrough. Operation Market Garden is my new Kroegel/Landrey favourite game, but only by a tiny notch. At least I can keep saying “each new Kroegel/Landrey game is better than the previous one”.
Reception
I only found two significant reviews for Operation Market Garden:
- A medium-sized one by Neil Randall in Compute! (January 1986), which compares Kampfgruppe and Operation Market Garden. About the latter, it says:
There is little innovation, but there is nothing out of place, either. The game uses well-tested movement, combat, and supply systems to simulate the campaign with respectable accuracy. It forces the player to use both strategic planning and tactical finesse. And it does it all without raising the gamer’s ire. thoroughly solid effort.”
- A long one by Bob Proctor in the September 1985 issue of Computer Gaming World. The review is decidedly positive and ends with a recommendation, with a focus on the many customization options offered by the game. However, next to the article, Proctor wrote a short article titled “What’s wrong with SSI games?” which covers some of the issues I highlighted myself (in particular weak AI).
As for Evan Brooks, he did not miss the game in his “wargame prospective” and gave it only two stars in 1987, not mincing words in the review: “A tactical/operational simulation of the World War II airborne operation (“Monty’sFolly”), this game suffers from poor graphics; determining the road network is a lesson in frustration. Also, moves may not be adjusted in mid-play, and overall, the clumsy and unforgiving user interface dooms this simulation.”
Operation Market Garden sold only 7 100 copies in the USA, better than Breakthrough in the Ardennes (5000) but way below the success of the earlier Knights of the Desert (16 300), prompting Landrey and Kroegel to return to the Civil War with Battle of Antietam in November 1985 – a move that would prove to be commercially solid. Hopefully I will cover this game on the blog too.
4 Comments
You did Monty proud! The ZX Spectrum game “Arnhem” by CCS is very good, where you have three movement phases, and units in travel mode cannot pass through each other. And you make good choices throughout.
IRL the issue was that Model could have just blown up the bridge at Nijmegen whenever he wanted (until he lost it), and the salient produced by XXX Corps was a very long, thin piece of rope that could be attacked on either or both sides at any point along its length.
As one of the big operations that involved Polish troops, the Market Garden is relatively well known in Poland – and we have rather worse opinion of Montgomery as a result! The Polish paras were wasted on poorly thought out operation in the Netherlands instead of being dropped in Warsaw to help the uprising is one of the outlooks that color this opinion.
Also, I would probably throw the disk with the game through a closed window in the middle of the first turn with this UI… Thank you for playing those games, so we don’t have to 😀
Adapting a famous XKCD drawing:
“I did not actively try to surround and destroy my isolated units”
Well it would be weird if you had tried that. There should be “It” instead of “I” at the beginning of that sentence.