I am not a huge fan of wargaming the Battle of the Bulge as the Germans: game designers usually give you a lot of powerful units to play with, and then they ruin it by limiting your frontage (“how many units can fight at the same time“) and by not giving you enough supplies to move freely. At least, when playing the Bulge as the Allies, you struggle to defend a few villages with a handful of GIs and then have this cathartic moment when the sky clears, the reinforcements arrive, the German army melts and the credits roll.
Unfortunately, you can only play the Germans in solitaire Breakthrough in the Ardennes, but still I had some hope: this is David Landrey’s 5th game for SSI, and each one has been better than the previous. My first attempt at playing Breakthrough became save-scumming intensive, for reasons I will explain later, until I reckoned I was not playing the game as I should, and started again. In my second attempt, however, the gap in performance compared to my earlier save-scummy session was so huge that I grew frustrated and decided to put the game on the back burner for a while. I picked up the game a few weeks ago, so I am happy to finally present you my third attempt at beating the game.
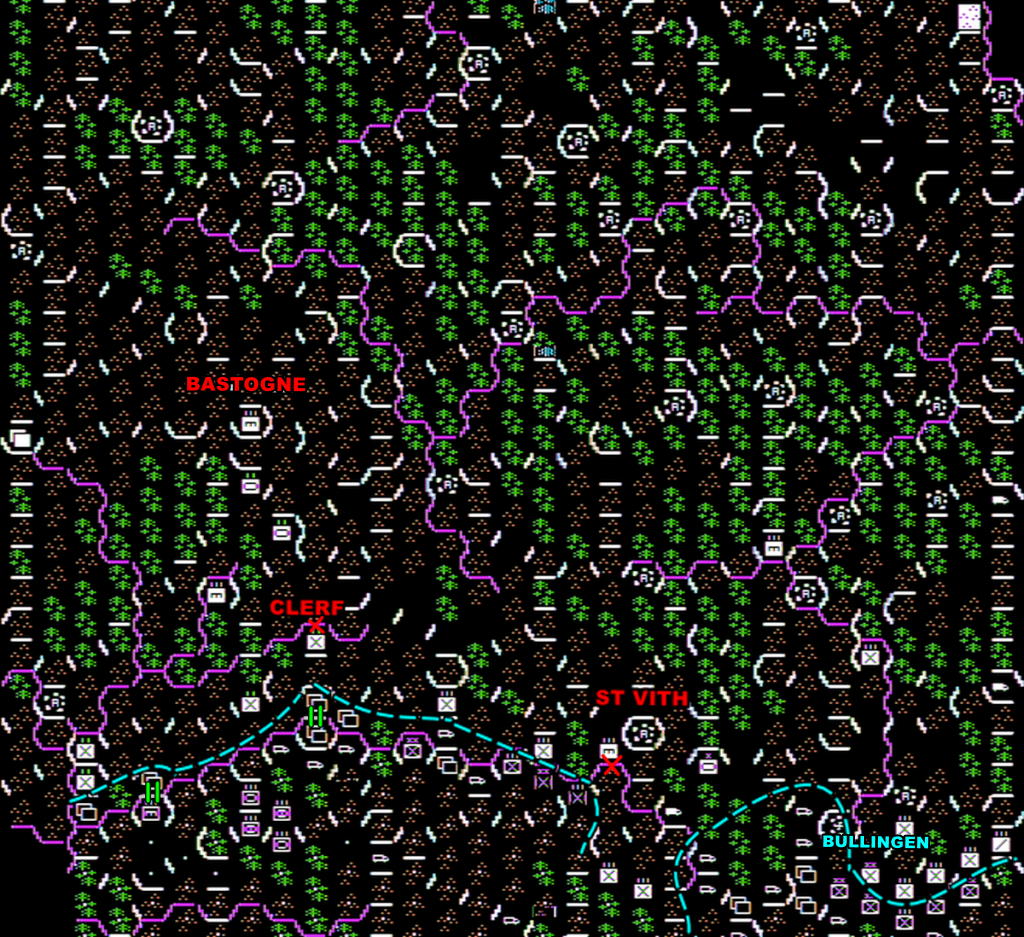
The large maps in this AAR (except the first one) have been done thanks to a tool created by the DataDrivenGamer for his Eastern Front 1941 AAR, which he adapted specifically for my needs. I cannot thank him enough: collating screenshots for large maps could take 20 minutes or more, but with his tools, it took seconds. The only “cost” is that the first two rows of the map are lost (this is due to the way SSI displays the bottom of its map), but they’re not used except as spawn points for the Germans, so not much is lost.
16th December, 1944 (Turn 1)
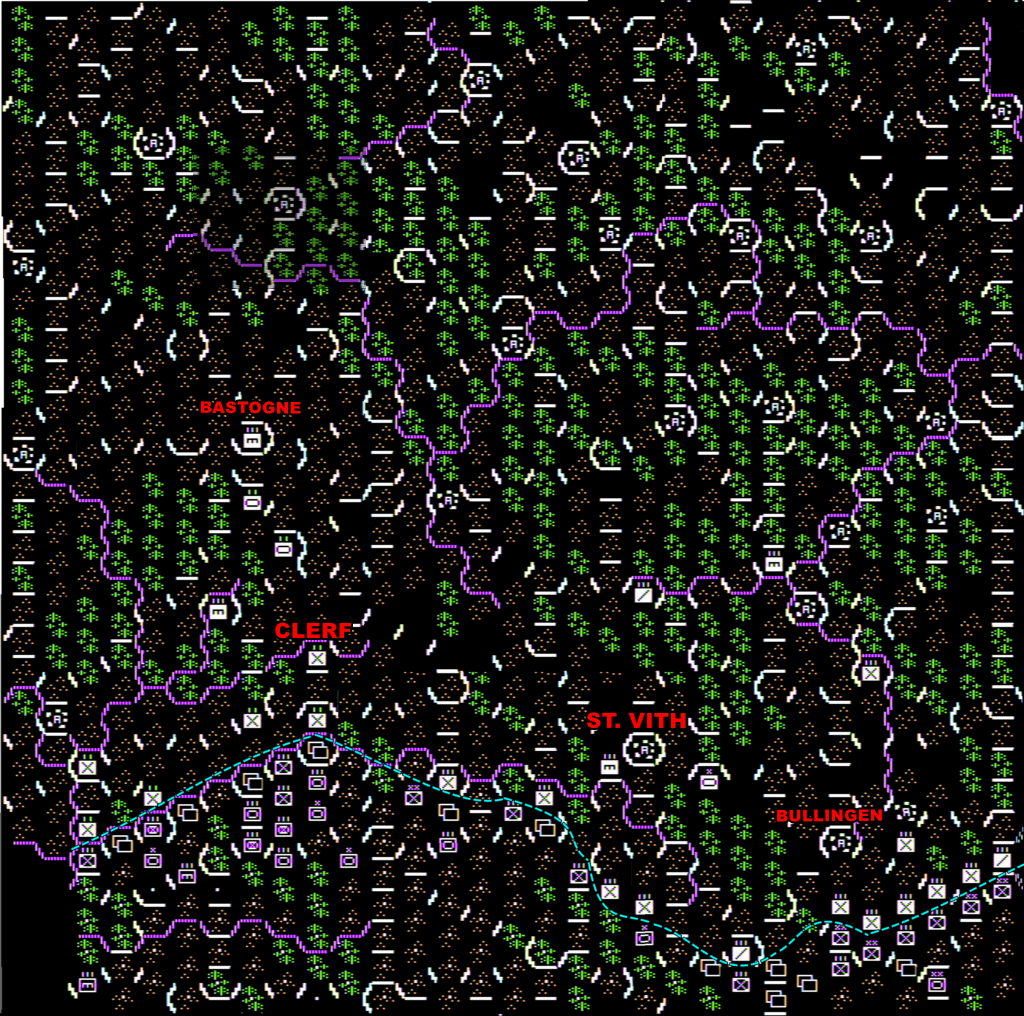
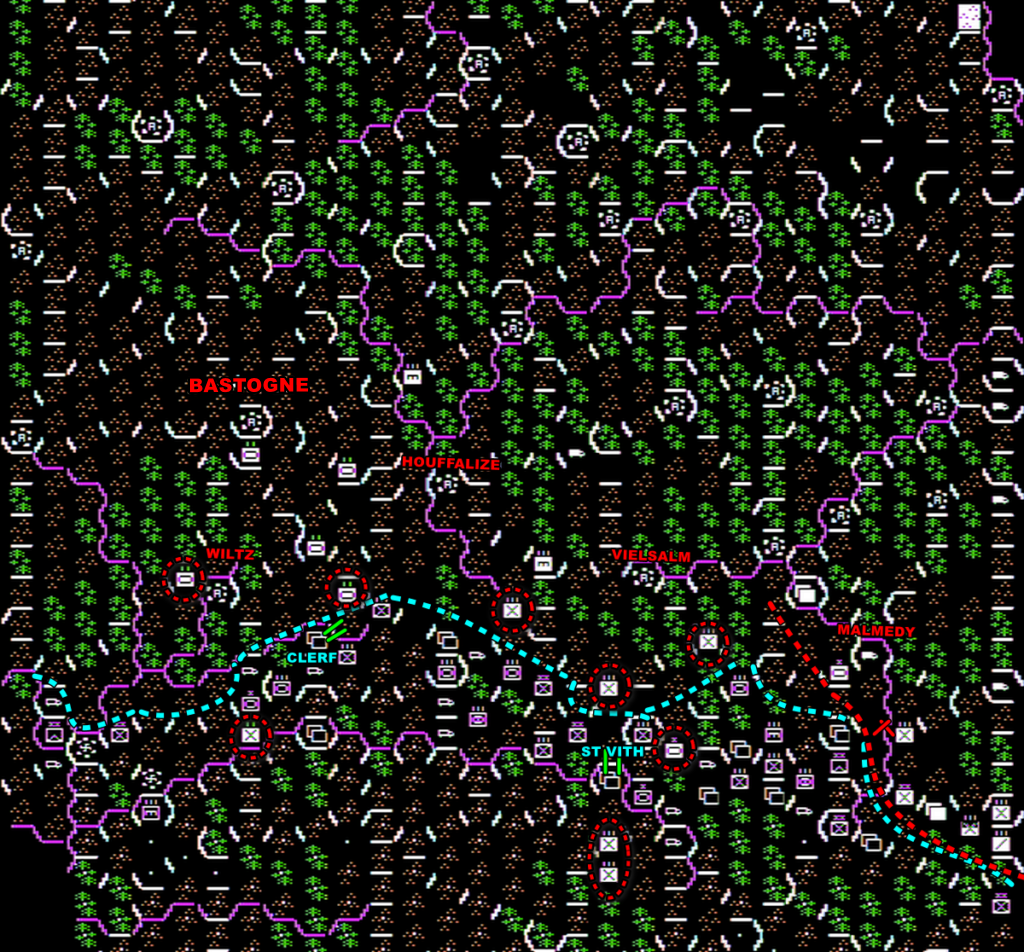
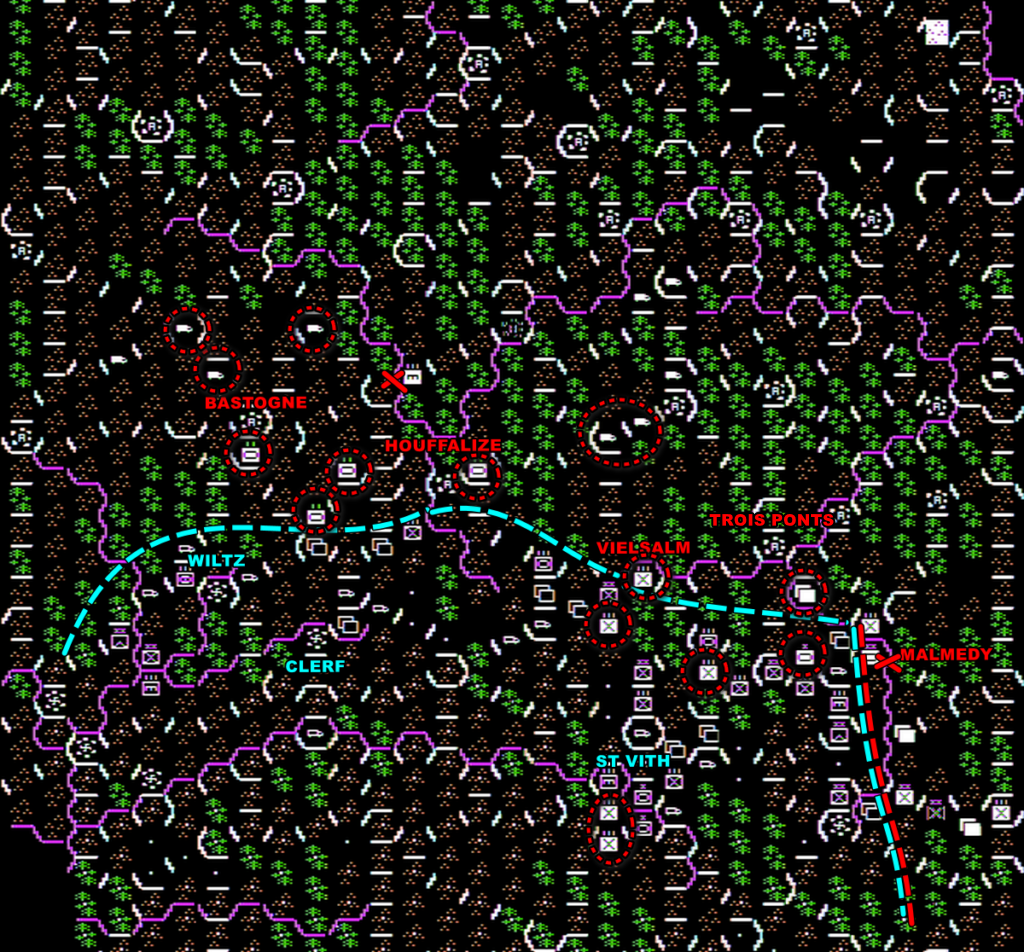
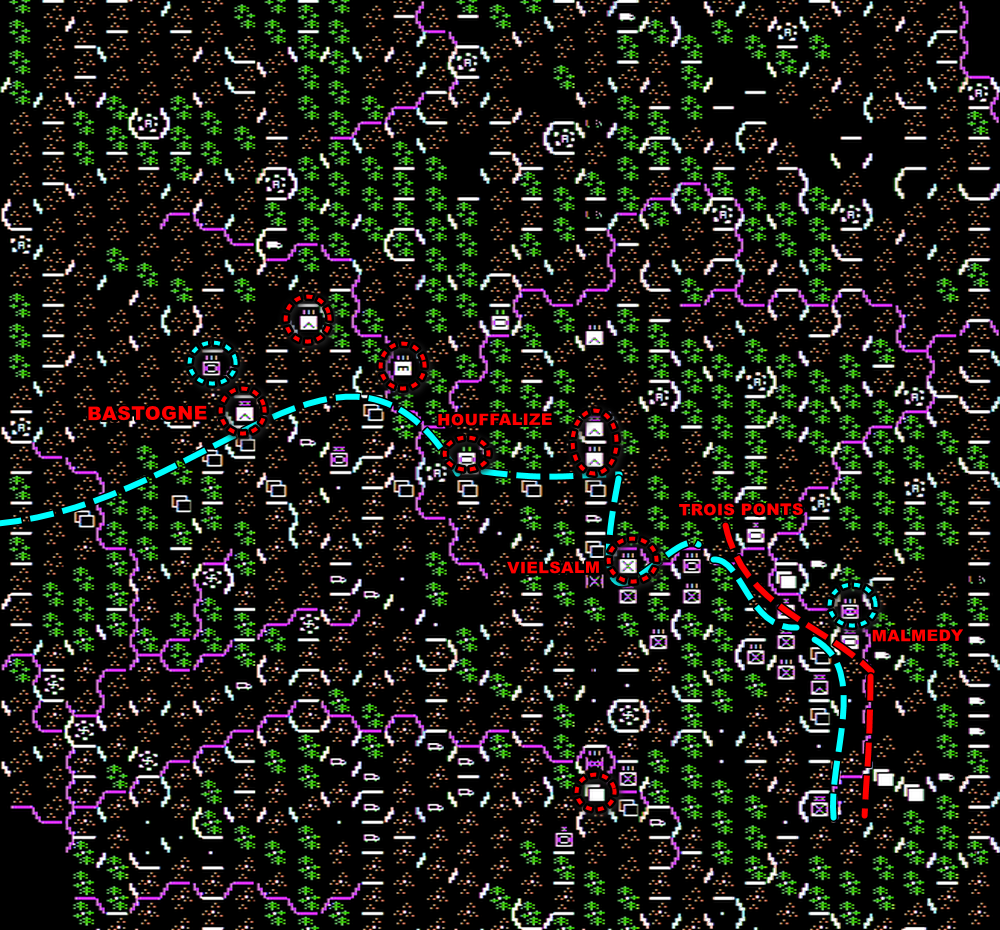
The game opens with a dense German deployment South of the Our, facing a few scattered American units. My objectives are to capture as many cities as possible (Bastogne giving extra points), destroy as many Allied units as possible and, if I perform well, exit units through the top of the map. Of course, the Allies will receive a trickle of units every day, and then way more than a trickle – I need to breakthrough decisively, which I plan to achieve by day 3.
The game lasts 12 days, each of them split in four playable phases: the air mission phase (when the weather allows – not the first turn), the organisation phase and two operation phases, each with movement and combat. During the organisation phase, each player can build or destroy bridges, allocate replacements or artillery and finally merge regiments into divisions or break divisions into smaller regiments. The last one is one of the many devious ways in which the game can destroy your chances before the first shot is fired.
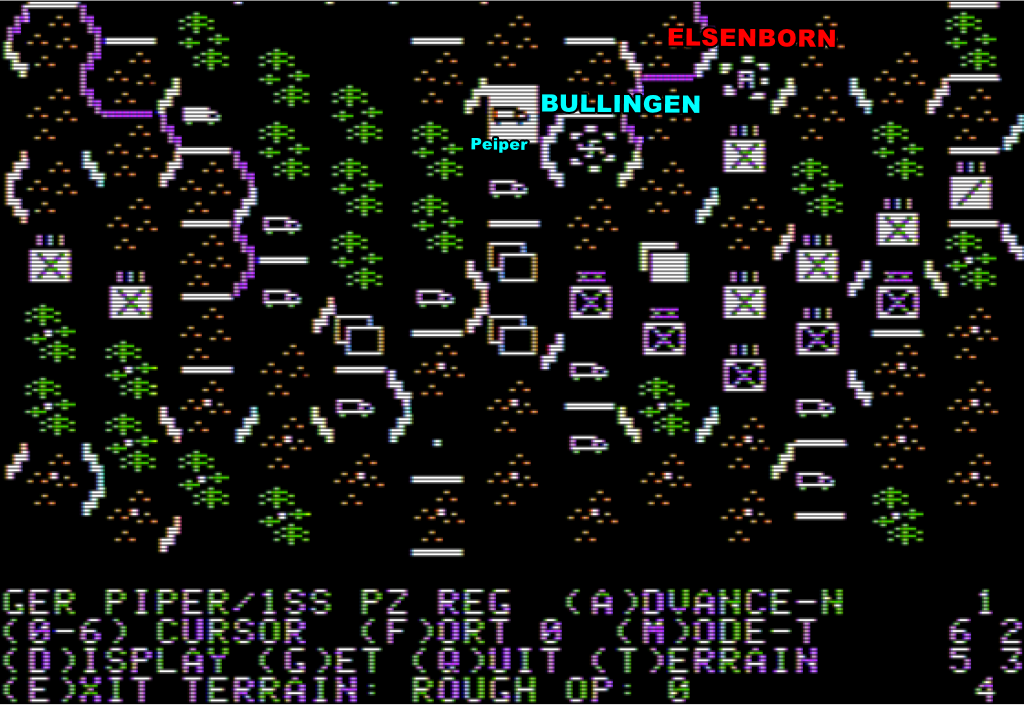
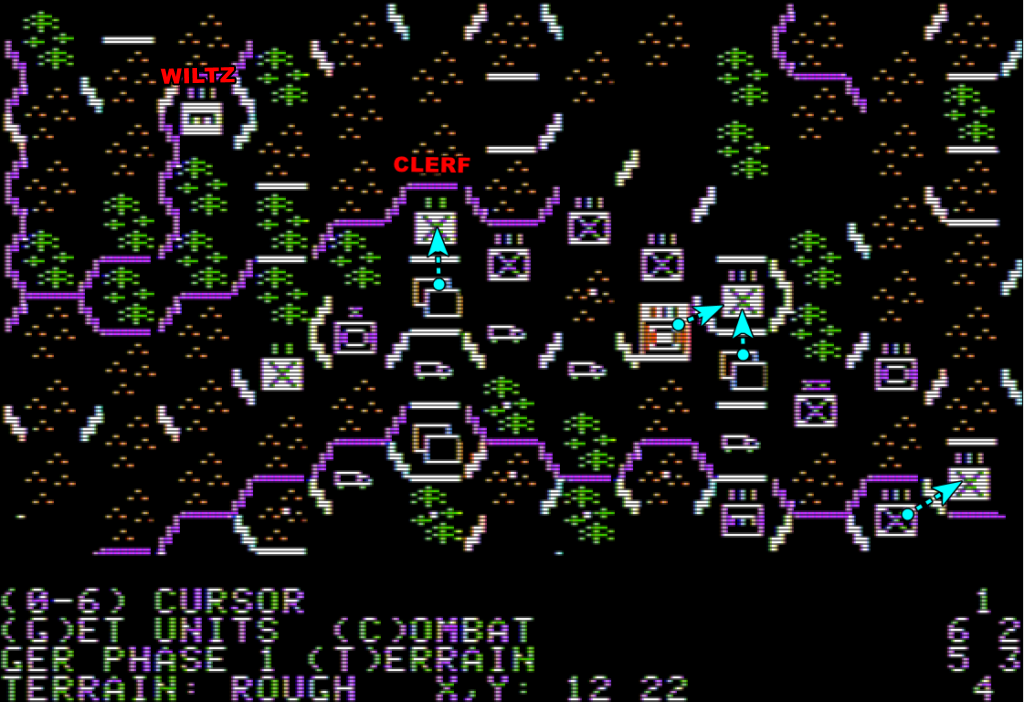
Let’s take for instance this stack of units about to cross the Our:
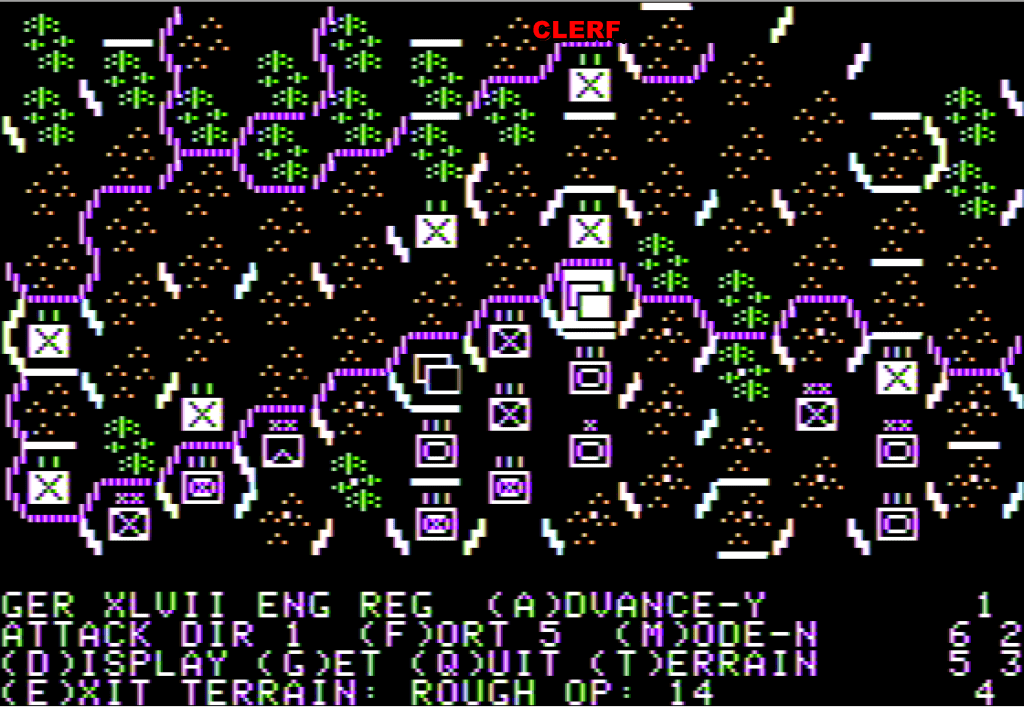
This stack includes one engineer regiment and two regiments of the second Panzer Division. Divisions have a combat bonus of 25%, so of course you want to immediately merge them…
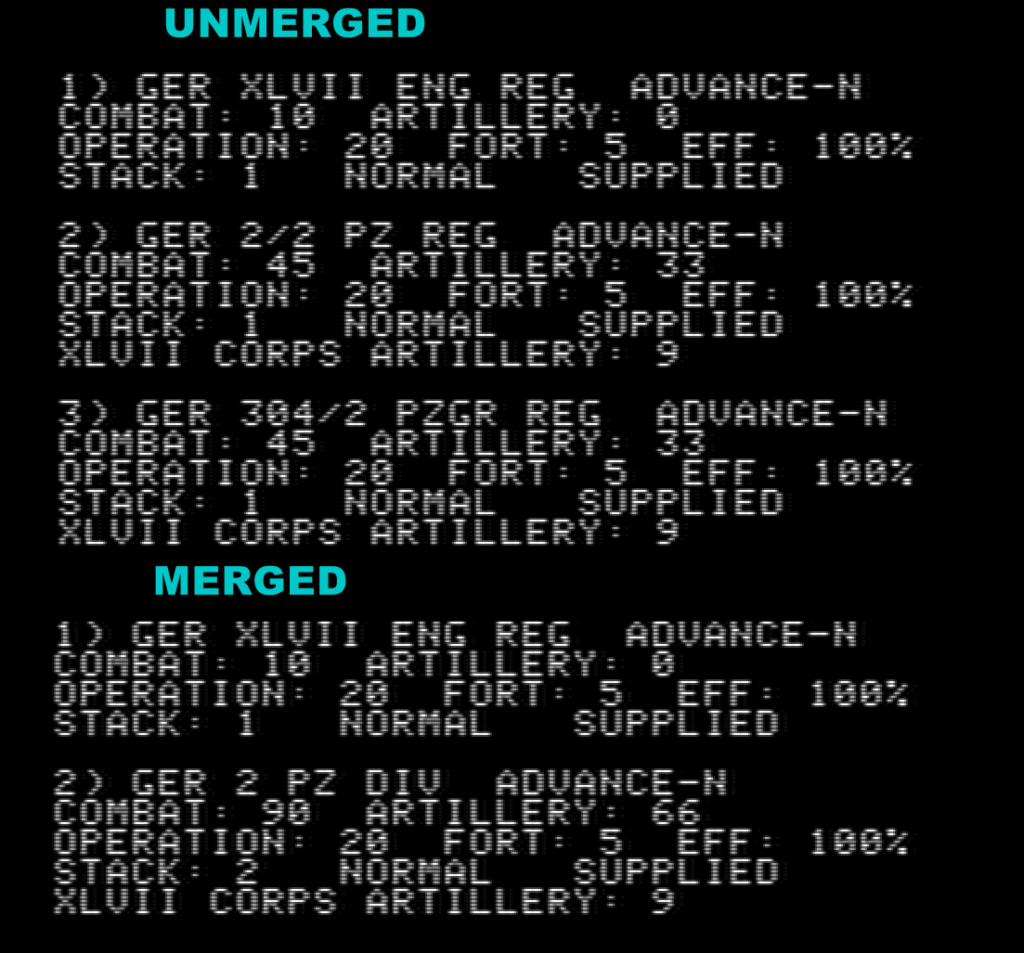
… but if you do that, whoops, you just sabotaged your opening because Panzergrenadiers can cross rivers and Panzerdivisions cannot, so your soldiers will stay on the wrong side of the river after the assault. Similarly, regiments can move in fast travel mode and divisions cannot, so the first thing to do in Breakthrough in the Ardennes is to break the divisions at the back of your line so you can bring their components to the front quickly.
In any case, for the first turn, the tactic is simple: all-out assault. It’s not like there is anything better to do as by design units can only attack in the first operation phase of the game.
After the first operation phase, the game gets in full motion and I can finally move my units – and that’s when the savescumming started. To explain why, let’s check what I have on my right flank:
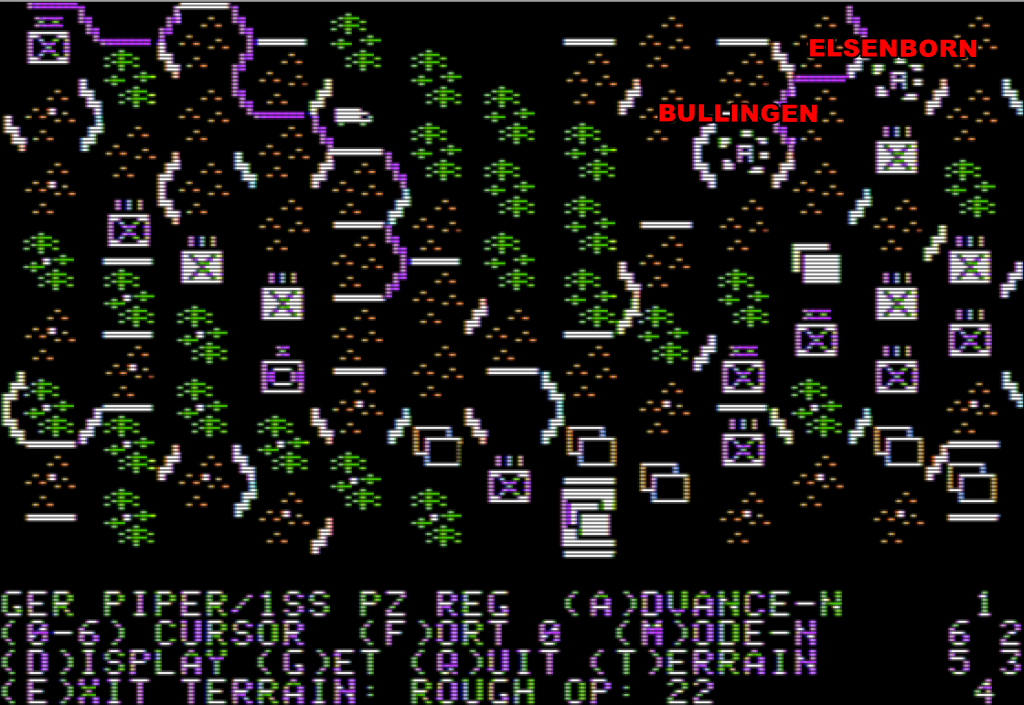
I have a lot of units available at the bottom of the map, and only one route North not blocked by enemy units. That’s where Breakthrough in the Ardennes is diabolical. While David Landrey’s earlier games were all about managing supplies, the supply rules are trivial in Breakthrough (“can you trace a line of owned (=dotted for the Germans) hexagons to your border of the map? Yes? Then supplied, except later in the game where there is also a random roll”). Instead, all the complexity of the game has been put into movement.
All units in Breakthrough have two movement modes: normal and transport – with the transition from one to the other costly in operation (=action) points. Transport mode is fast, but it can only be used on roads (indicated by white bars separating two hexagons) and, critically, units in transport mode can’t stack with another unit in transport mode. What turns movement rules into a puzzle in which any error can cost you the campaign are the rules added to that:
- Movement cost depends not only on the terrain but on whether your unit is “mobile” or “not mobile”,
- Moving into an enemy hexagon (one without a dot in the middle) costs one additional movement point so you should send units ahead in transport mode to “convert” the hexagon but also find a way to move them out of the main road with their last operation points so they don’t block the way,
- Stacking another unit while in transport mode (but not in normal mode) costs additional points, depending on the size (brigade or division) of the unit you passed through,
- Entering or leaving enemy zones of control has its own cost in points, which also depends on your mode,
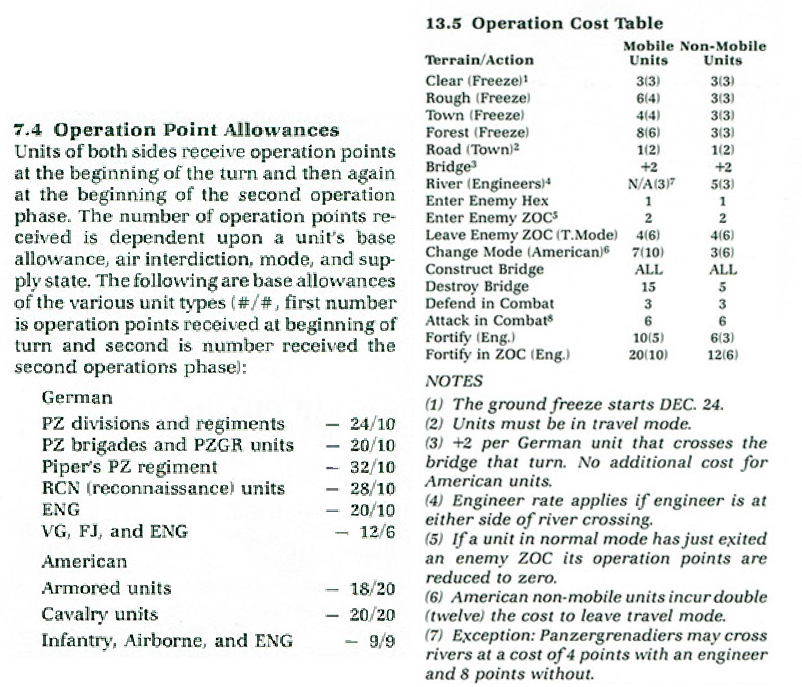
Even without any bridge to cross, it is incredibly easy to miscalculate oneself into a situation where a unit in transport mode and out of operation points blocks a lot of “fresh” units behind it. That’s what happened consistently in my first attempt to play the game, before all the rules became “second nature” to me, a situation I “solved” by reloading the game. One thing leading to another, I found myself reloading if the final movements were anything less than perfect, then reloading if I had not allocated enough forces to chase some American unit from its position, because it was crippling my movements the following turn, and by then I had both won the game and optimized the fun out of it.
Does it mean that in the current playthrough I stopped reloading? Alas, no, but I managed to (almost) limit it to “stupid mistakes” that did not involve interaction with enemy forces (eg: I forgot to break a division to move it in transport mode, or a unit in transport mode is stopped at a crossroad because I thought it could move one more hexagon).
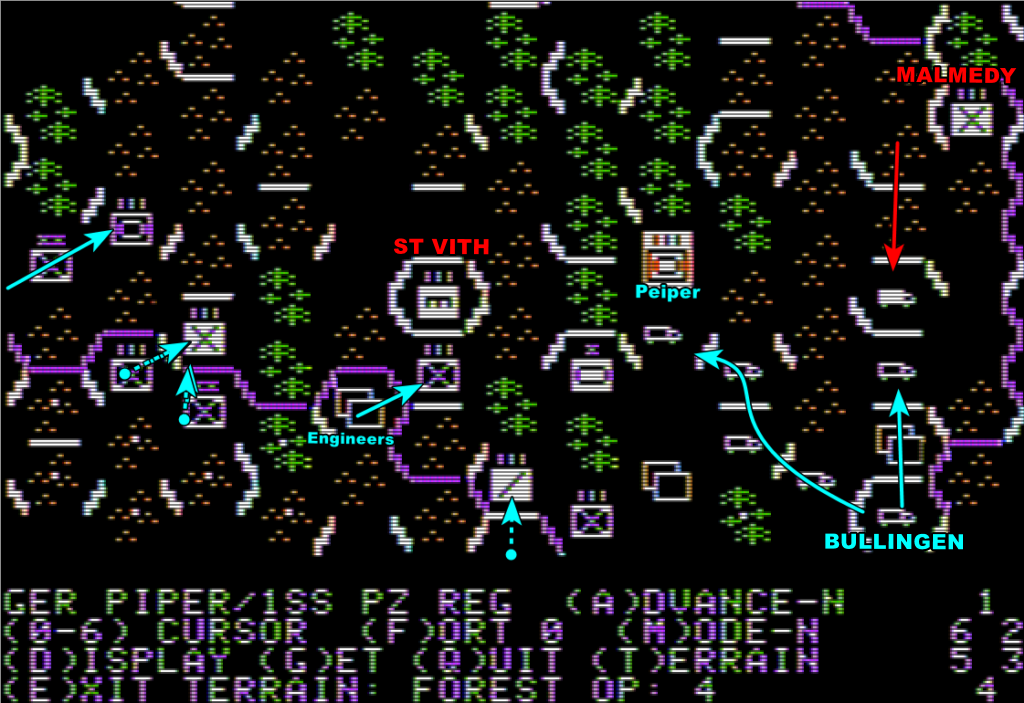
In any case, back to the game – my strategy is to attack as much as possible through the centre of the map, as there are redundant roads and fewer rivers to pass. Therefore, my plan on this flank is to advance as fast as possible and then turn left when possible to support my effort to pierce the front at St Vith. I can guarantee you that with this strategy I am going to take St Vith by the 18th and then breakthrough and penetrate deep into allied lines.
There are fewer movements on the rest of the map. My infantry crosses the river South of St Vith and Clerf, but the lack of bridges near the latter blocks my Panzers until my engineers can chime in.
17th of December, 1944 (Turn 2)
Starting the 17th of December, the Allies will receive endless reinforcements, which will guard the important crossroads and clog my advance. The Americans also sabotage bridges in front of my forces, though this morning they only managed to destroy two: one behind Clerf, one in front of St Vith. While there are combats on my flanks, I focus my efforts on two locations: St Vith and Clerf. As I said, there are only a couple of units to mop up and then I will have the titular breakthrough.
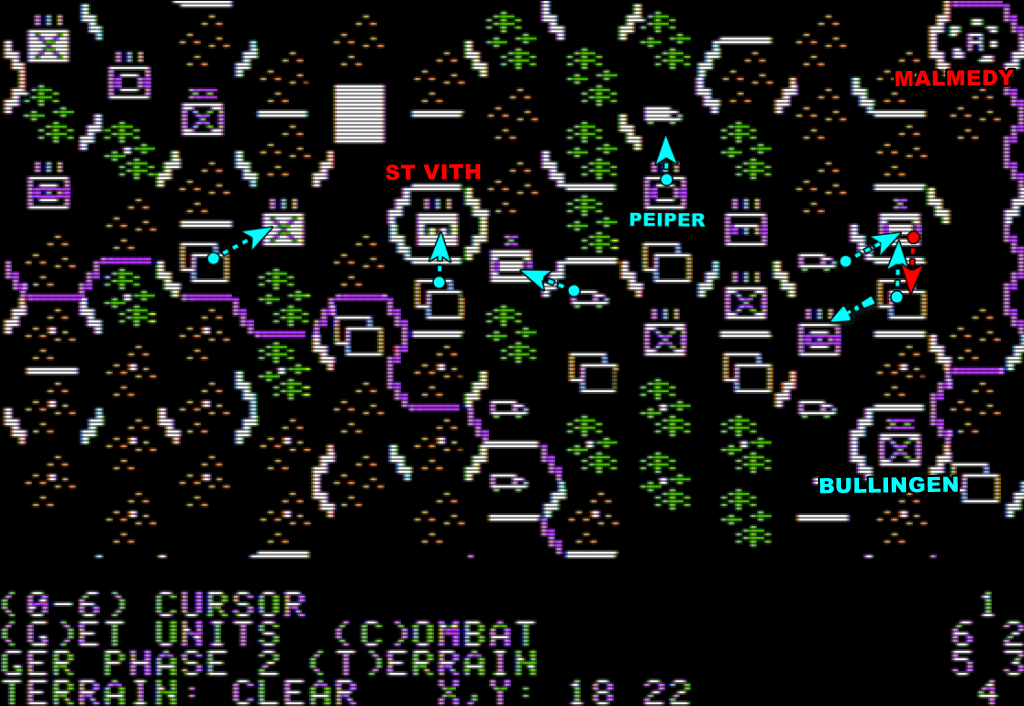
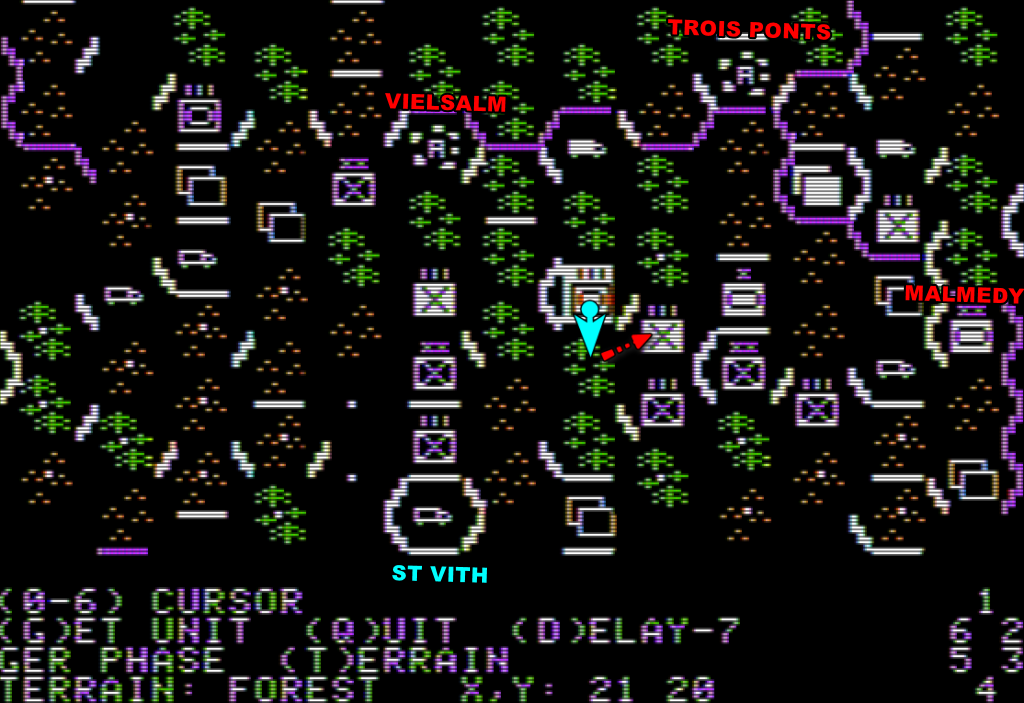
- In St Vith, engineers arrive just in time to help some infantry cross to the South, while more units arrive from the West and East to surround the town. Peiper uses his insane mobility to go off-road, hoping to reach an unguarded route. An enemy cavalry unit on the way is easily eliminated.
Alas, my opponent is smart, and it allocates one of its mobile units to block Peiper. It also counterattacks on my right before I can properly transit from transport to normal mode. Units in transport mode only fight at 60% of their capacity, and so my elite PanzerGrenadier vanguard is forced to fall back and reorganise for the day. However, the Allied cannot prevent an assault on St Vith from the South and East during the second operational phase.
I win all the combats in the area, but the only unit I eliminate is the engineer unit in St Vith, which is occupied. The rest either retreat or, if it can’t due to zones of control, stay in place and receive additional damage.
- In the centre, I assault both Clerf and a crossroad between Clerf and St Vith – the unit in Clerf is wiped out while the one at the crossroad falls back.
It is still blocking my way, so I surround it the following turn before attacking again – but it manages to fall back further at the cost of additional damage.
In any case, with Clerf and St Vith under my control, my breakthrough in the Ardennes is now imminent.
18th of December (Turn 3)
The 18th of December starts with bridge-building in Clerf and South of St Vith. The Luftwaffe has 2 missions available, which I allocate to “interdiction”, slowing down some of the units coming to reinforce the Allied line. While the Allied deployed some units North of my position in a desperate effort to slow me down, the situation is excellent. I will have my breakthrough at the end of this day.
The road to Bastogne is teeming wth Allied units so I am not going to break through there quickly, though I still send units in this direction. On the other hand, the area North of St Vith is a land of opportunity, with two roads leading there and only one layer of units (plus one engineer) to go through, plus some mop-up around St Vith. Given the discrepancy in number, I should easily be able to brush the enemy units aside, after which I will turn West on Bastogne.
That’s the plan anyway. In the area leading to Houfflize, it works as expected and I destroy the two enemy units blocking the way. Even better, the enemy resistance North of Clerf and West of Wiltz is much lower than expected, with two units eliminated by relatively weak attacks and a third moved out of the way. Maybe there is a direct route to Bastogne after all?

On the other hand, that one allied unit (an element of the 9th Armored Division) near St Vith resists a powerful assault, blocking around 10 units in transports that really wanted to go through St Vith but would have been better off going off-road. The Americans are eliminated the following phase, but that’s one phase too late.
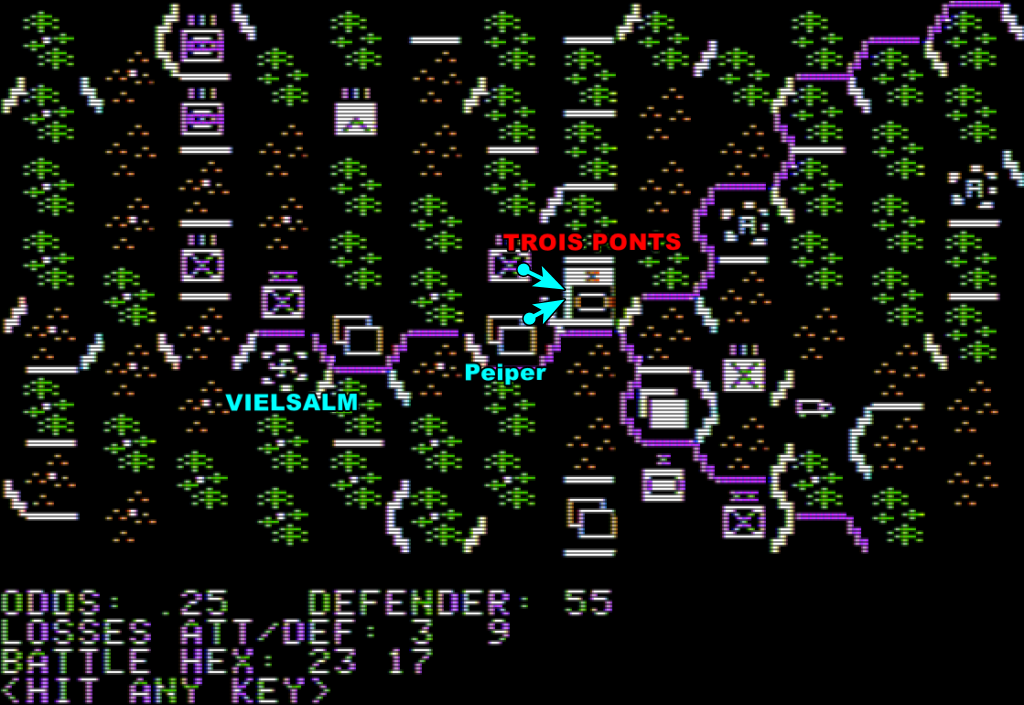
Finally, the road between Vielsam and Malmedy turns into pure chaos, pinning a lot of my units that I had expected to free. As a final sour note, Peiper’s unit is cut from supply by the retreat of the unit it attacked, so next turn it will be unsupplied and lose half its mobility.
19th of December (Turn 4)
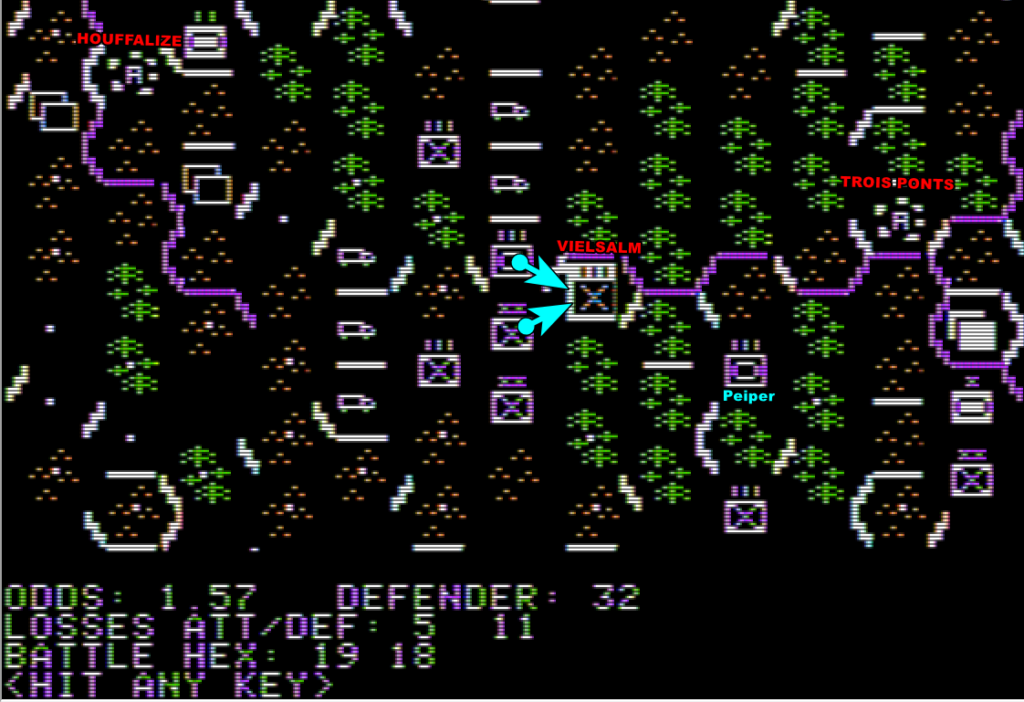
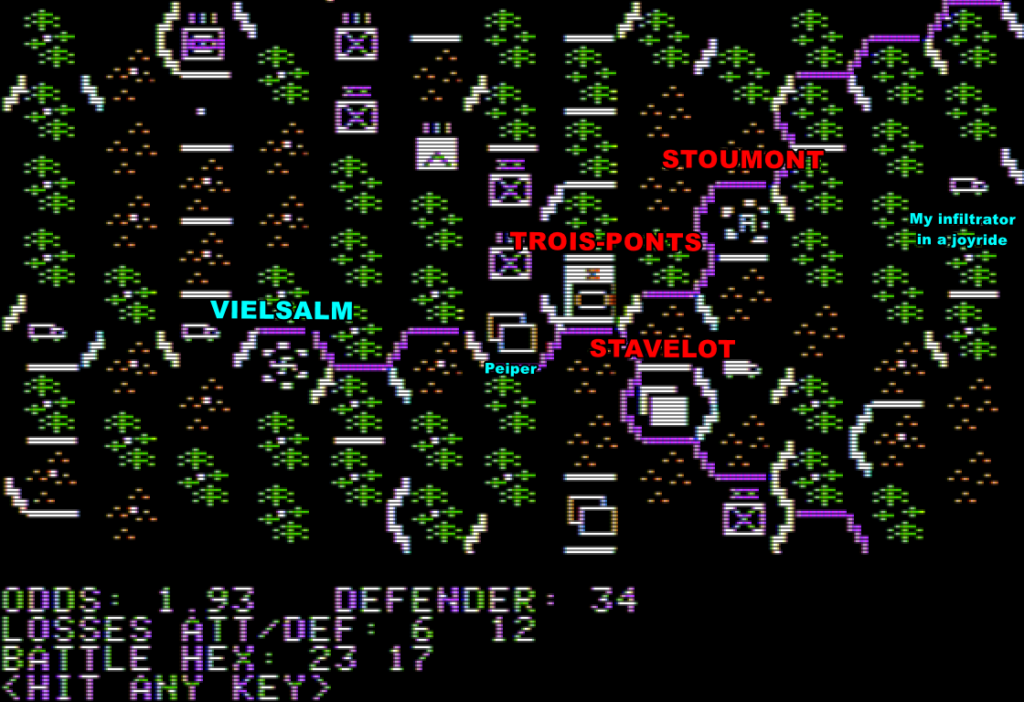
As I expected, I broke through North of St Vith by the end of the 18th. For a few minutes. The Allies immediately closed the gap by moving one of their infantry to Vielsalm, covering the Eastern road, while the Western road is still blocked by the armor unit near Houffalize. It’s OK though, it’s only one unit. New plan, hear me out – I can easily destroy the unit guarding Vielsalm this turn, and then the road to Trois Pont and then North is open – I’ll have my eponymous decisive breakthrough, which I will be able to exploit even better thanks to 10 fresh units I just received this turn. Meanwhile, I’ll try to reach Bastogne before the Allies reinforce it, and put pressure in the centre.
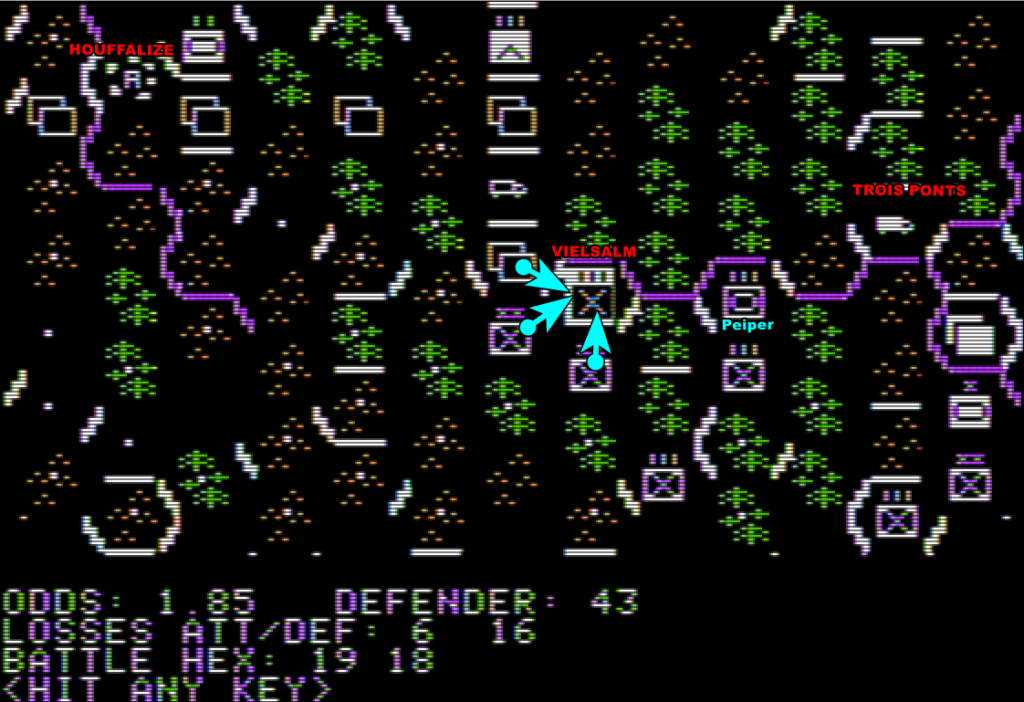
That’s a nice plan, but there’s a wrinkle: the American infantry (elements of the 30th infantry division) in Vielsalm won’t move. Despite being attacked by massive forces two phases in a row, it just stays there and tanks the damage like a champ, while Peiper advances at half-speed due to supply issues. There is no breakthrough to Trois Ponts.
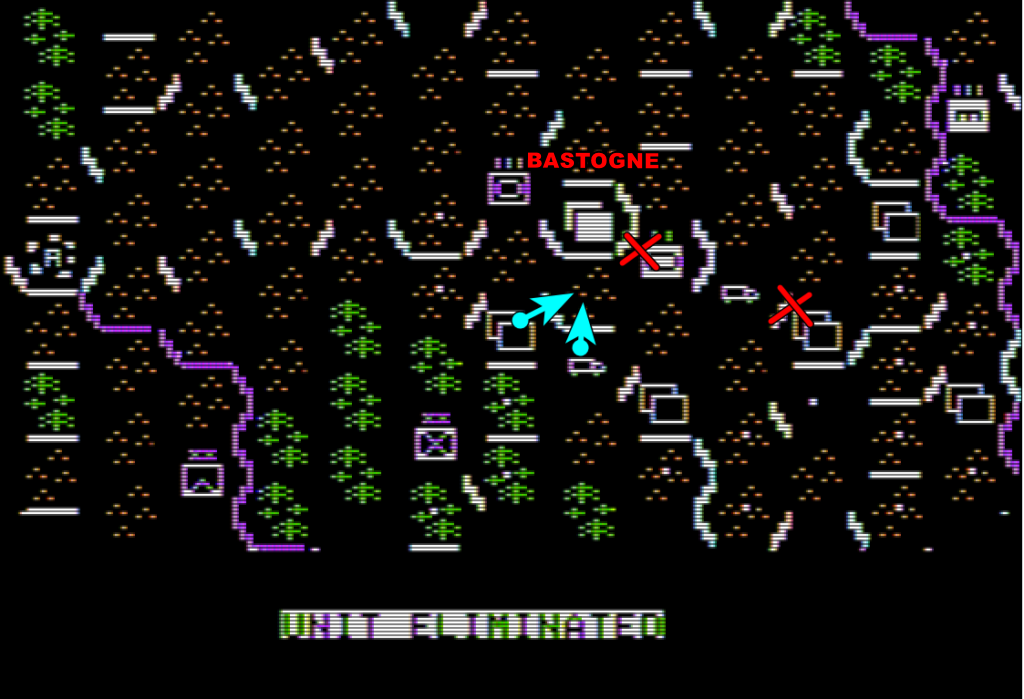
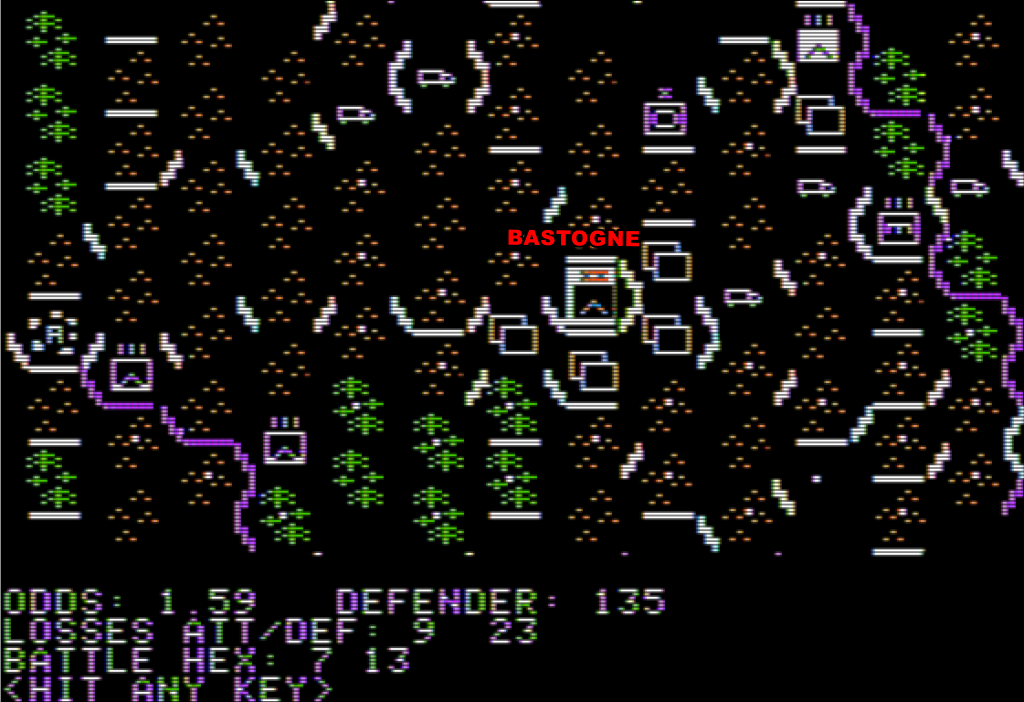
At least I have some success around Bastogne: I don’t manage to reach it before it is reinforced by the 101st Airborne no less, but all the armored brigades screening it are destroyed, so now it’s only the city and a bunch of infantry left. Elite infantry, but still infantry.
20th of December (turn 5)
The previous days have been a long succession of disappointments, but today should be finally decisive, with, I am sure of it, the long-awaited breakthrough in Trois Ponts. I also have an opportunity to add some chaos behind Malmedy, where I managed to infiltrate a unit at the end of the previous day. Finally, I’ll keep Bastogne locked tight while I prepare an assault with the elite units I received the previous day.
Let’s close the Vielsalm-Trois Ponts attack quickly: while Vielsalm finally falls, a brigade of the 3rd Armored Division in Trois Ponts holds as steadfast as the infantry in Vielsalm did the previous day, so no breakthrough there.
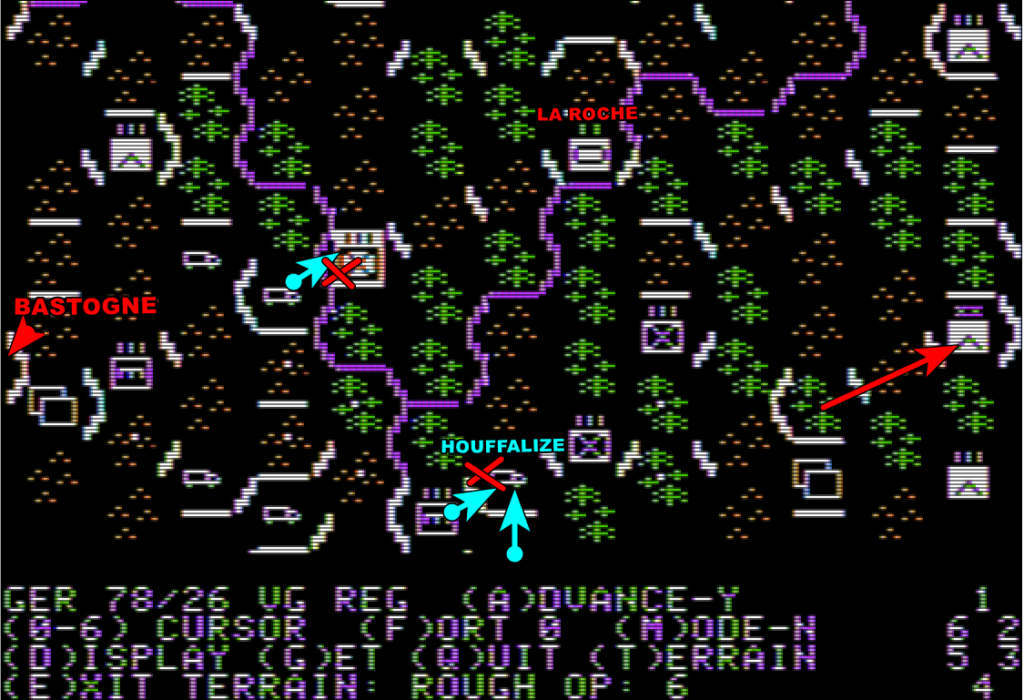
On the other hand, the situation develops where I did not expect it. My infantry crossed the Our East of Bastogne after easily dispatching an engineer unit. I should have been blocked next by the garrison of a town called La Roche, but it turns out that after Houffalize fell further in the South, the Allied division guarding a strategical crossroad also leading to La Roche relocated East, so now I can do a pincer movement and maybe take the town quickly!
21st of December (turn 6)
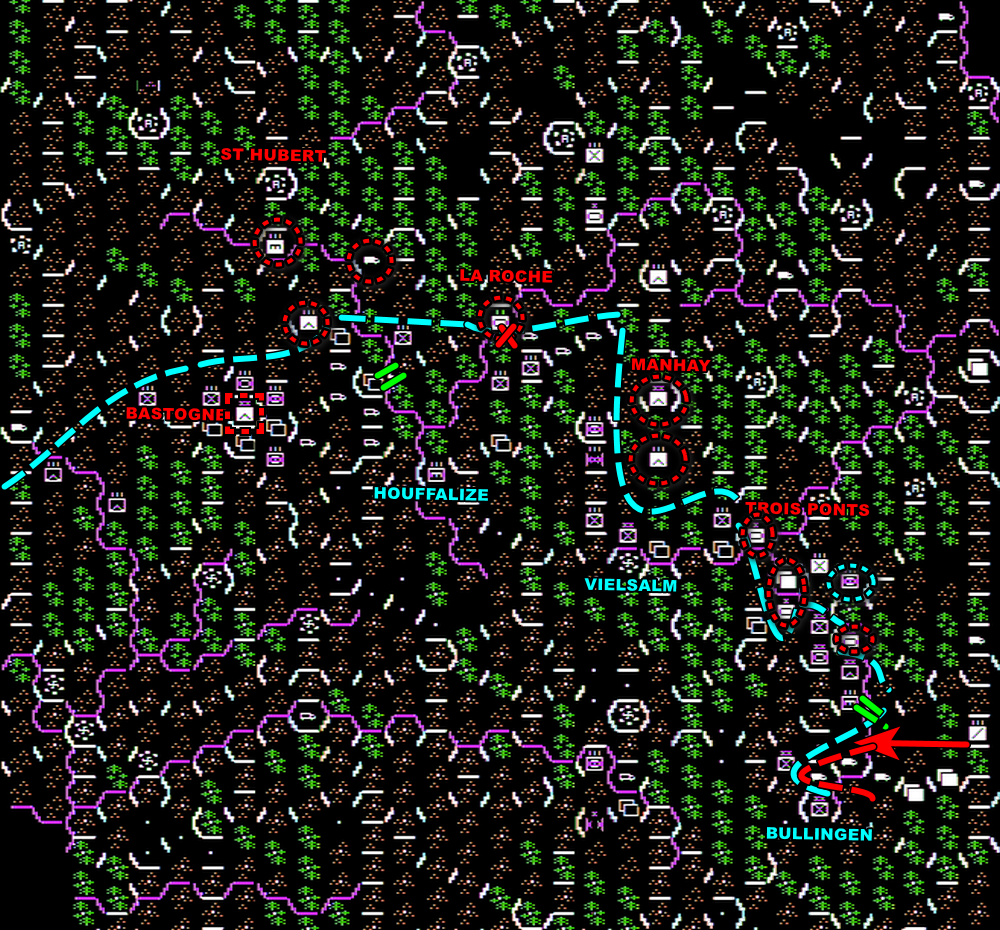
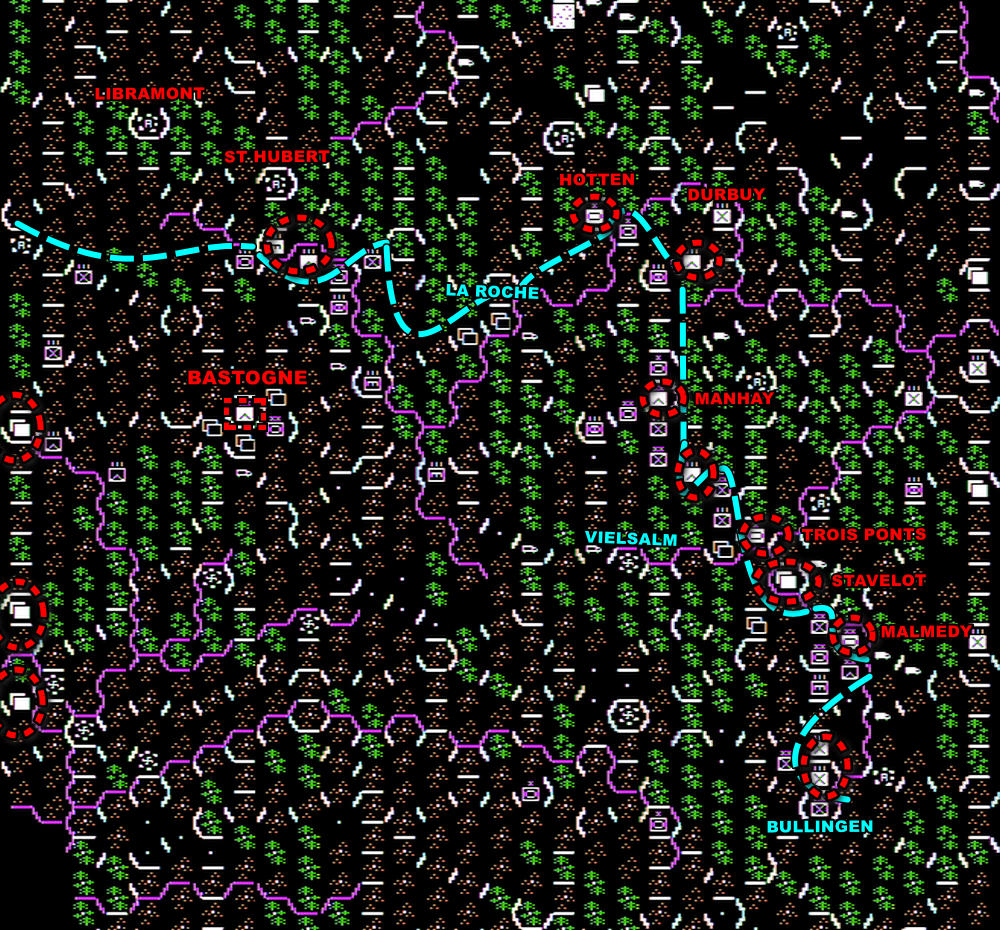
I know I overpromised on this breakthrough, but you just had to be patient. The situation is ripe now, with several weak points in the Allied lines: I can breach near St Hubert in the North, near La Roche where my engineers have been busy or maybe at Trois Ponts. This is the turn.
Well, once again, Trois Ponts holds. It’s just unnerving, no matter how much pressure I put, the garrison swallows its losses and keep its position, and my lightning fast Peiper unit does not use any of its speed!
Bastogne also holds, though this was expected. Their losses, however, are huge: 23 and then 27 out of 120 starting strength points (according to the manual)! It’s just a matter of time now.
The best news of this day, however, is that I have finally achieved what looks like a breakthrough with the destruction in the same phase of both the La Roche garrison and of a unit guarding a crossroad North-East of it!
And you doubted me! Nothing can stop me now! Nothing!
Hey, the weather cleared!

Hey, what’s that?
Allied units appearing on my flank? That’s not good, is it?
I will stop here for now, having played half the campaign. The game is slow to play, as there are a lot of units on the map. I focus on the key progression axis in the AAR, and it’s already too long for my taste, but a lot also happens on the edges of the map. Reloading has also intensified: it is easy to miss a division that should have been broken up, and by now the game also hits random units with “unsupplied” status, which it does not tell you if you don’t check every unit individually. Both of those events, which I usually realise mid-turn, often collapse carefully designed movements, and I did not have the discipline to accept it, making this AAR the most reload-intensive I have ever played. This aside, it has been for now a great experience (I would not have started the game 3 times otherwise), with a very strong AI and great decisions to take – I hope that however dry this AAR may have been, I could convey that correctly.
2 Comments
This looks like a game with some THINKING involved, which is a good thing. Moving and combining does seem to be very complex!
This sounds like the old SPI Bastogne game, which had similarly styled movement rules, requiring intricate coordination to pull off. Realistically but tedious.
However this is a great AAR so far! Can’t wait to read the rest!