
Back in October 2021, I had what was then my worst paleo-gaming experience as I tried to understand Napoleon’s Campaigns. Wargaming realistic games at the corps level is rarely easy to start with, but Napoleon’s Campaigns took it to another level: delayed information, delayed orders, independent commanders who were either passive or reckless, all of this explained in a confusing manual and conveyed through a UI so terrible the game shipped with a physical map and counters. Yet, what truly cemented Napoleon’s Campaigns as the most difficult game to review was a specific bug: there were no scout reports.
In December 2023, commenter LanHawk found another version of Napoleon’s Campaigns, which, lo and behold, did not have the bug when I tested it. I promised myself to give the game a fair try and then forget about it. More recently, I found someone interested in trading my box of Napoleon’s Campaigns (with map & counters) for manuals I am currently missing. Well, it’s time to give Napoléon one last rodeo…
… and then, unearthing various versions of Napoleon’s Campaigns and with the insight of three more years of emulating games, I discovered that the versions I had in 1981 worked perfectly. I just needed to emulate an Apple II+ and not the marginally more advanced Apple //e. Yes, I sent 3 different people on a search for a good version of Napoleon’s Campaigns that had been available everywhere for at least the last 10 years!
Let’s see what the game is worth when complete, as I take on the Battle of Leipzig – at maximum difficulty. This AAR was supposed to fully replace the first one, but it turns out the experience with and without scouting is not that different so the first AAR turns out to be still valid.
October 14th, 1813
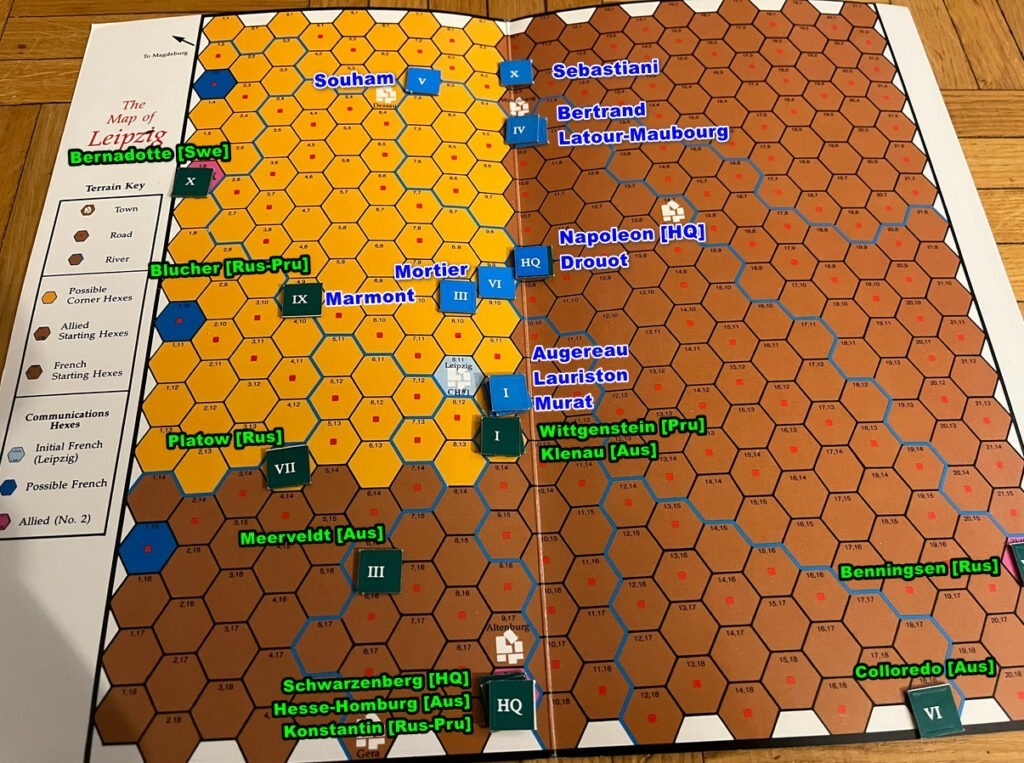
The briefing hasn’t changed since last time. After rebuilding the army he lost in Russia, Napoléon has made it difficult for the Allies to push him out of Germany. However, they have slowly ground him down, mostly by focusing their efforts wherever he is not personally commanding. In October 1813, Napoléon decided to take a stand at Leipzig, whose central location, with its vital roads and rivers, made it an unavoidable battleground. The Allies accepted the challenge, seeing the battle as an opportunity to surround and destroy the Imperial army once and for all. The objective for the French is simple: inflict as much damage as possible while keeping a line of communication westward open.
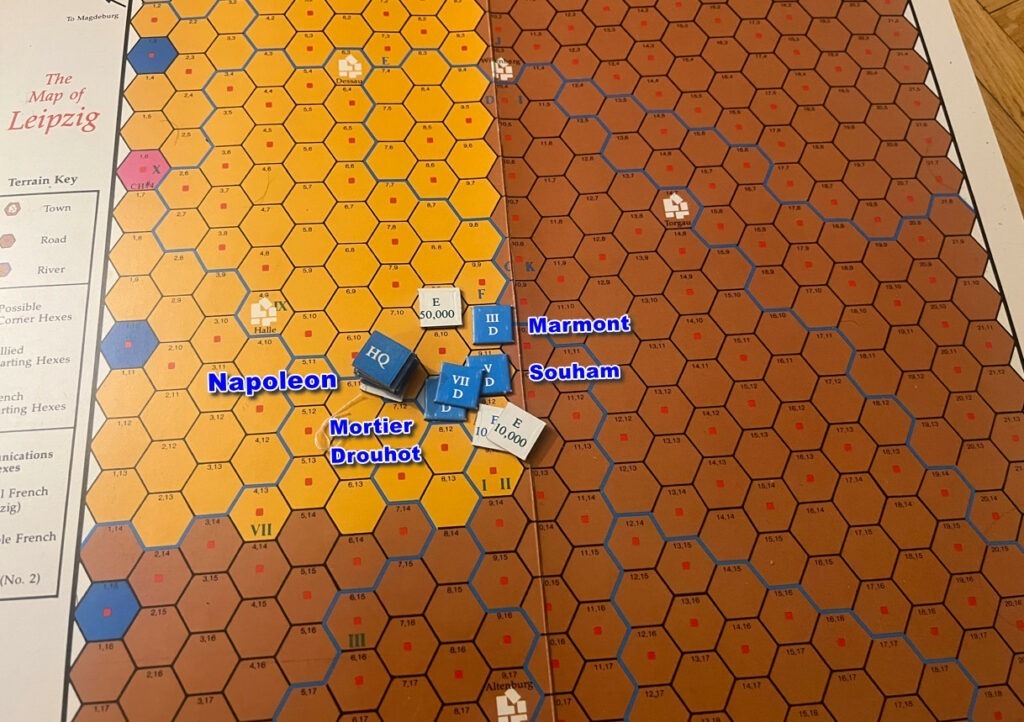
The game starts with the set up of the French supply lines – almost useless as by design the French corps are always considered in supply for the first 4 days of the battle and then can change them on the fifth day. After that, I set each of my corps’ “urgency” (how aggressively they will move and attack) and their stance if they encounter an enemy force.
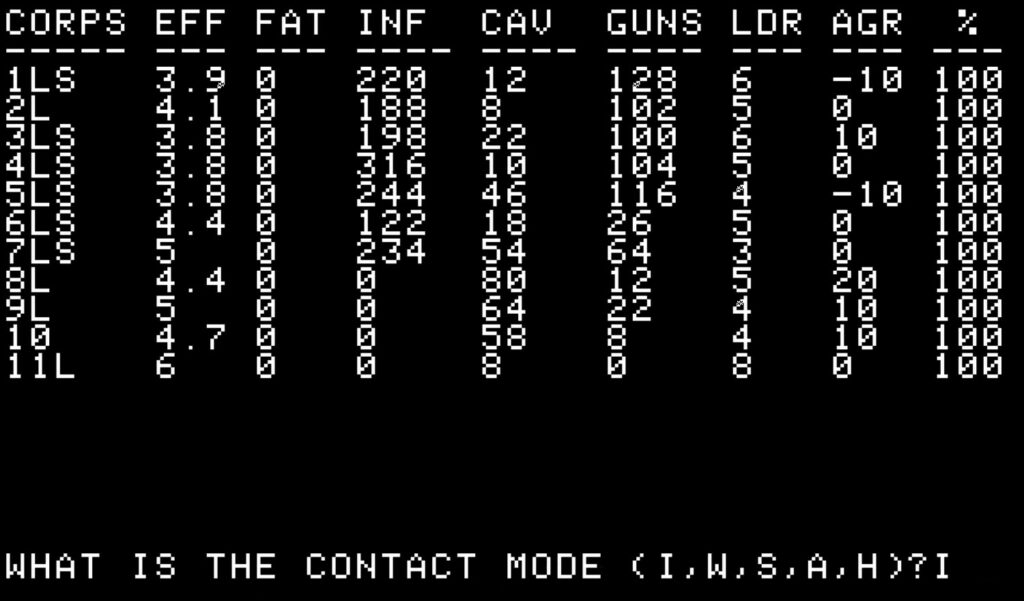
The Allies significantly outnumber the Empire, but their forces are scattered and their commander, Schwarzenberg, has half the leadership of Napoléon. This means any army under Napoléon’s direct command fights at double efficiency. My plan is therefore simple: regroup as many forces as I can and as fast as possible in Leipzig, and then defeat the enemy before they can consolidate. I am confident I can strike them before Bernadotte’s Swedes and Benningsen’s Russians join the fray, which should give me favourable odds once Napoléon’s superior skill comes into play.
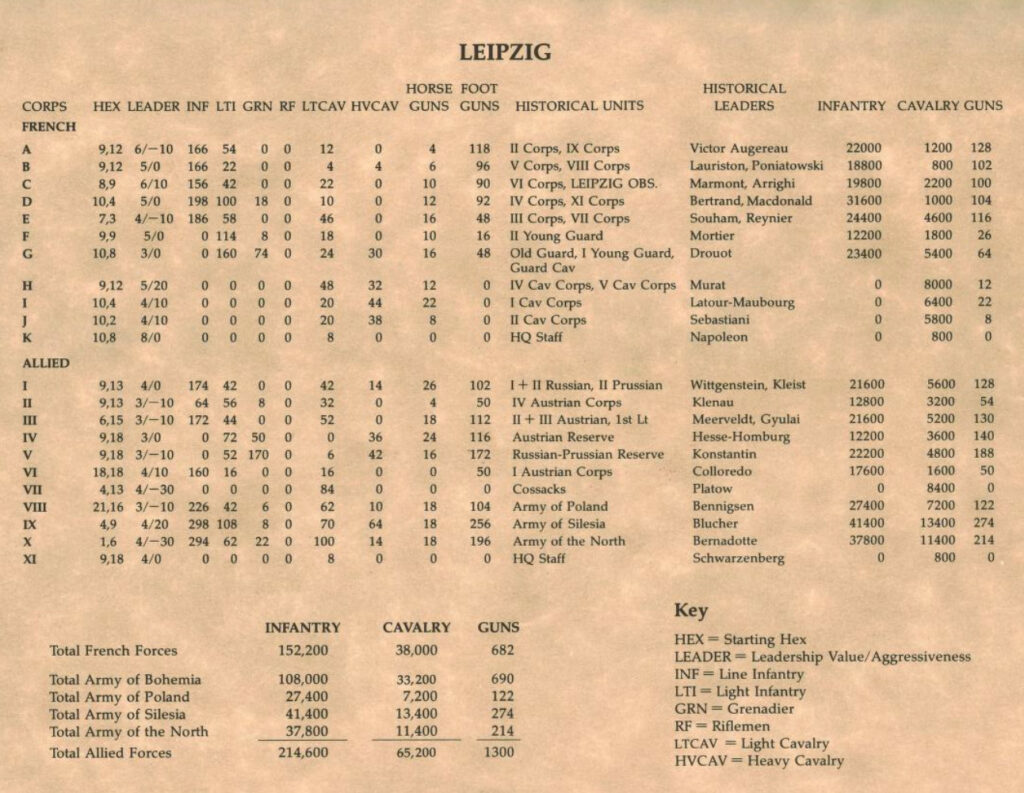
My initial orders, however, are cautious. In Napoleon’s Campaigns, orders to and reports from corps away from the Commander-in-Chief [C-i-C] are received with a delay, and then commanders try to execute them (if given high urgency) without taking into consideration whether the night or the rain. As force march during night or rain devastates fatigue, a commander will accept to see his corps be routed by sheer accumulation of fatigue, without ever seeing the enemy. I don’t want that, so for now, I tell my corps to move to a position only slightly South of where they currently stand. During the night, I will send more decisive orders that they should receive in the morning.
October 15th, 1813
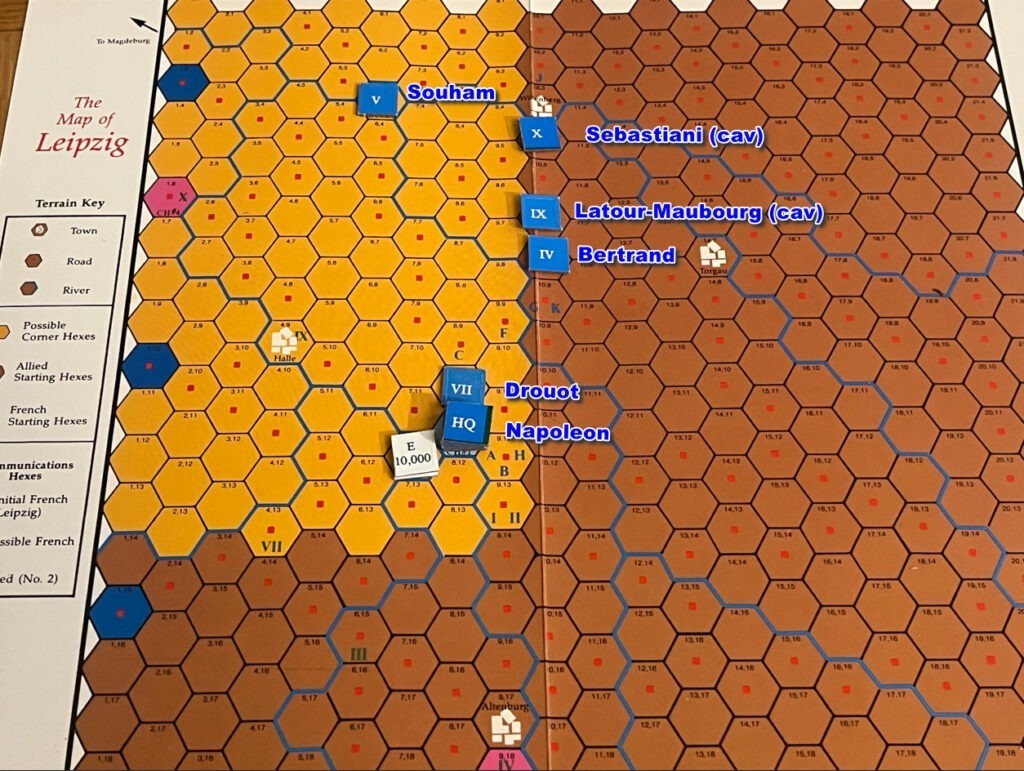
As the sun rises on the 15th of October, the first batch of infantry corps has reached Leipzig, with only Drouot still on the march. Bertrand, Latour-Maubourg and Sebastiani receive their orders over breakfast; Souham will get his at lunch due to a slight miscalculation – the messenger is still en route.
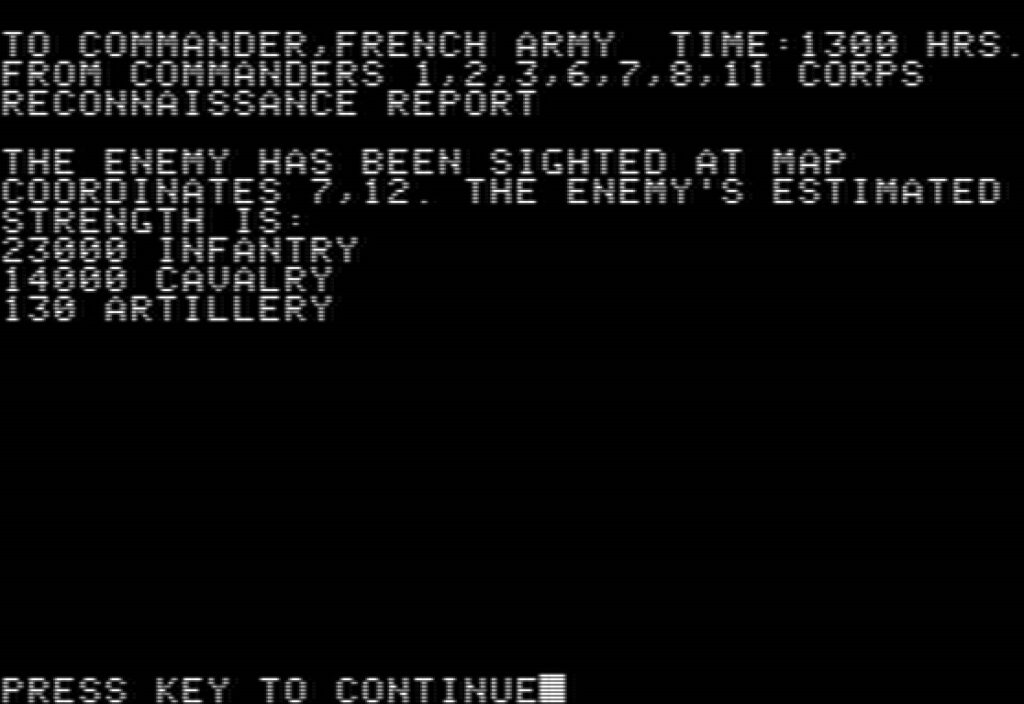
This is the long-awaited moment when I receive my first-ever scouting report in a Napoleon’s Campaign AAR. The enemy force appears small, and I could probably attack immediately, but since they are on the other side of a river, I prefer to wait for Drouot to arrive at 1 PM. When he does, the enemy force remains unchanged.
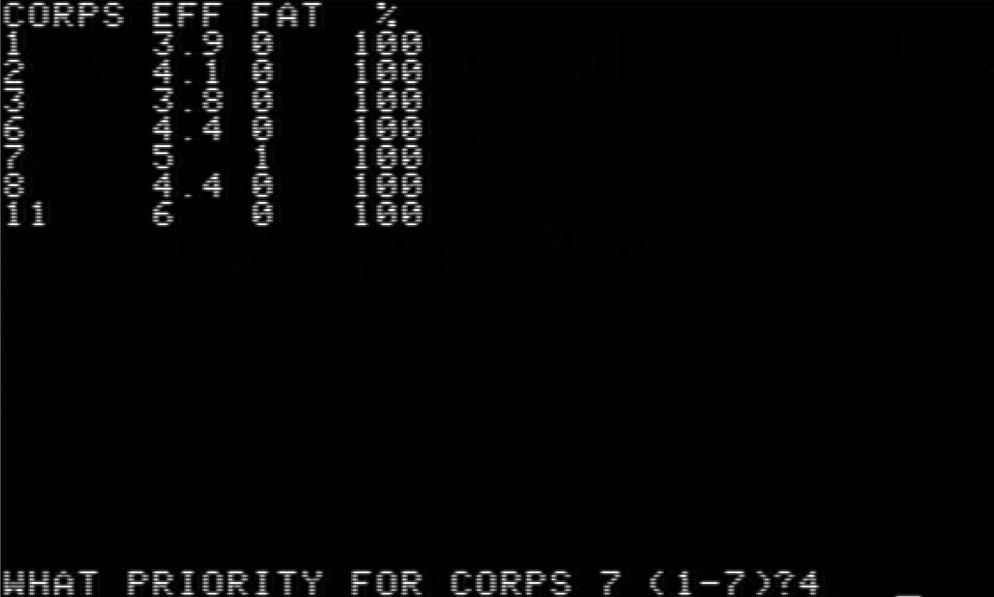
I order my army to deploy for battle [Attack stance, which unlike Hasty Attack stance takes 4 hours to prepare]. The assault begins at 5 PM.
The odds are good due to my number and leadership advantage, only mitigated – I think, the manual is unclear – by the river crossing.

Battles require assigning “priority” levels to corps which will determine in which order they will engage in the battle. In 2021, I didn’t fully understand how it worked, and after rereading the manual, well, I still don’t. I am unsure whether “1” is a high or low priority, so I give the corps I want to engage first middle priority and hope for the best.
The battle is a success – the enemy corps is mauled with almost no losses on my side.
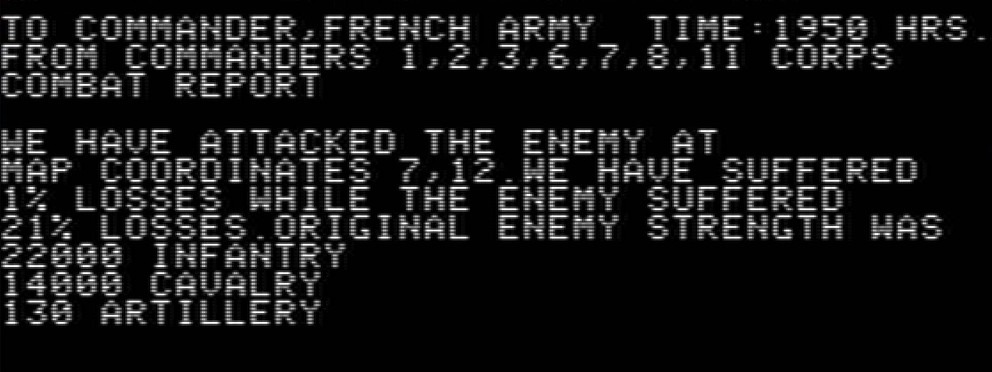
Before nightfall, however, I receive a disturbing report: Souham has encountered a larger force which can only be Bernadotte’s.
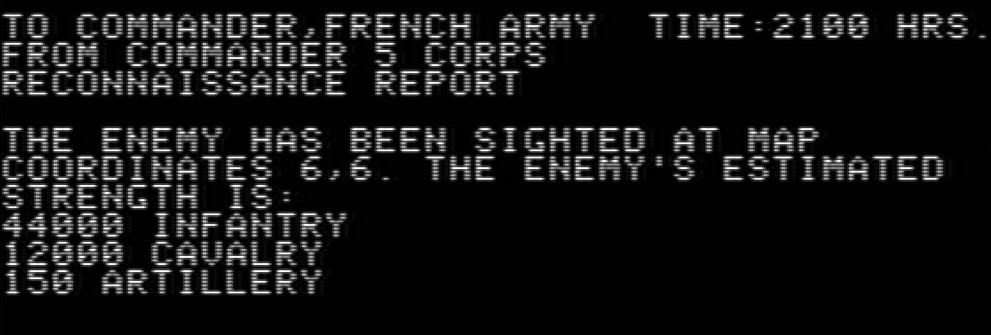

October 16th, 1813
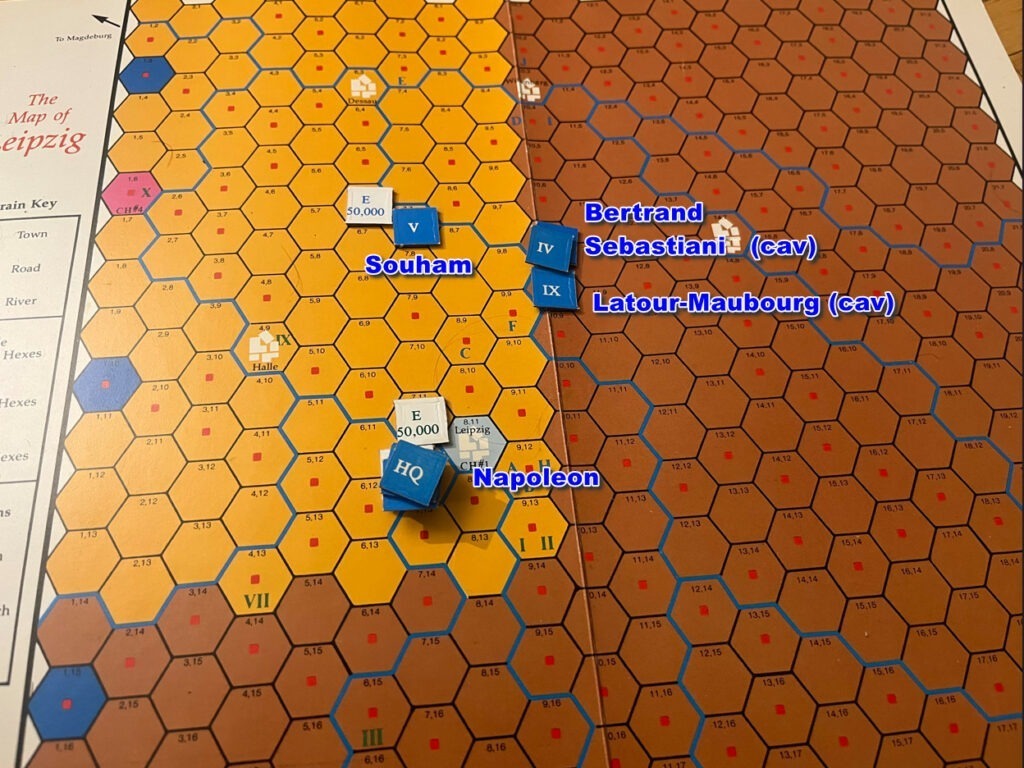
After yesterday’s victory, the 16th is a letdown. Another large Allied force is approaching Leipzig, and those slackers of Bertrand, Sebastiani, and Latour-Maubourg are still marching. I have no idea why they are moving so slowly.
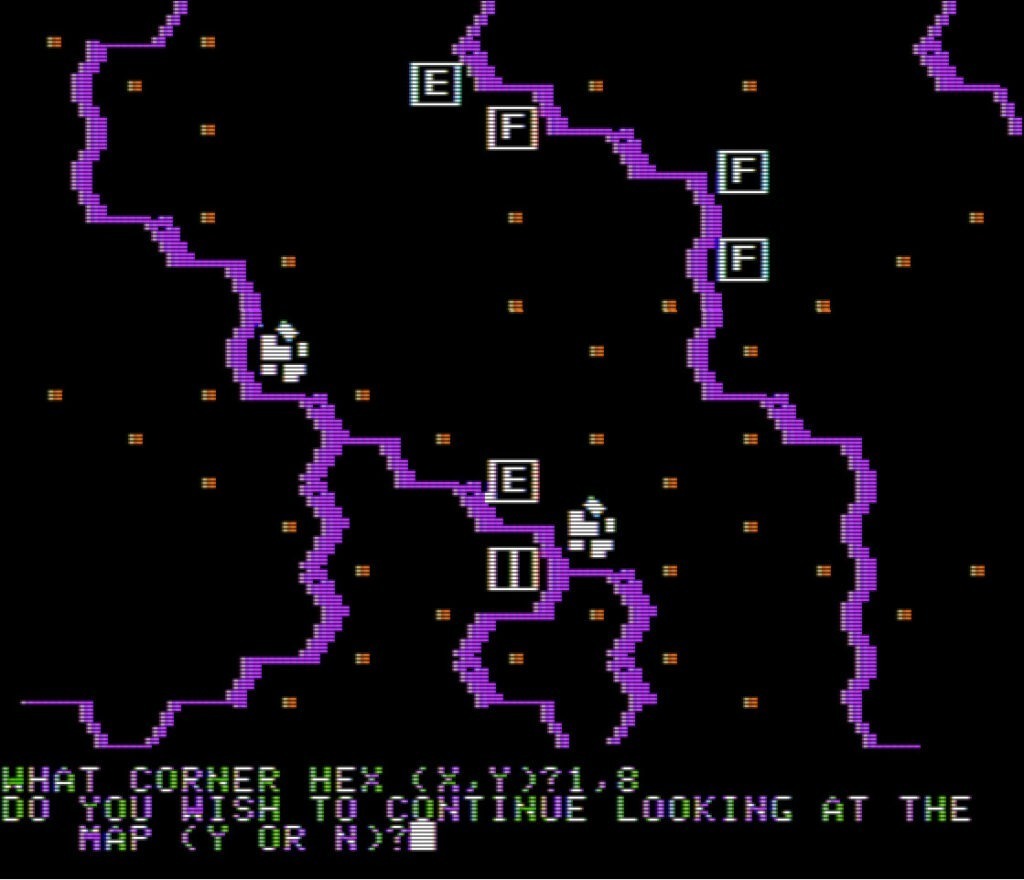
Due to rainy weather, little happens. The rain prevents any battle from happening and slows down Bertrand and alii‘s movement even further, while the Allied forces north of Napoléon continue to grow.
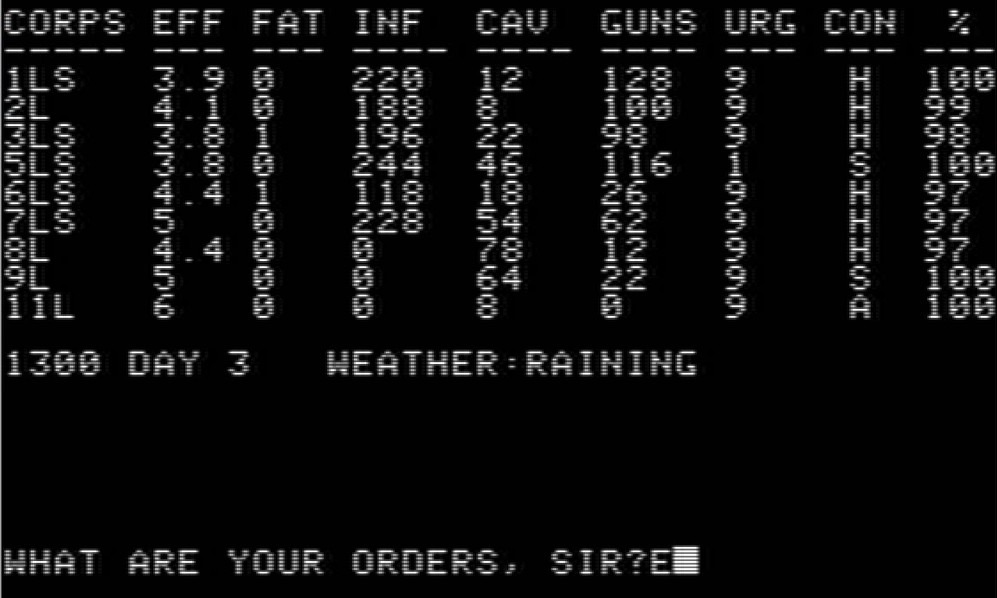
October 17th, 1813
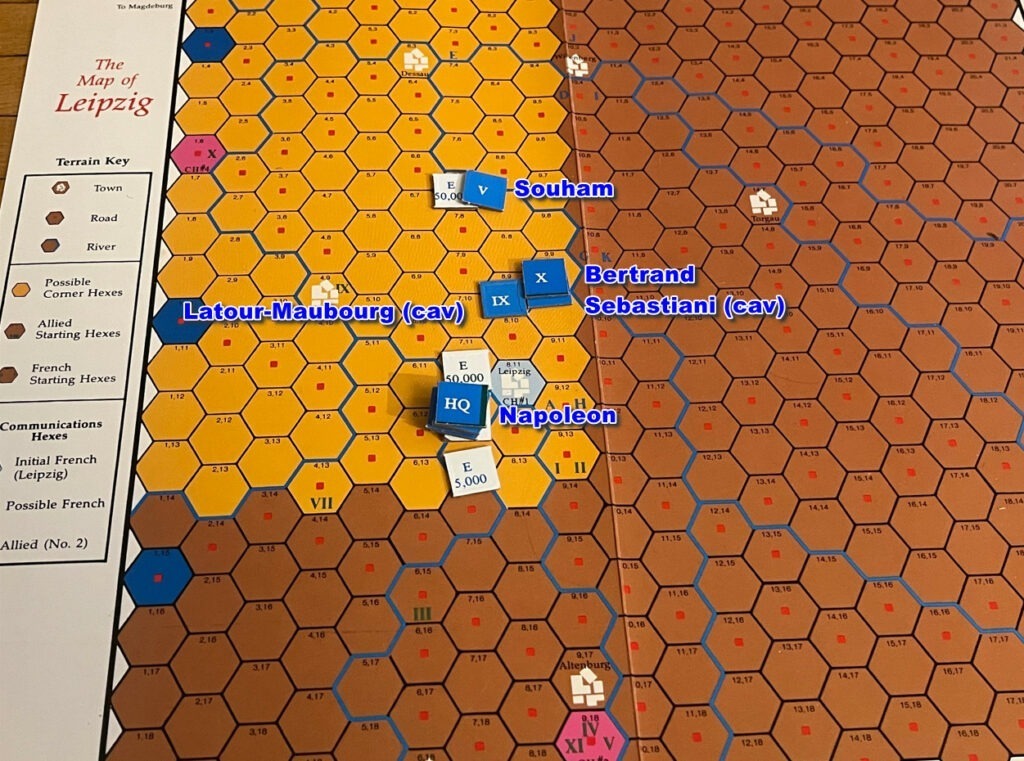
By the morning of the 17th, the situation has become worrying. Bernadotte is now occupying Souham’s hexagon and Napoléon is now surrounded by around 150 000 men, divided into two groups, with an additional 5 000 of Platow’s Cossacks in the south. So much for my plan of defeating the Allies in detail.
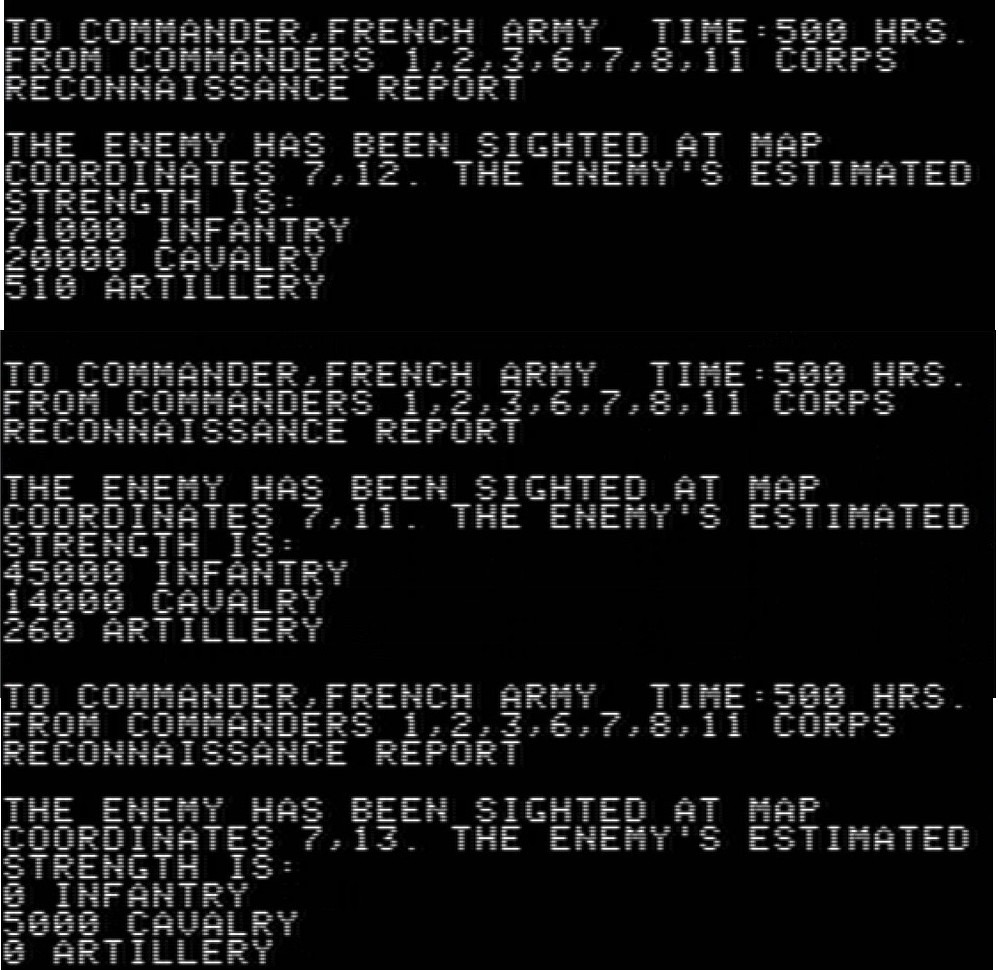
On my side, I have around 100 000 infantry and 15 000 cavalry. I still trust Napoléon’s superior leadership to bridge the gap in numbers. The battle begins at 9 AM, and my faith is rewarded: Napoléon’s forces inflict significantly more damage than they receive.
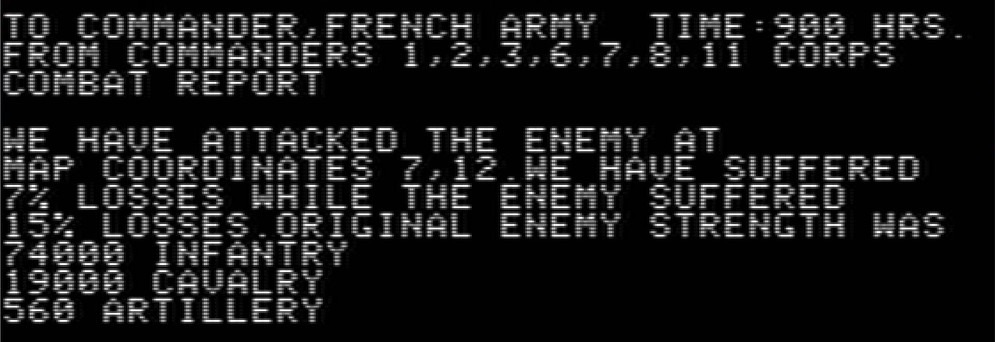
Souham is also attacked, but I gave him the order to fight as conservatively as possible. He receives some losses, inflicts a bit less, but nothing decisive.
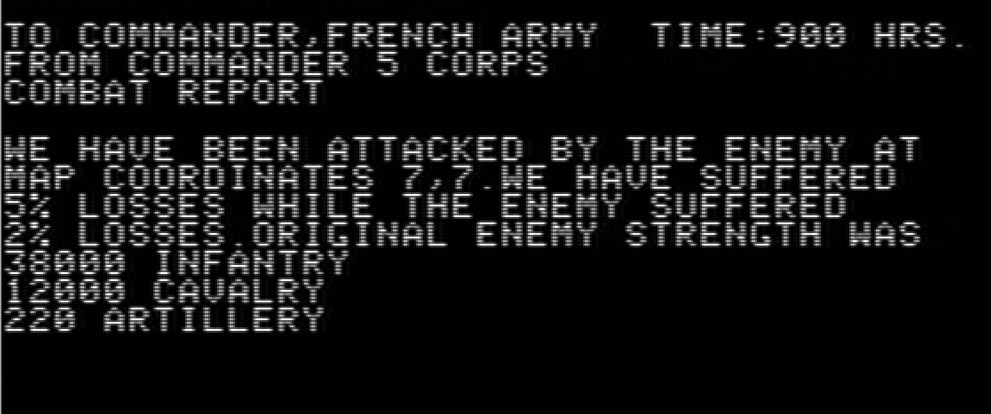
Both near Leipzig and at Souham’s location, the battle rages for a whole day, with relative losses staying more or less the same compared. By nightfall, my forces near Leipzig are exhausted but still standing, while the main Allied force is severely bloodied.
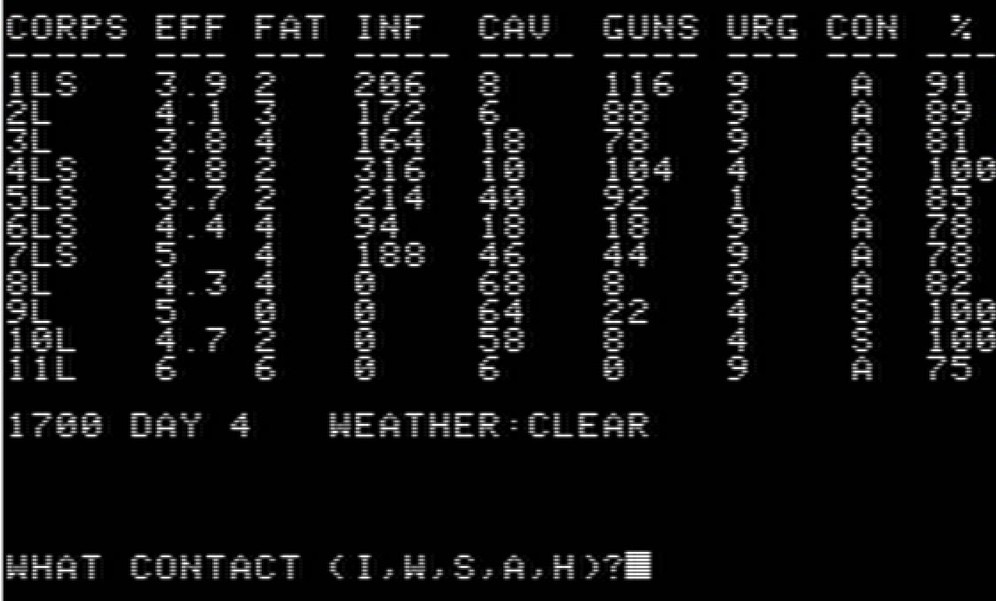
However, I become increasingly concerned about Souham’s position, and I order him to withdraw overnight.
October 18th, 1813
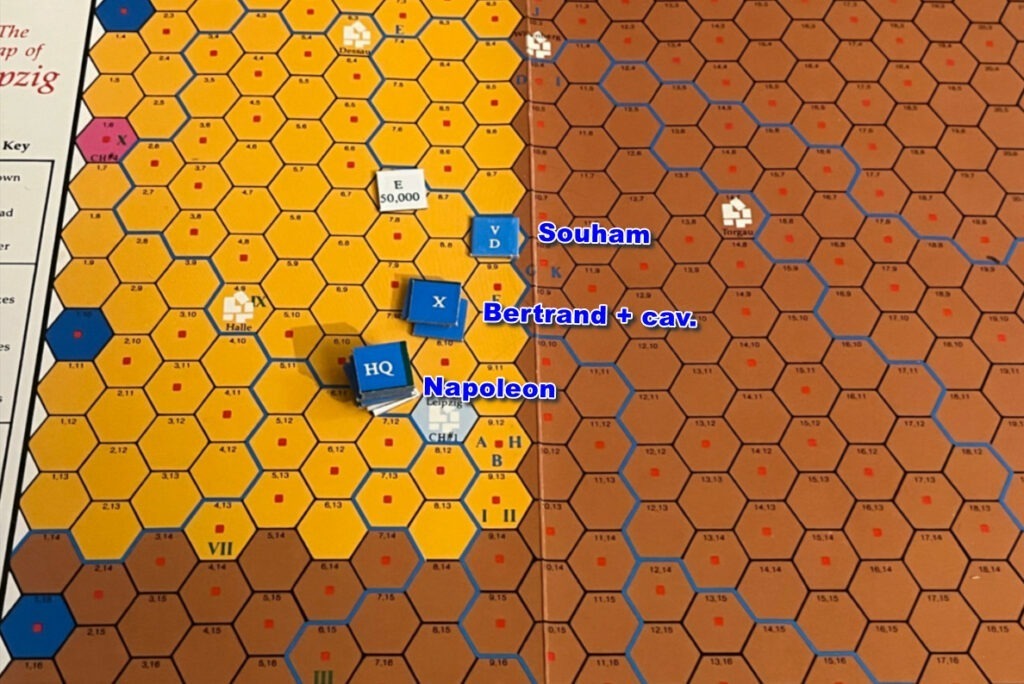
Remember what I just said – that thing about Souham’s withdrawing? Well, I forget a golden rule of Napoleon’s Campaign and its Civil War clone Road to Gettysburg: never withdraw at night. A withdrawal is a forced march, which as I said you should never do during a night. Souham’s corps takes so much fatigue that it is now “disorganized”. I will never recover.
Worse still: in the commotion, I forgot to set a new supply line between Leipzig and a western exit. My existing supply line runs north to Dessau, but with no connection westward, I will not accumulate victory points for keeping a supply route open.
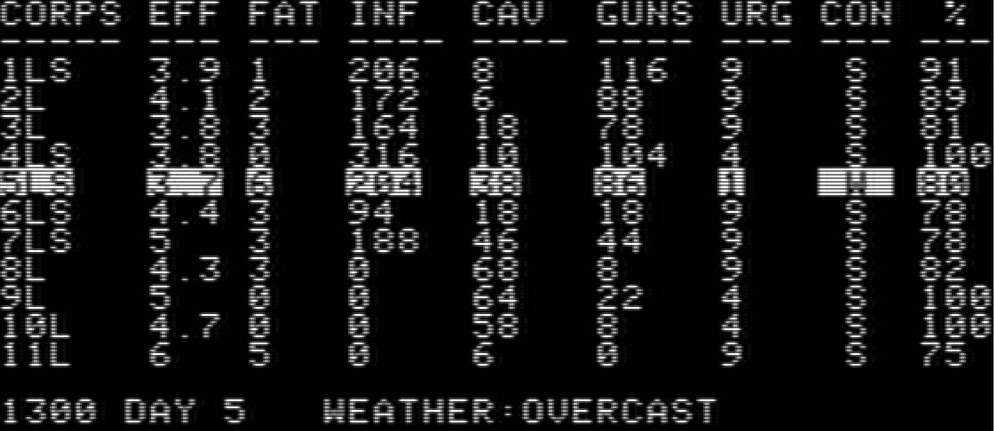
My attention is focused on Napoléon. He still has the advantage with his current forces, but I now have an opportunity to deal a decisive battle with Bertrand and the cavalry, as it finally arrived in the vicinity of Leipzig. I order them to join the melee from the North.
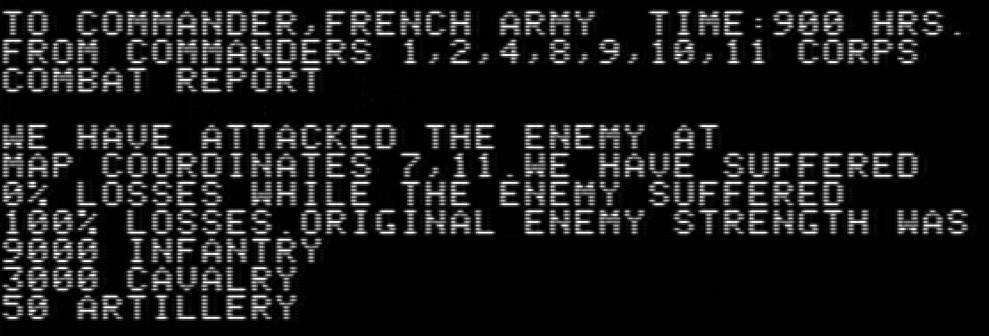
The first battle of the day, before their arrival, goes well:
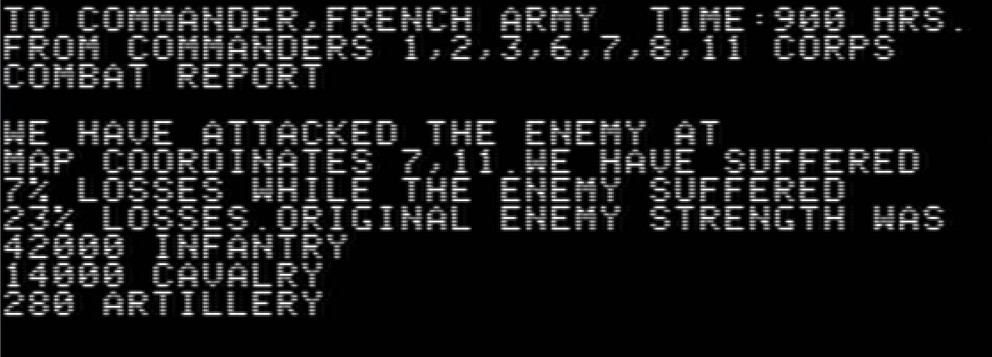
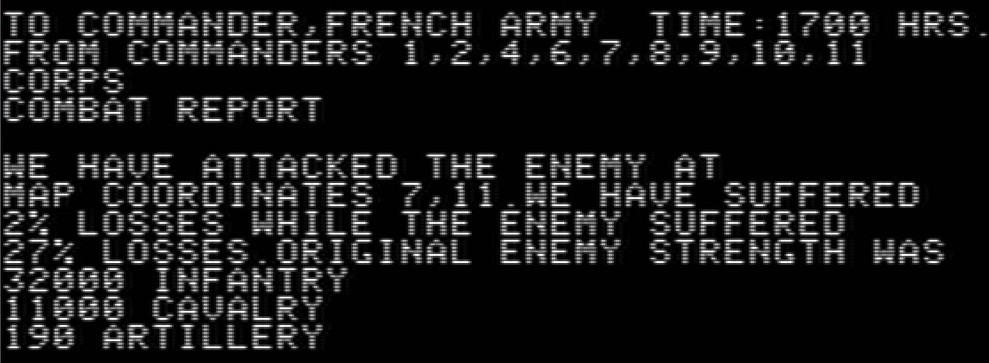
But when Bertrand arrives, the battle turns into an unidirectional slaughter:
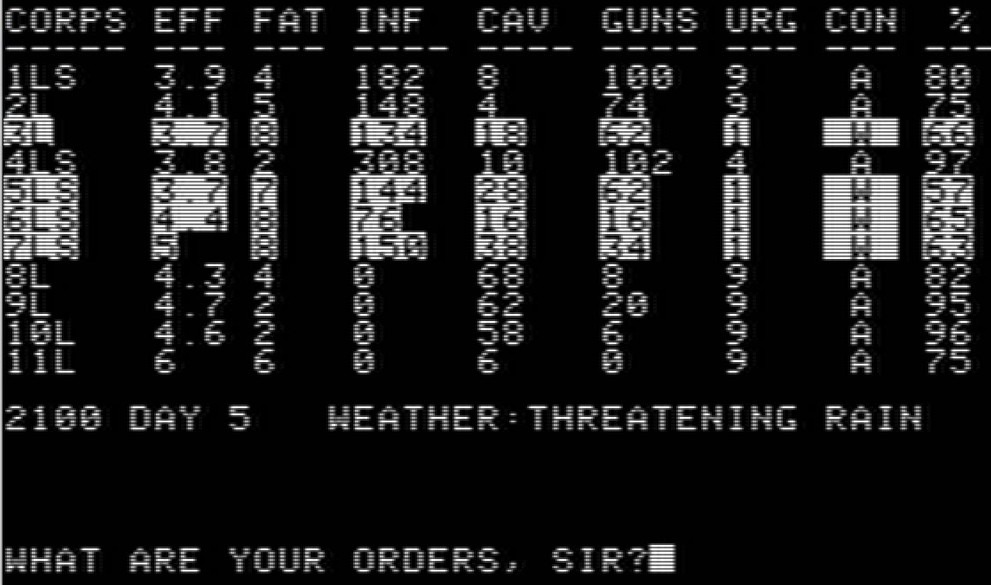
Alas, I have pushed my troops too hard, and by the end of the day, some of my corps are exhausted and forced to withdraw. This could have been avoidable if I had checked their fatigue level and remembered that the threshold for withdrawing is 6. I am sorry, but there are just too many rules to know in this game!
October 19th, 1813
Not much happens on the 19th. There is a short window of opportunity in the morning during which Napoléon finishes off what’s left of Blücher’s Corps, which is satisfying.
It rains for the rest of the day, preventing any further battle from happening before the end of the battle. Alas, my routed corps can’t use that time to recover. As long as they are fatigued, they have to keep their “withdraw” mode, and as long as they keep their “withdraw” mode they have to move away (in the rain at extra fatigue cost) whenever an enemy army is next to them, even if that army is itself in rout. Eventually, two of my corps dissolved altogether shortly before the battle ends at 5 PM.
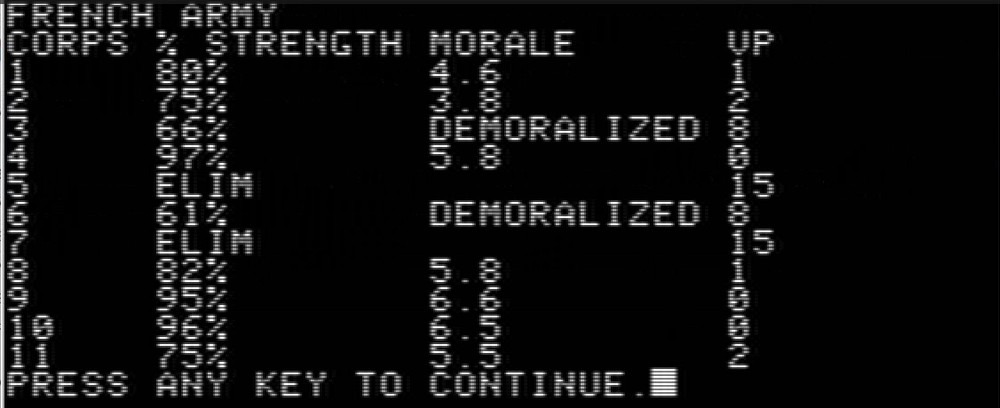
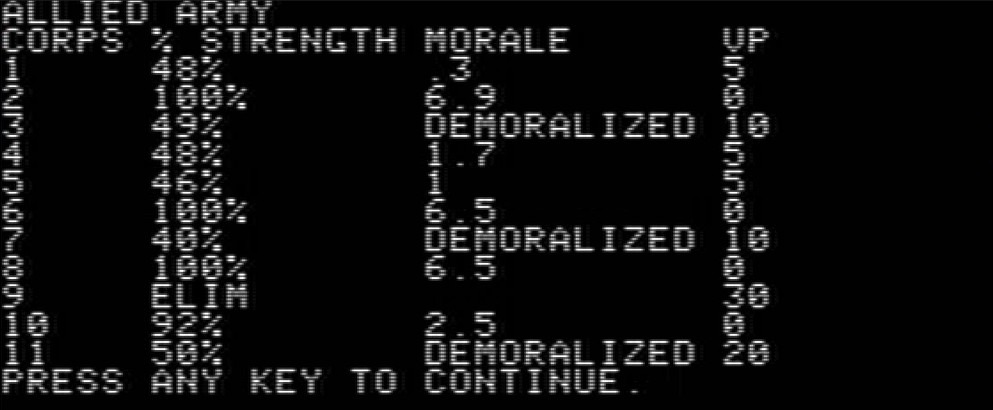
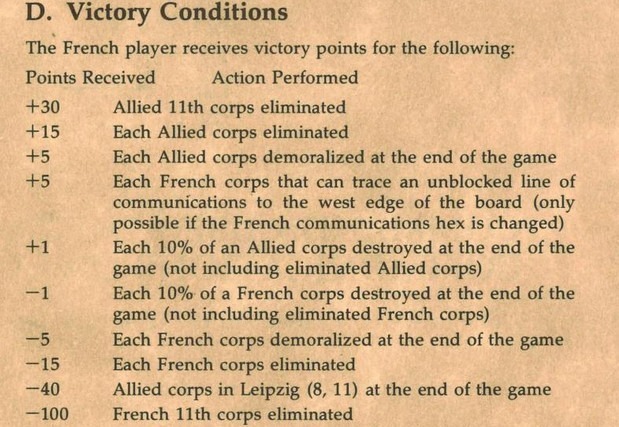
The final result is 52 VP for the Allied and 85 VP for me, so +32 points. The threshold to earn a substantive victory was 39 points.

I calculated the casualties in men based on the numbers given by the game:
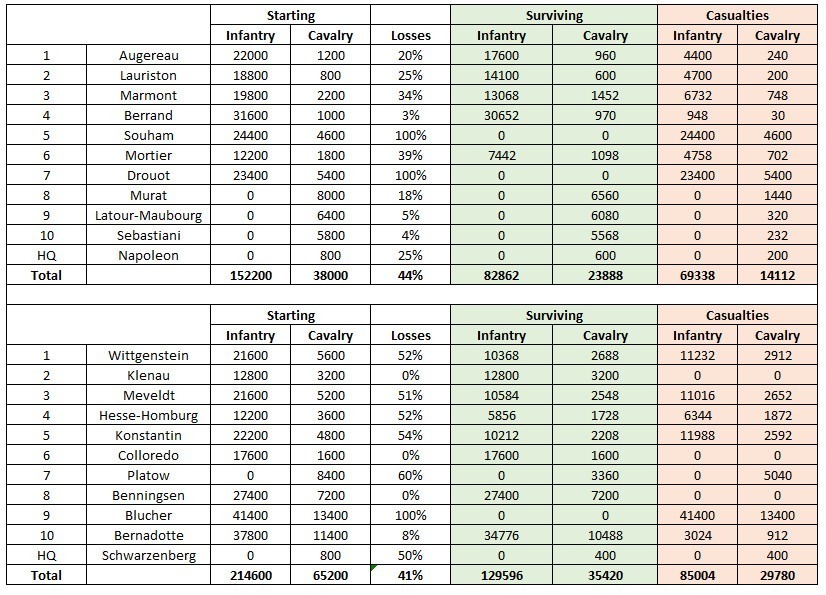
For the record, the historical battle of Leipzig had 60 000 casualties on each side, and I had a substantive victory with 15 000 French casualties and 100 000 Allied casualties in my last game.
I am fairly satisfied with the results, considering that I plunged back into this complex game three years later without any warm-up and played at maximum difficulty. While I made some strategic mistakes (I should have ordered Bertrand and his forces to march through the night, and I had no compelling reason to ask Souham to withdraw), most of my errors were related to the ruleset itself. For instance, I forgot about the impact of a night withdrawal, forgot about the critical fatigue threshold of 6, and neglected to update my supply line on day five. This likely cost me at least 35 victory points (seven corps would have established a line of communication) and possibly more due to how withdrawals are managed. However, I’m certainly not testing this game again; with three AARs, I think I’ve spent more time on this game than anyone else ever will again until the heat death of the universe.
Having scouting reports did not significantly change my experience with the game. Upon re-reading my rating and review from November 2021, I find that everything I said remains true. On the few points where I had previously given Napoleon’s Campaigns the benefit of the doubt, I can now confirm that it is indeed as bad as it seemed back then. Why didn’t scouting reports improve the experience? Because even with the addition of scouting, you remain incredibly short-sighted. The maximum range at which you can “see” the enemy is 2 (using “Patrol” mode under specific conditions) and more commonly 1 – too late to do anything in a game where everything takes time because it means the enemy is already within your zone of control. While the reports also allow you to gauge the strength of enemy armies upon contact, they rarely influence your decision. Typically, if your megastack can attack then it should, and if an isolated corps can attack then it still should probably not. There are a few situations where scouting is valuable, but the overall impact is minimal.
So, what’s my final word on Napoleon’s Campaigns? This is a game that is incredibly difficult to get into, with a UI that fails to convey essential information. But after you invest the hours required to understand it, you are finally rewarded with, well, a terrible game. For all its supposed subtleties, delayed orders, independent commanders, yada-yada-yada, the main objective boils down to destroying the enemy army. And the best way to do that? Megastacks. Even Joel Billings megastacked in his January 1982 AAR in Computer Gaming World.
I don’t want to be too hard on Napoleon’s Campaigns designer Paul Murray. It’s now tempting to compare it to games from 1984, but this is a 1981 game, a time when most wargame programmers were still on the Chesil Beach of game design. The prevailing belief in the industry was that computer wargames should be like board games, but automated and more realistic, and so we had complicated, realistic and dry experiences like Torpedo Fire, Computer Air Combat, and, of course, Napoleon’s Campaigns. It wasn’t until Chris Crawford’s Eastern Front 1941 (released in August 1981, just one month before Napoleon’s Campaigns) that the industry began to shed the fantasy that realist games are good games.
As we know, Murray took a second shot at the ruleset with The Road to Gettysburg. To his credit, he addressed several issues from Napoleon’s Campaigns in that game (stacking was removed, and the objective was to exit the map, not to win a giant brawl), making The Road to Gettysburg a much better game. It did not make it more commercially successful however, prompting Murray to refocus his efforts on the more popular space games of the time. His Imperium Galactum is coming soon to this blog.