[Avalon Hill, Atari 8-bits]
Why are we shooting at that specific location, colonel ?
Because that’s where the Germans spawn, Lieutenant Narwhal !
In 1983, Avalon Hill’s attempts to penetrate the computer wargame market had produced some of the best and some of the worst wargames of the industry. As we have seen, mostly the worst. Still, the quality was going up overall, with the release of the critically acclaimed Legionnaire in fall 1982 and Close Assault in January 1983. Avalon Hill’s vice-president Thomas Shaw, in a February 1983 interview to the Washington Post, testified that “[Avalon Hill] never had it so good“, with $8.1 million is sales in the 1981-1982 fiscal year, “much of that coming from the three-year-old line of 40 electronic games“, not all them wargames of course. Shaw could even spell out “the secret of good computer games” : single-player mode. “That’s the great appeal–the solitaire feature”.
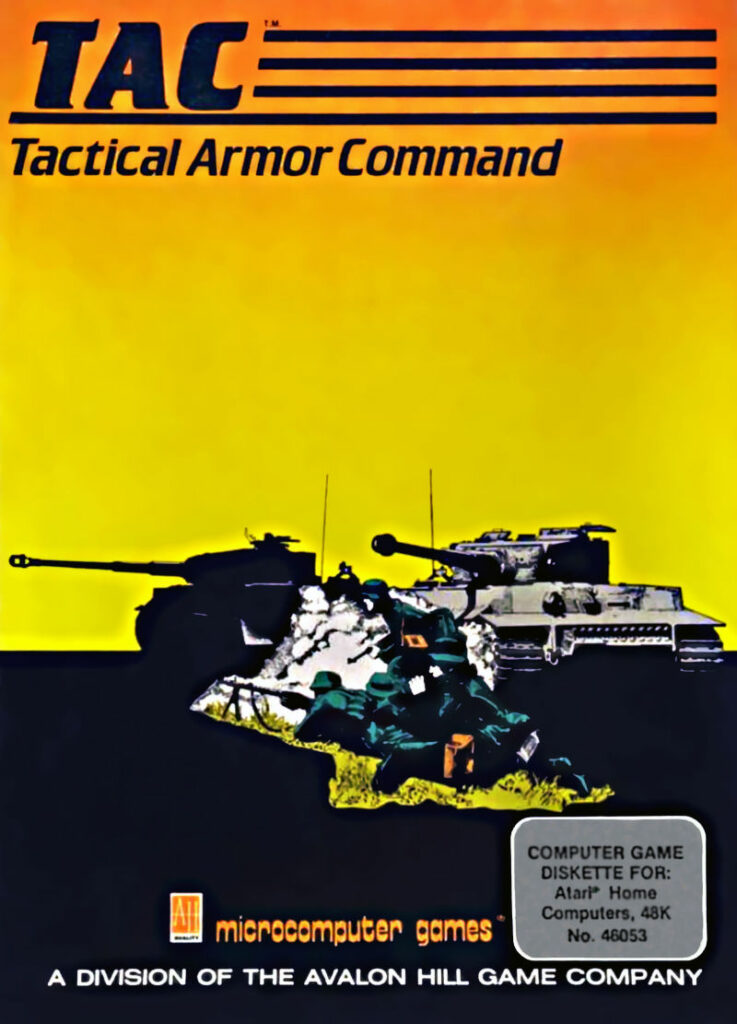
Having found the secret of good computer games, Avalon Hill then released two multiplayer-only wargames : Fredericksburg (a TRS-80 exclusive, currently lost) and Paris in Danger (an Atari-exclusive covering the 1814 campaign of France). Fortunately for single players everywhere, Avalon Hill also published in April 1983 Ralph Bosson’s Tactical Armor Command, or just TAC, probably the first computer mixed-arms tactical wargame.
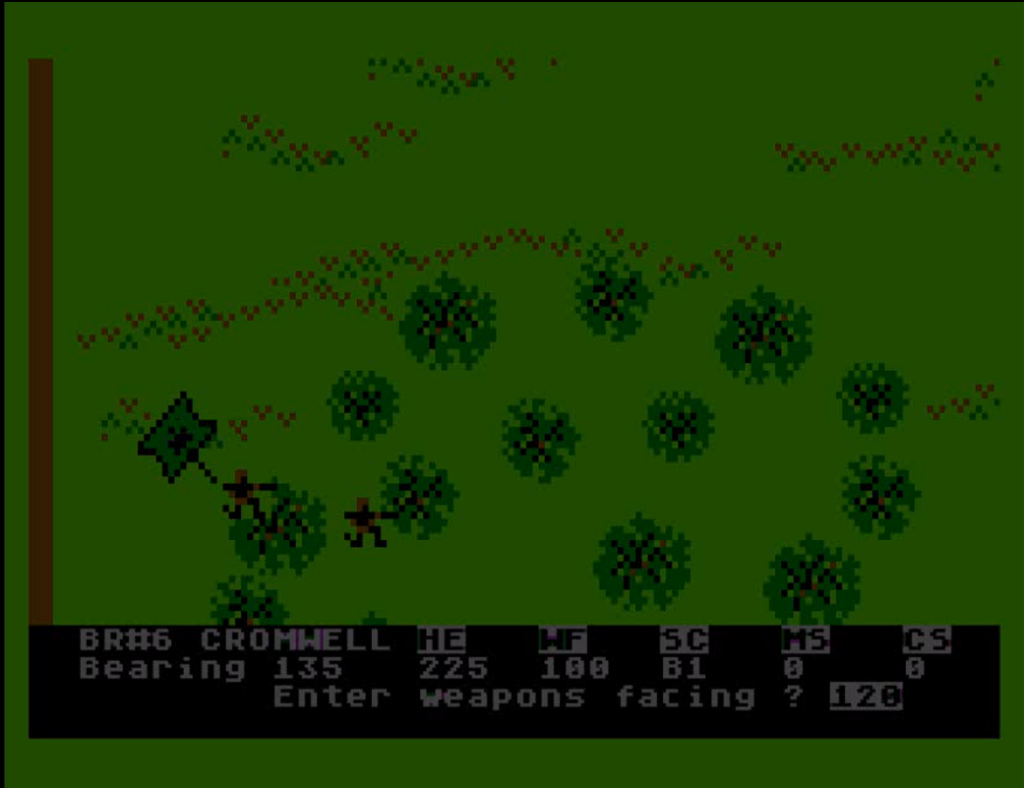
After choosing a scenario (“Meeting Engagement” in my case)TAC let you pick your faction. United Kingdom when available is almost always at the top of my WW2 pecking order, so UK it is. This means, obviously, that the Germans will be on the receiving end of my hopefully superior tactical mind. After that, it is time to select a force composition.
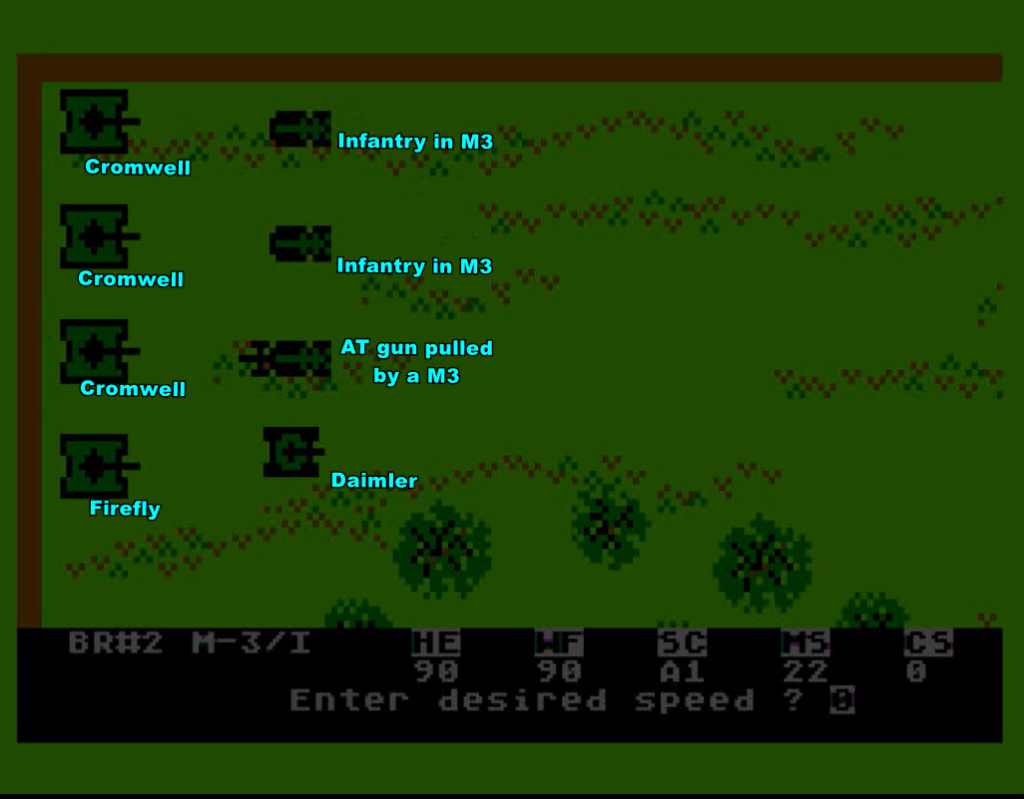
I select my force among a list of 8 units :
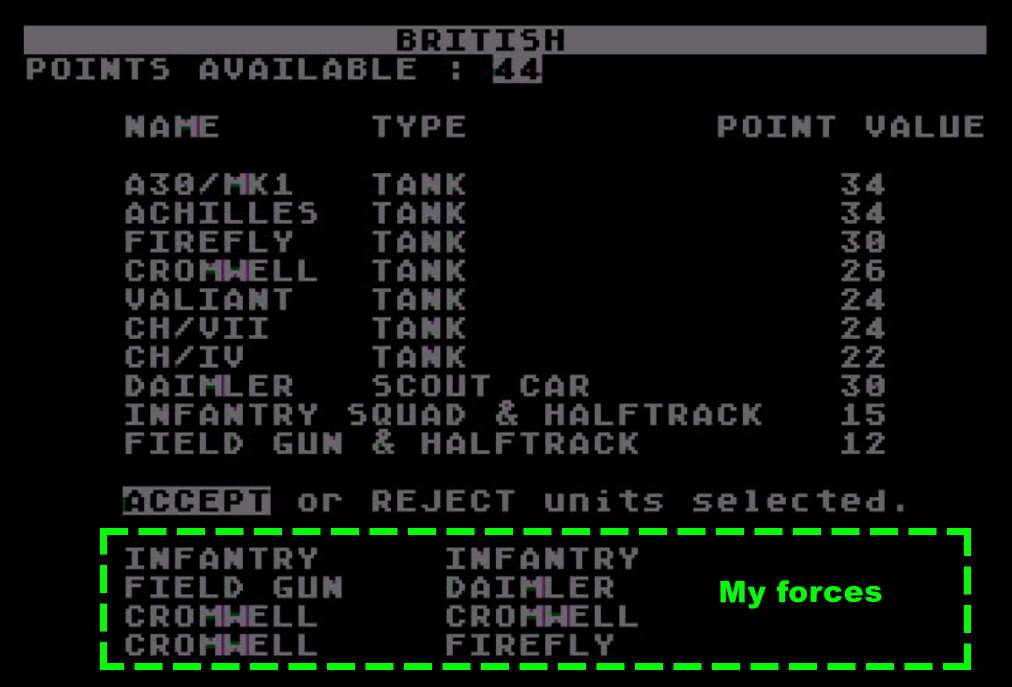
- Infantry, because I need to take these if I want to showcase the “mixed-arms” part of the game, plus they are sneaky and resilient,
- An anti-tank gun. Hidden in forests, they can be devastating,
- A Daimler recon vehicle, armoured cars are horribly overpriced in TAC so I am still trying to make them work,
- A basis of 3 Cromwell tanks. Not great, but at least their design is British,
- A [Sherman] Firefly, so I have at least one armoured vehicle with a good gun,
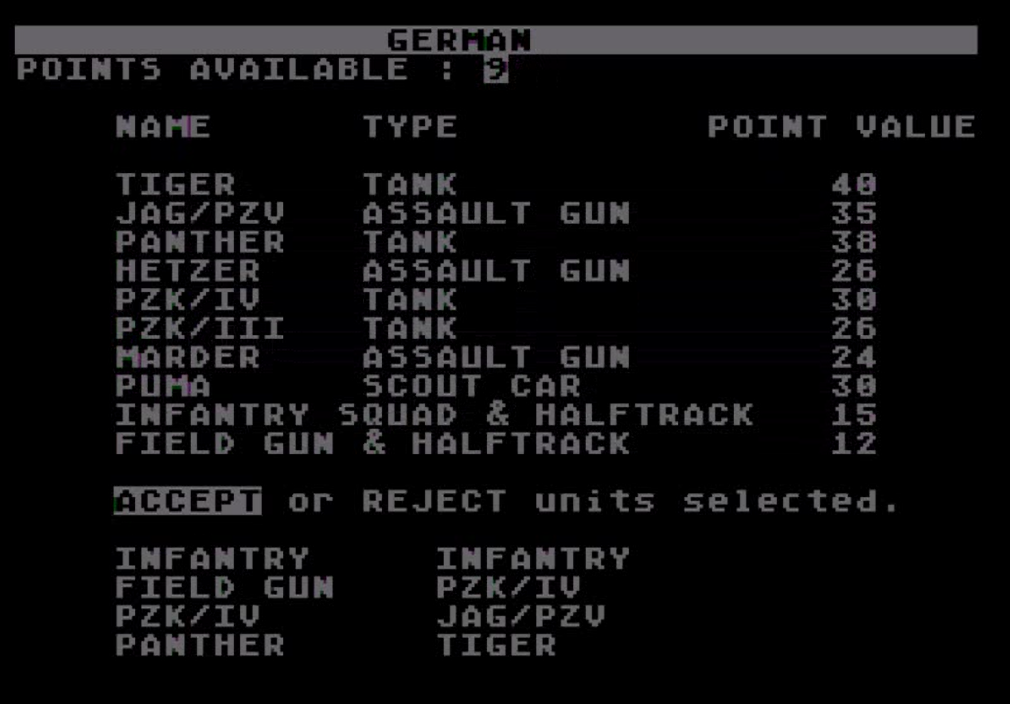
I am also supposed to create the German force, so I give them a Tiger tank because of course I do, and for the rest a mix of vehicles and infantry.
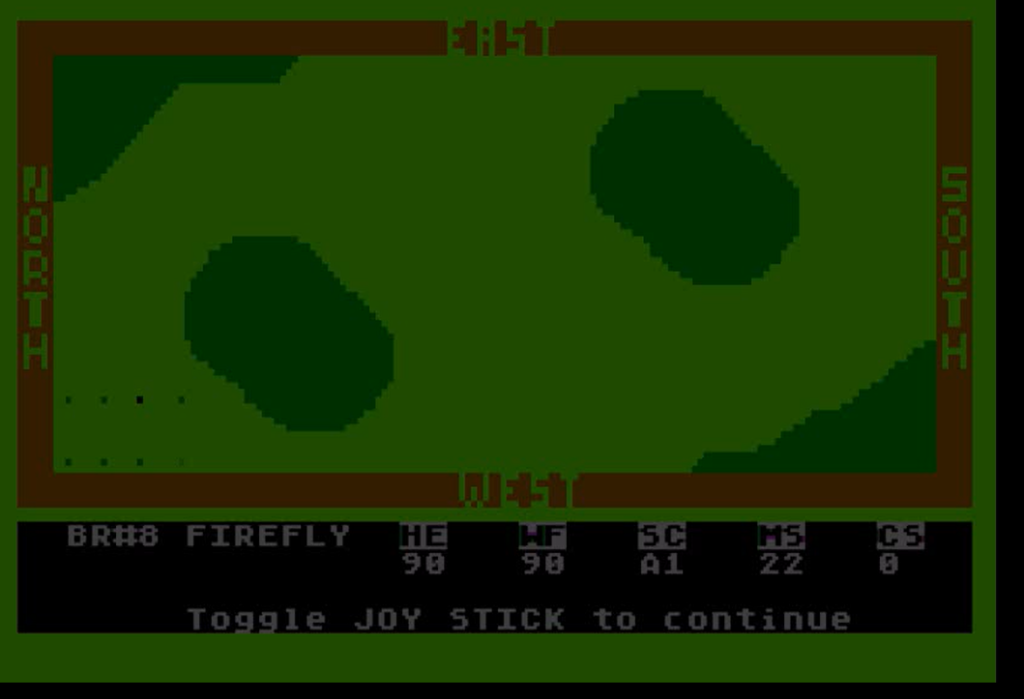
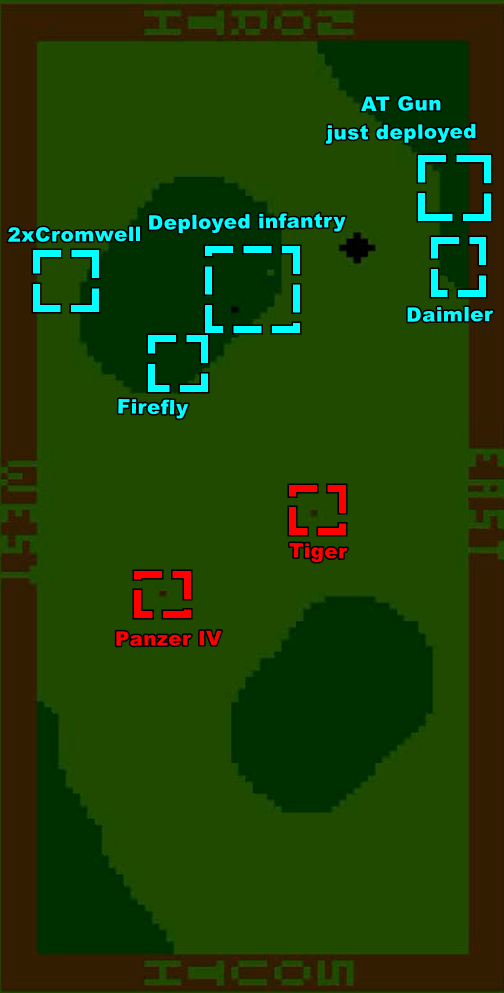
My troops are then automatically deployed in the top left-corner of a map, with one simple objective : wipe out the German force.
At this point, I must stop and immediately point out one of TAC’s many affordance flaws : the orientation of the tactical screen (as above) is not the same as the orientation of the strategic map. As a player I got used to it ; for the purpose of the AAR I will rotate the strategic map in my screenshots.
So my plan :
- My infantry will occupy the border of the central forest. They should be pretty invisible,
- My armoured car and my anti-tank gun will occupy the small patch of forest at the top of the map. From there, the anti-tank gun should be able to side-shoot whatever tries to cross the central open terrain,
- The Cromwells will hug the border of the map as a group, and put themselves in a position where they don’t risk being shot by anything hidden in the opposite forest,
- Finally, my Sherman Firefly will remain hidden in the forest, only revealing itself to shoot at the Tiger and the Jagdpanzer when I will detect them. I don’t want to trade my only vehicle with some punch for a mere Panzer IV,
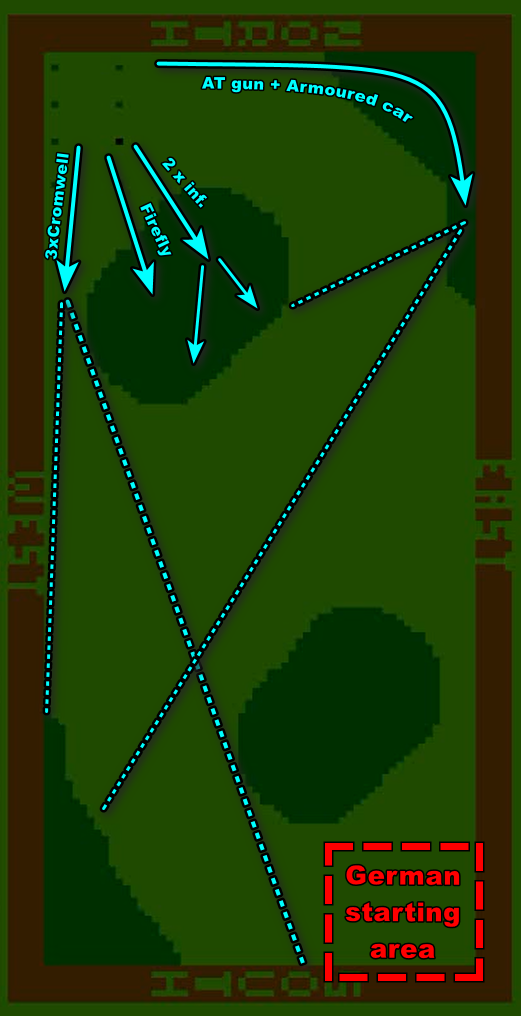
The reason I don’t hide everything in the forest, mind you, is that all vehicles in this game can shoot in “indirect mode” at targets they don’t see. The AI uses and abuses this feature from the very first turn, shooting randomly in my spawning area, so I need to remain spread out.
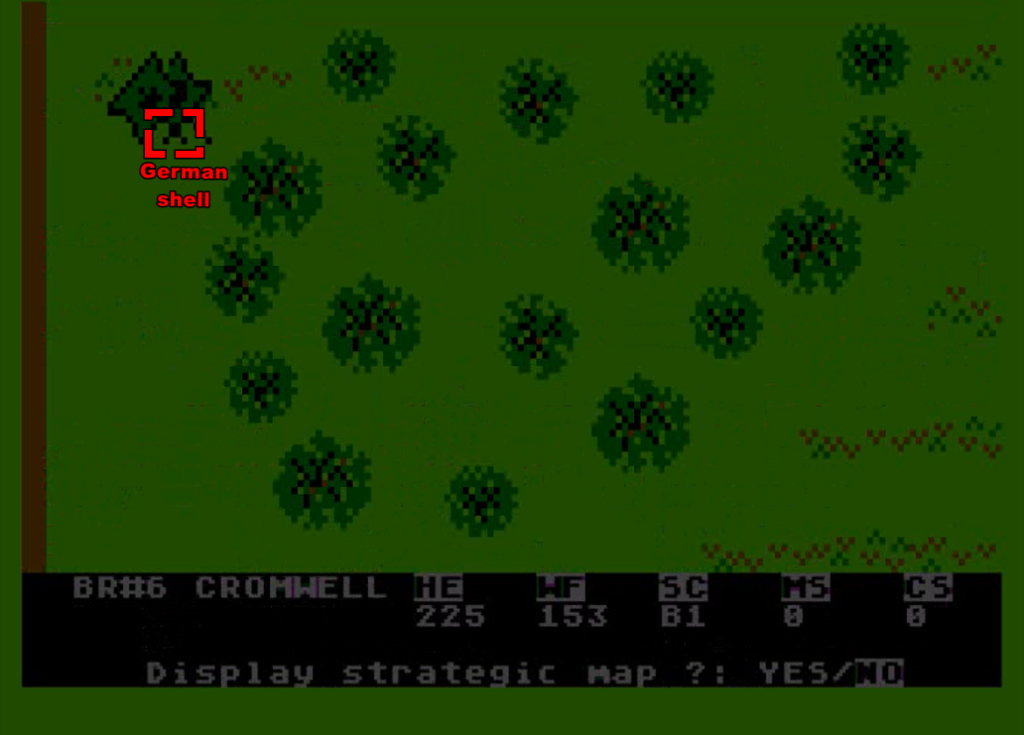
Well, if the AI is exploiting, so should I – I immediately start shooting towards the enemy’s spawning area :
I have no idea of the result of course.
For all sorts of UI issues I will get into in the review, my initial deployment is chaotic. Two of my half-tracks collide without damage. Worse, two of my Cromwell tanks are so close to each other that one lucky German shell lobbed in my general direction destroys both of their tracks. They are repurposed as static artillery until the end of the battle !
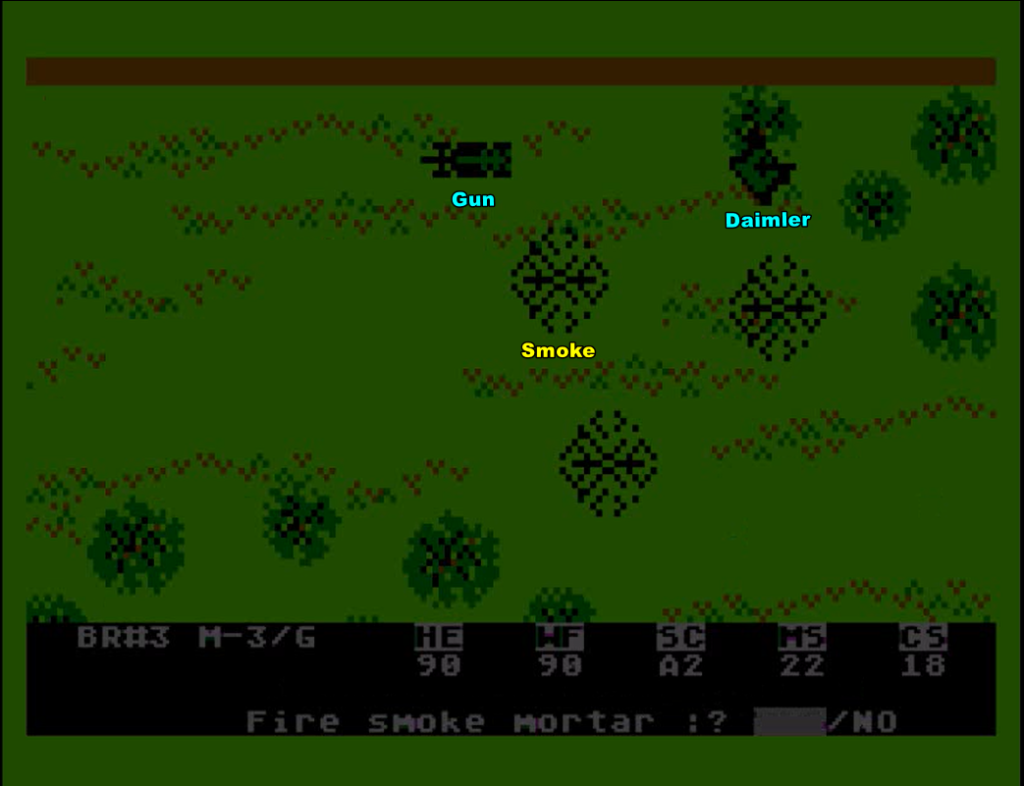
The rest of my team slowly reaches its planned position, often after deploying copious amount of smoke :
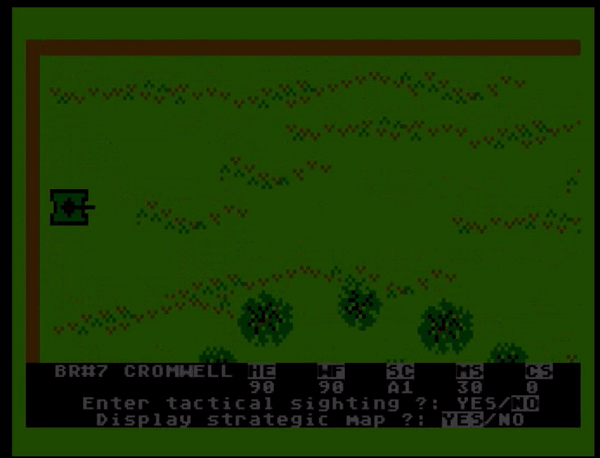
Soon, my last mobile Cromwell detects the first enemy – a Panzer IV. It is pretty far away, it is moving, my tank is moving as well, so I “track” the Panzer (not shooting to increase my chance to hit it in the future) and my tank moves to the edge of the forest.
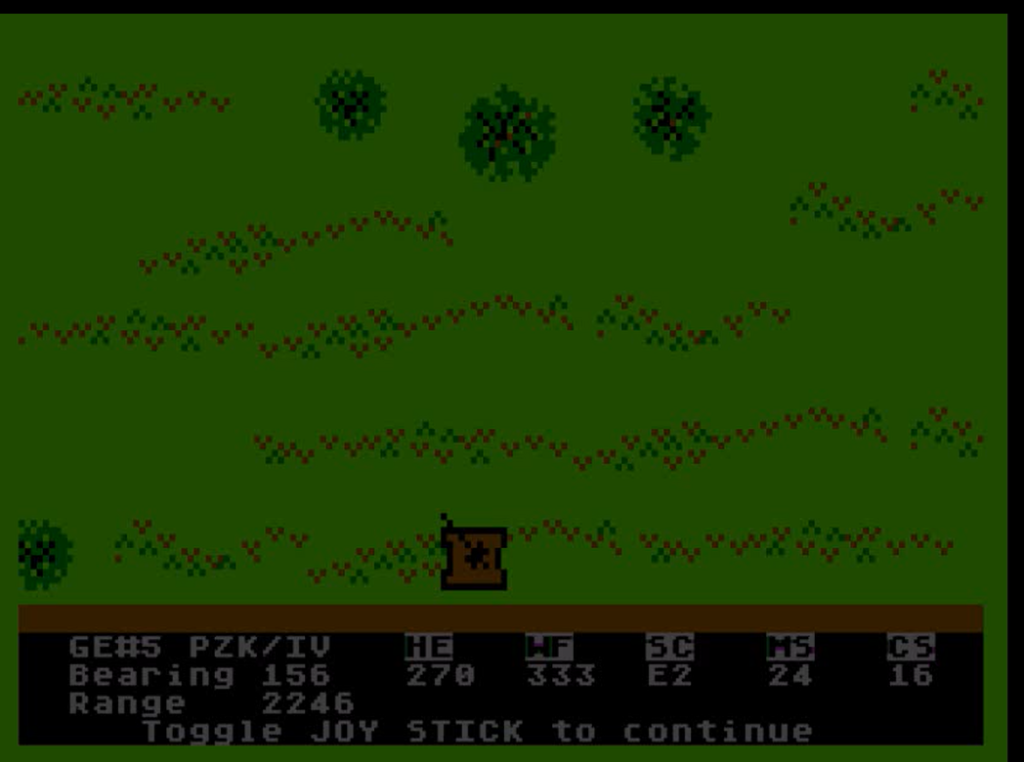
After one more turn where the Panzer IV is still moving straight ahead, my Cromwell shoots :

Well, I got the Panzer IV, but it looks like there was a hitherto undetected Panzer IV which had spotted my own Cromwell. That’s one tank lost for each side.
My infantrymen finally jump out of their half-track the following turn. Along with the Daimler, I have full coverage of the central area. The Germans try to cross with more tanks : one Tiger and one Panzer IV.
The infantry is almost invisible as long as it stands still in the forest, but its short range bazooka can’t do much. On the other hand, my Daimler, my AT Gun and my Firefly are tracking the two targets, ready to shoot with pinpoint accur…
Well, my Sherman Firefly is gone. All that tracking for nothing. Now, I have one gun with a chance to penetrate the armor of the Tiger.
As the enemy force approaches my patch of forest (under indirect fire from my immobile Cromwell tanks), I grow worried that my Daimler armored car will get spotted. It has been tracking the Panzer IV for several turns, and the latter is showing its weak side, so it is now or never !
I shoot. It is a hit ! The Panzer IV is destroyed. The following turn, the Tiger shoots at the now detected armored car, anniliating it.
The Tiger then resumes moving toward my line, now with German infantry some distance behind it. My new, updated plan is to wait until the massive tank is in range of my bazookas and go all out, including with my anti-tank gun on the side. Meanwhile, my Cromwell “artillery” tries to hit the enemy infantry, but the latter zigzags and is hard to hit. The German artillery is more lucky. Firing randomly in the forest, it hits very close to one of my infantry units, destroying the M3 half-track (and its supporting machine-gun) and suppressing the men.
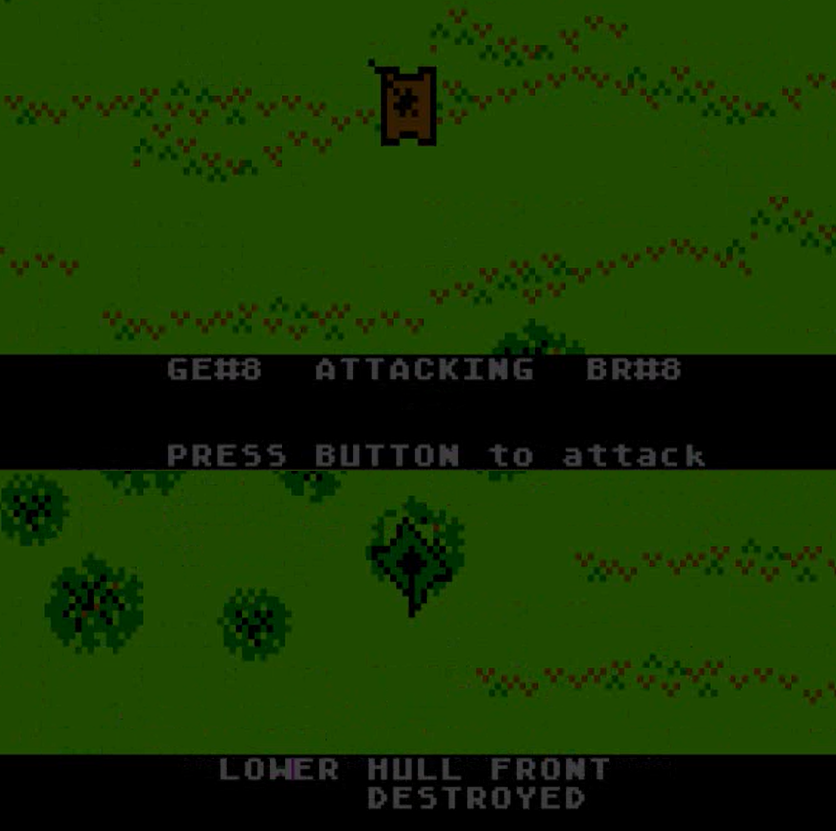
Finally, the Tiger is in range :

The frontal armor of the tiger bounced the bazooka, but the anti-tank gun managed a perfect side-shot !
I immediately relocate, it takes one turn to load the gun on the truck, two turns to drive away and one turn to redeploy. Meanwhile, the enemy infantry approaches. I shoot at it quite ineffectively with my own infantry. The enemy feldgraus are even less accurate. What really devastates my force is the enemy indirect fire : I make the mistake of not moving my men, and over time the shells destroy one of my units and cripple the other.
When the German infantry approaches the edge of the forest and is about to engage my men at close range, I desperately try to save the situation by shooting again with my gun :
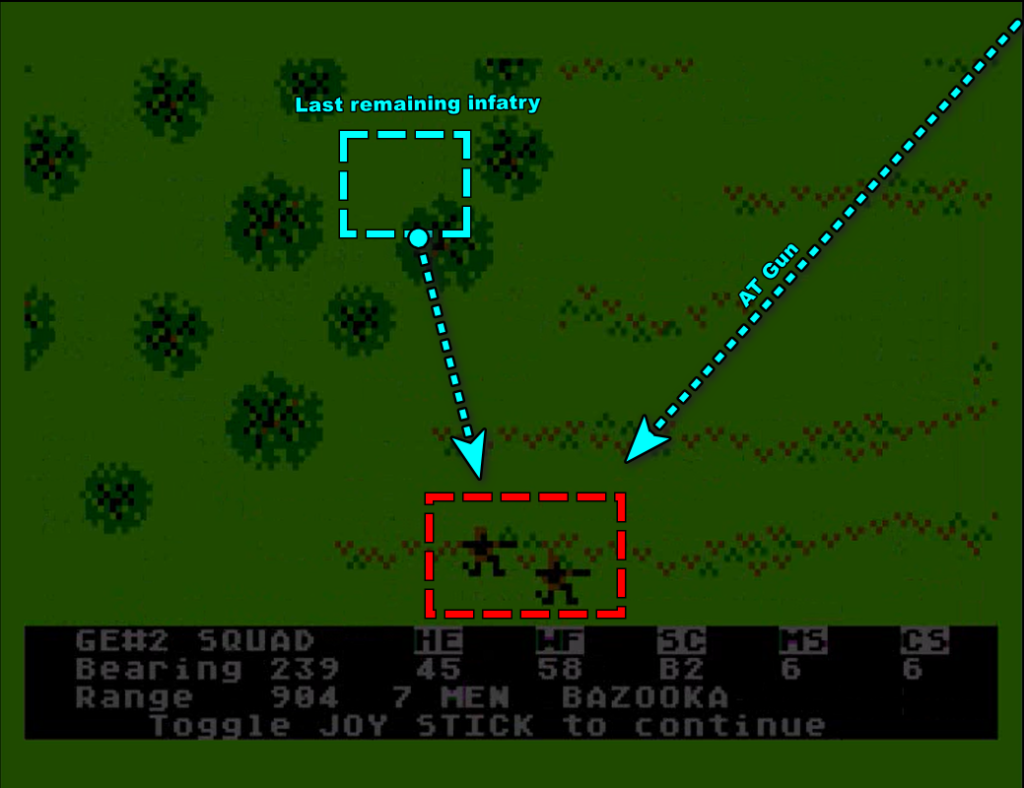
All I achieve is to make my AT gun visible again. This time, the Germans don’t leave me enough time to relocate !
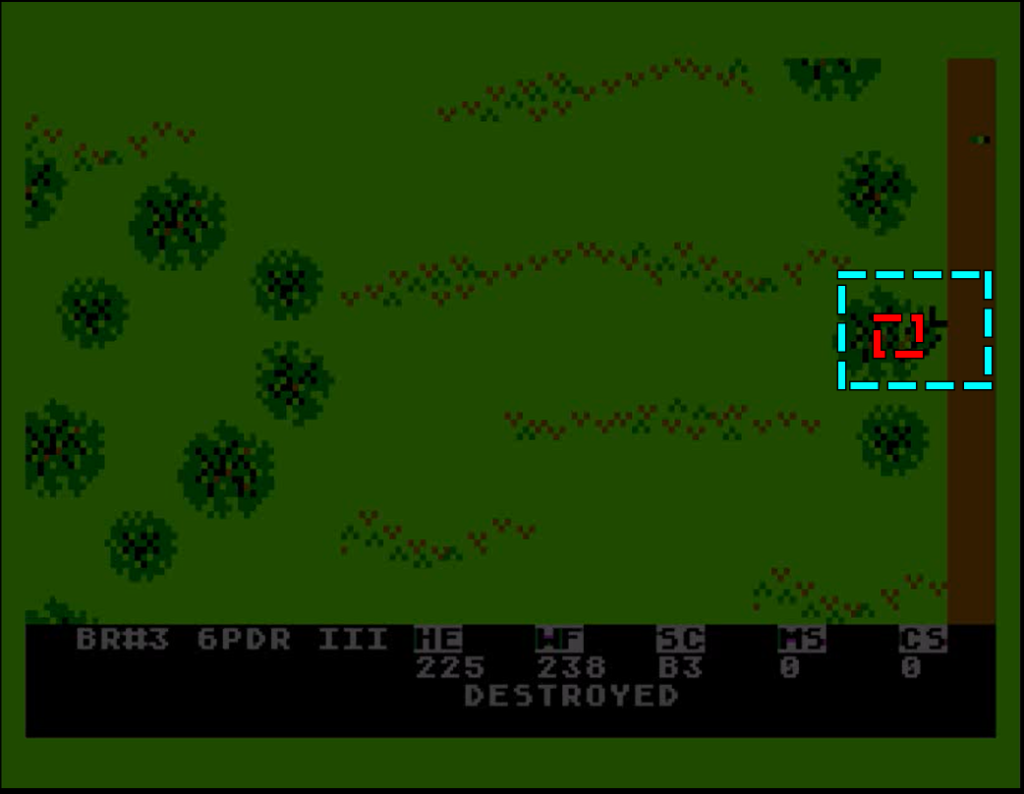
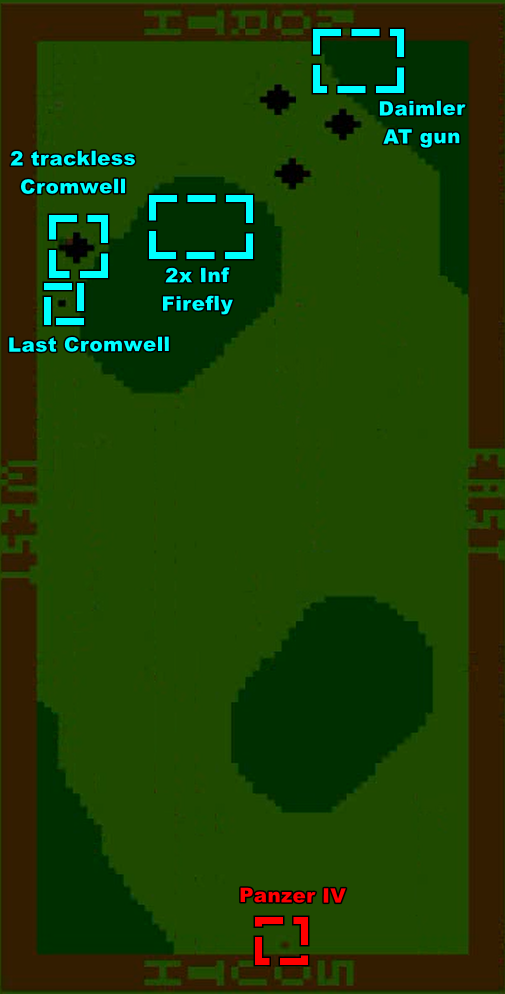
All that’s left for the Germans to do is to mop-up the last soldiers remaining in my last infantry squad, and then to look for my Cromwell tanks. They don’t have to look for long :
The Germans have lost their panzershrecks in the earlier infantry combat, but they can send a memo to their artillery about where to strike. Nothing I can do, and my remaining tanks are destroyed.
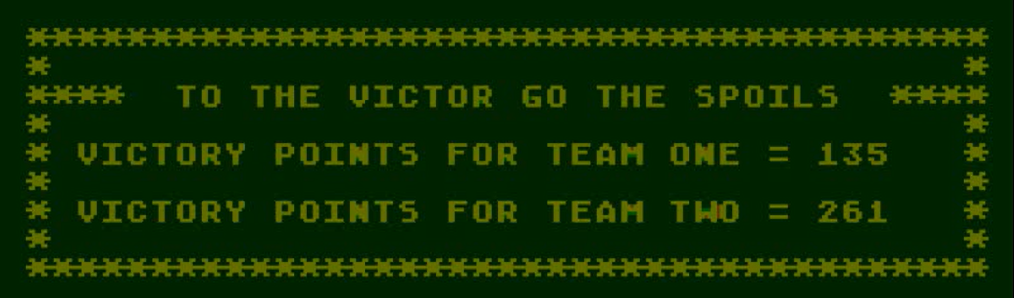
Well, I lost. Again !
I have seen neither the Panther nor the Panzerjaeger. Given my final point tally and the fact that he enemy indirect fire was two shells a turn, I believe one of my early random indirect attacks destroyed the Panzerjaeger. The Panther possibly lost its engine or tracks in a similar way, else I would have seen it. Still, that early luck did not save me : the AI bested me fair & square.
In theory, I should start my Rating & Review here, but I did not have the time to finish it before leaving for abroad – so I’m saving it for next time. It might be just as well, I found my last articles (like Knights in the Desert) a bit too long.