Back to North Atlantic ’86. As I ended the first part of the AAR, NATO had retaken Iceland at a significant cost in ships and planes. On the other hand, the base of Scapa Flow was on the brink of surrender, and needed supplies before the end of the month. As a final cliffhanger, the USS Kennedy, one of the two available NATO carriers, had been torpedoed, putting her one-hit away from being unable to receive planes.
November 12th – November 16th : The escorted convoy
After some thought, I decided to wait for all my transport ships to be ready instead of rushing in with half the supplies I could carry. According to my calculations, even by waiting two more days, I should arrive 2 or 3 days before the “morale” at Scapa Flow reaches 0, so I wait a bit for the transport to be ready. Meanwhile, my men in Iceland mop-up the last resisting Soviets.
We finally leave the 14th, with 4 fleets :
- The carrier fleet, with new escorts added (27 escorts in total),
- The transport fleet, with 22 escorts in total including the two battleships,
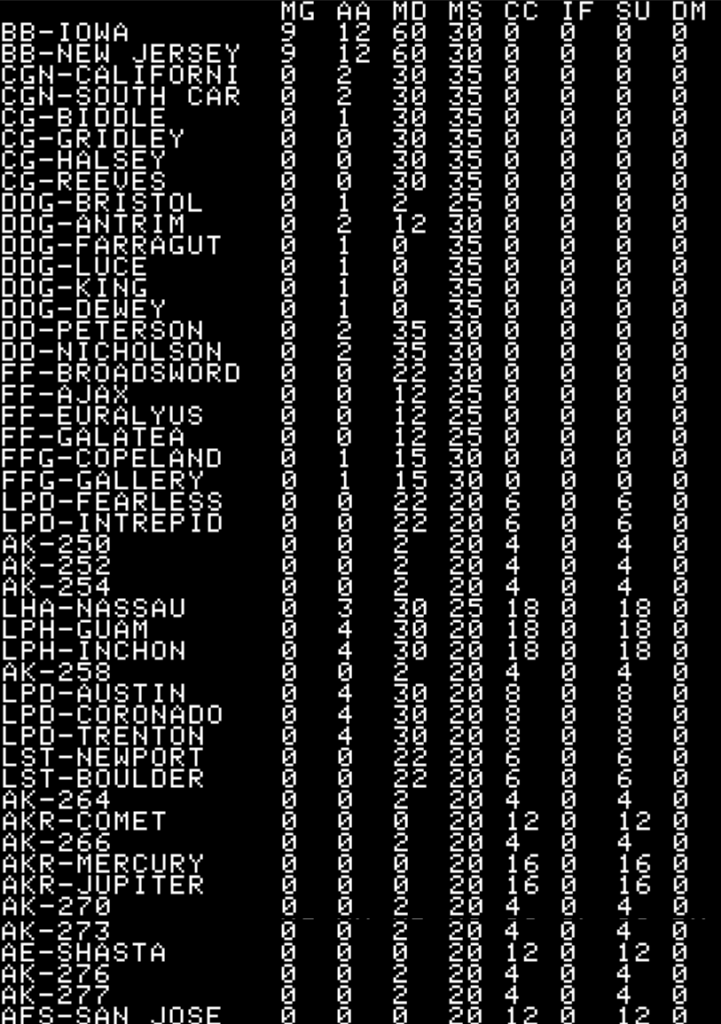
- Two groups of submarines of 8 and 10 ships,
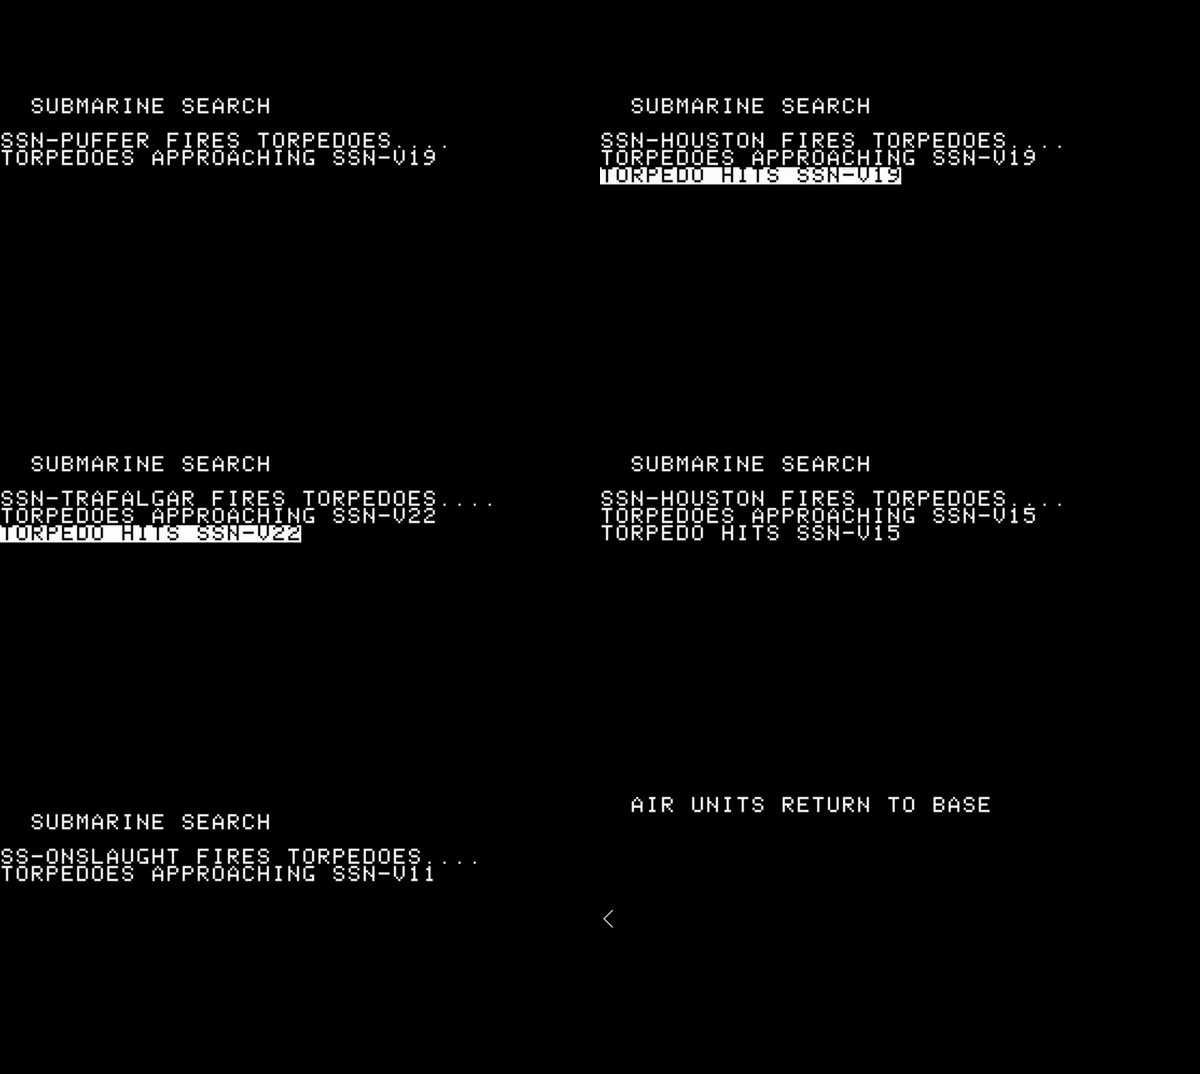
The crossing is initially uneventful ; it is attacked by a large number of Soviet submarines but they are being illuminated by my sonars every turn, and consistently sunk. I only lose one of my own submarines, and the Soviets lose between 3 and 6 submarines every day. Soon enough there are no more submarines around to harass my fleet.
Once I am in range of the enemy bombers, the tune changes. As usual, I allocate half my planes to cover my carriers, and the other to cover the rest of the fleets (“Long range combat air patrol” as the game calls it). But the Soviets focus on the transports, and after the battle of Iceland I simply don’t have enough planes to stop the missiles. In one fateful turn, I lose 4 transports !
Well, since my opponent seems to be concentrating on the transports, I decide to set all my fighters to “long range combat air patrol”.
Not a good idea, the morning of the 16th the enemy planes focus on my carrier fleet !
Several missiles make it through, and hit various ships. One is of particular interest :
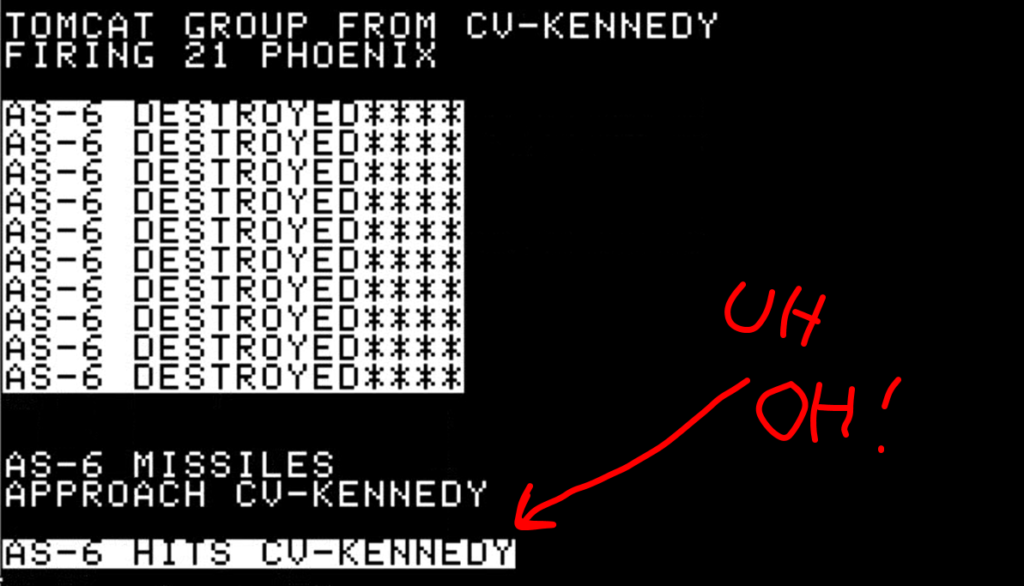
An AS-6 is an unforgiving missile, and the USS Kennedy was already damaged – it is now unusable. Its planes are unable to land, and have to ditch in the sea…

I am roughly 2 days away from Scapa Flow, down to one carrier and I don’t have enough escort to protect everyone.
This may be an issue.
November 16th – November 18th : The unescorted convoy
With the USS Kennedy neutralized, I must decide on two things :
- Return home, or carry on relying on one carrier (the USS Vinson). If I carry on, I am bound to lose a lot of ships, if I don’t I am bound to lose the game, so that’s a fast decision to take,
- What to do with the USS Kennedy. Is it going to be safer with the air cover of the USS Vinson, or is it less risky to immediately return to America. I decide to send it home with a minimal escort (6 ships) It is a tempting target, but with its electronic warfare systems off I hope it won’t be detected.

Indeed, the USS Kennedy manages to sneak off undetected and on the 18th it is out of range from Hamburg.
On the other hand, the rest of the fleet suffers for one day :
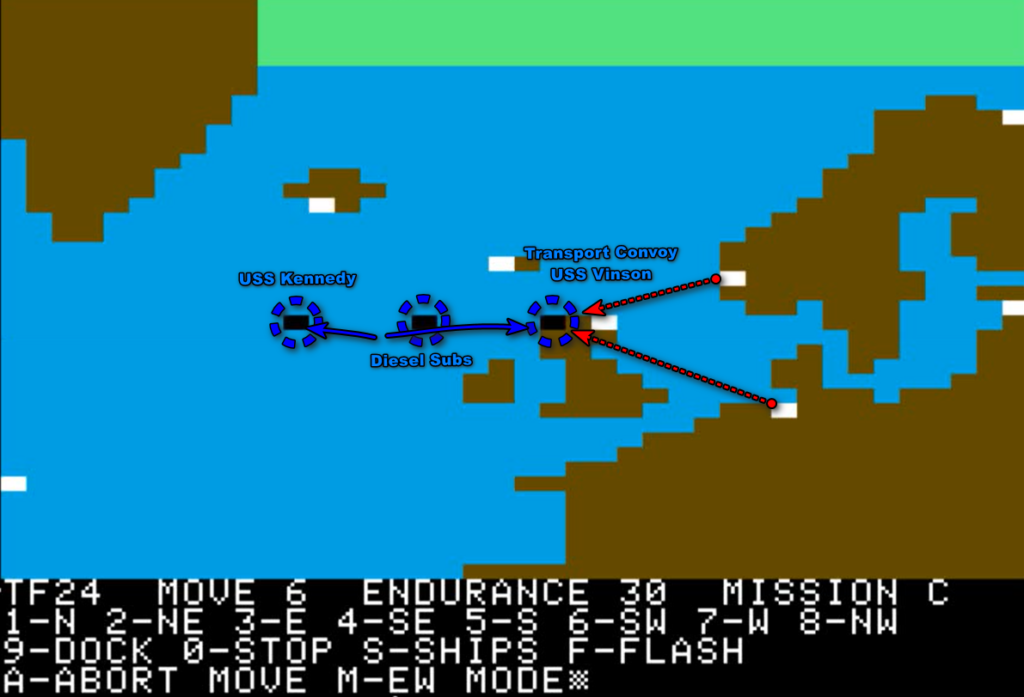
All my planes are covering the USS Vinson, which means they do absolutely nothing for the transports. The Soviets initially attack the USS Vinson, but the Tomcats do their job this time, and I only lose a couple of ships. Later, the Soviets switch their attention the transport group, with more success:

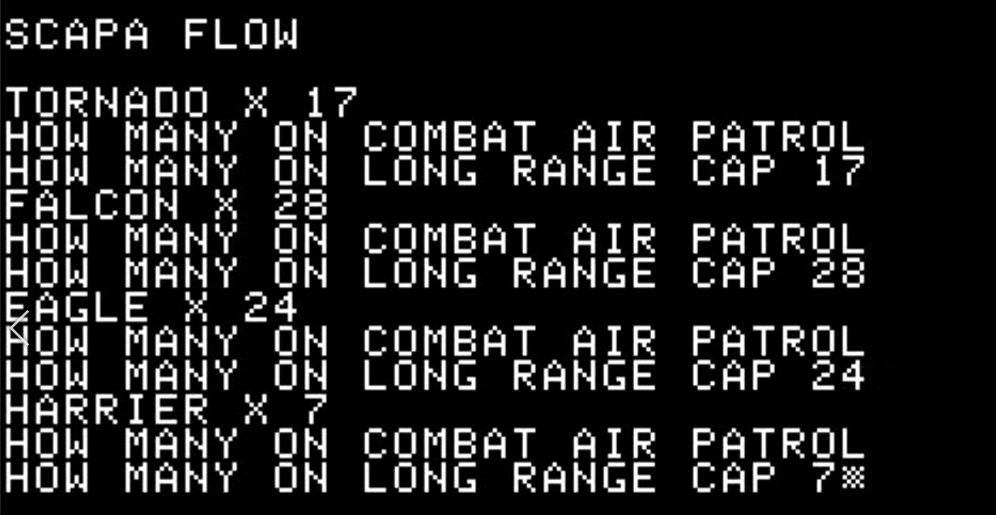
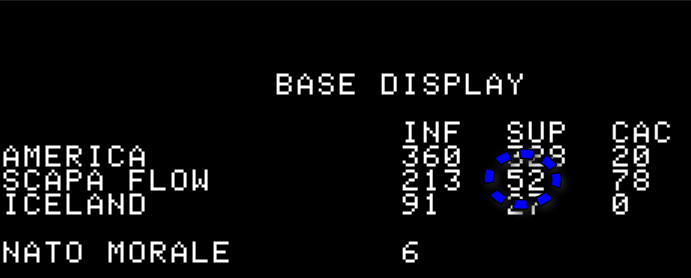
Still, I avoid a total disaster : Scapa Flow generated on its own a modicum of supplies. I transfer a further 6 by plane from Iceland (something I can do every two days), and I also use that option. Thanks to that very limited output, I can transfer fighters from Iceland to Scapa Flow :

On the 18th, those planes are able to fly their own long-range combat air patrols, enough to somehow cover the fleet as it is now near the coast :
Scapa Flow is then attacked by a mixed Su-24 / Mig-23 force, who sacrifice themselves to wipe most of my supplies. Not too little, but too late – these are replaced by my transport ships, who unload their first supplies the night of the 18th.
Once docked, the ships are safe from missile attacks, and I have enough fighters to fend off direct bomber attacks.
Still, I had an awful lot of losses on the way in : 6 escorts and 8 transport ships in total. Here is the same list as above with the lost ships crossed out :
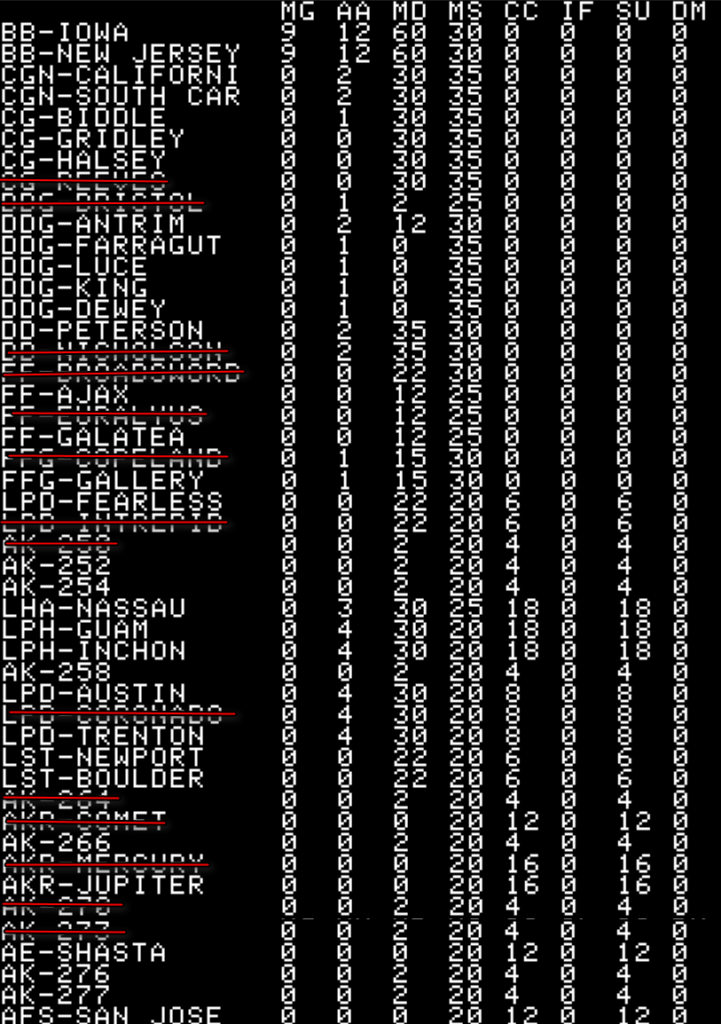
The carrier fleet, on the other hand, “only” lost 3 escorts, not including the USS Kennedy and the ships detached to escort her.
As for the USS Kennedy, she made it back home. Time to fix : four months. She is not coming back for this campaign.
November 19th – November 23rd – The Last Carrier of Scotland

I am safe in Scapa Flow, and the transport ships soon deposit 150 units of supply in the base. Scapa Flow consumes 3 units a day, plus 1 for all air attack I launch (combat air patrols are free). Since I can also fly 5 or so supplies from Iceland every two days, and some random generation from time to time, I should be able to hold until the end of the game, if the Soviets don’t bomb the area too much. Immediately after my convoy arrived, they tried a couple of times, then relented.
My problem is somewhere else. My ships are safe, sure, but there is no way I leave Scapa Flow without a horde of Backfires and Badgers falling on my ships, and I am unlikely to make it home. Sounds like I can check out anytime I like, but I can never leave.
Well, I have a solution : wait. Specifically, wait for two things :
- The USS Kitty Hawk should arrive on the 1st of December. It should be able to bring enough Tomcats to escort the rest of the fleet back home,
- There may be an opportunity before that. Should the weather ever move to “storm” I can slowly sneak away as there will be no air activity allowed. Of course, currently the weather is “clear” so I may have to wait for a bit. Where is the British stereotypical weather when you need it ?
Meanwhile, I send my submarines on patrol around Iceland, to support another supply run that goes as smoothly as possible. More are planned. I also bomb the Faroese airport from Scapa Flow, destroying all its supplies and neutralizing it. On the other hand, my attempt to raid Bergen to destroy some Backfires on the ground fails and is met with significant losses – I will not do it again.
Unfortunately, I don’t get to wait. On the 23rd, the Soviets are back, but instead of attacking Scapa Flow, they attack the port. There are a lot of them, a lot are shot down but not enough…

The USS Vinson is damaged, though not neutralized. Still, I need to get out of here, now !
November 23th – November 28th – USS Vinson‘s Anabasis
I need to return home, but the enemy air force is still there, so I need to strategize a bit here :
- I will sail North-West toward Iceland, which is the fastest way to get out of range of Bergen – it should take 1 day and half for my faster ships, and 2 and half for the slower ones. Looking back, I should have arrived from this direction to start with, but it’s too late for regrets,
- The slower escort ships are all allocated to the transport convoy since, well, the transport ships are not fast to start with,
- I detach decoys. These are the ships I care the least about (the AK-XXX ships that are replaced when destroyed and the USS Ticonderoga – a crippled cruiser). All their electronic warfare systems are activated so they illuminate the Soviet radars. Once some distance from the Faroes, the rest of the fleet will turn its EW off and hopefully disappear. Hopefully.
And off we go :
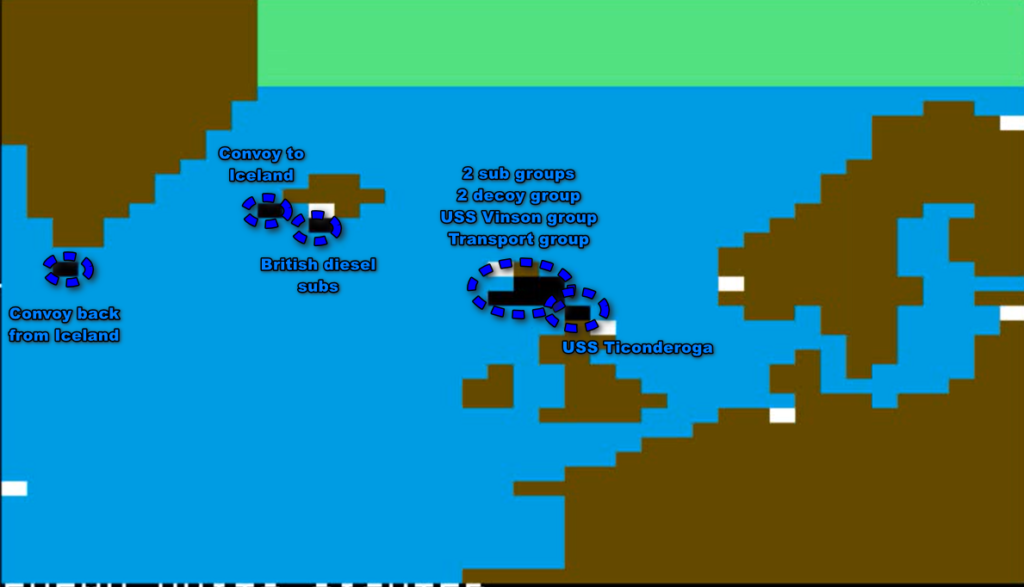
By some sort of miracle, the sortie starts well. The Soviets only send their Backfires, not sending the Badgers from Bergen for some unfathomable reason. Not only that, but even though I didn’t have enough Tomcats to intercept all the missiles, none of the many missiles that made it through reached their target.
This does not last, and on the 24th the Soviets attack from both Bergen and Hamburg. They manage to sink one escort and a couple of transports. Not great, but it could have been worse. On the evening, they reiterate, and I lose more ships. The decoy fleets had been superbly ignored thus far, but unfortunately Soviet submarines are on their tails. One of the two groups is fully destroyed on the 24th, the other on the 25th.
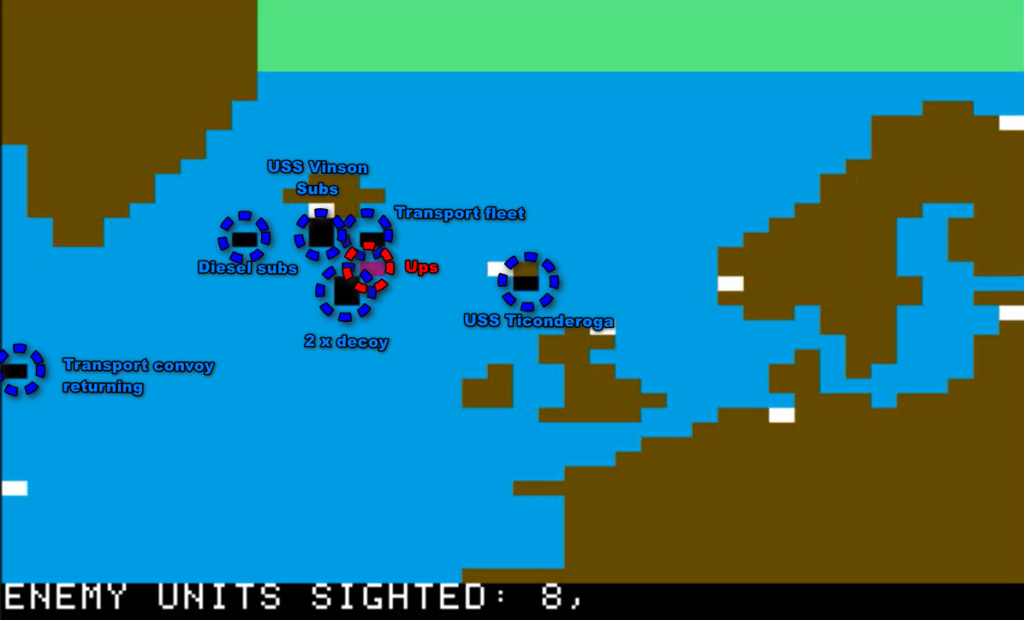
Finally, on the 25th, my carrier fleet is out of range. The Soviets get one last opportunity against the transport fleet, but combat air patrols also fly from Iceland this time, and I only lose one final escort. I am safe, or so I think.
But the ordeal is not quite complete. There are Soviet submarines on the way, and I don’t sink them as fast as I used to, possibly because I have fewer escorts than before. I lose yet more transport ships.
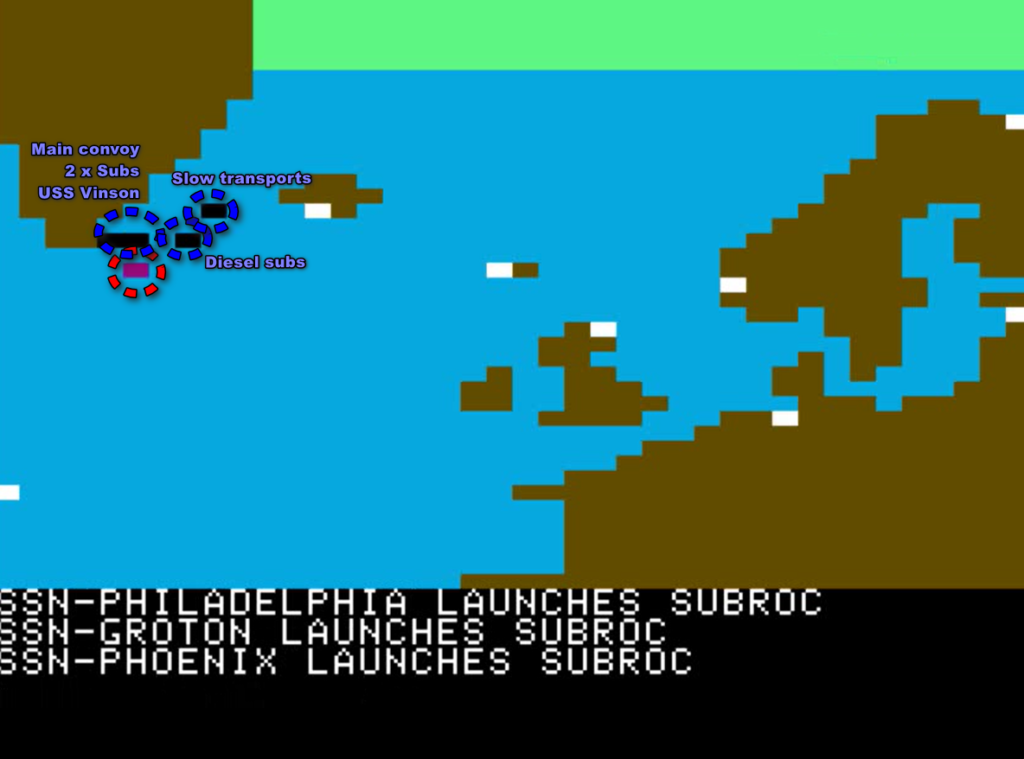
Finally, I arrive at home on the 28th. Losses are going to be hard to explain to the US public opinion, but Scapa Flow has been resupplied, and the USS Vinson is back home.
Heroic return, but to some extent pointless from a gameplay perspective. The USS Vinson repairs will take two months, she will not be seen again in this campaign.
November 29th – November 30th – Preparing for December
Almost nothing happens in the last two days of November. The only ships I have at sea are the diesel submarines. I fly some supplies to Scapa Flow, which is attacked once from Hamburg, that’s all. I am preparing for December.
Losses in the Scapa Flow expedition have been catastrophic:
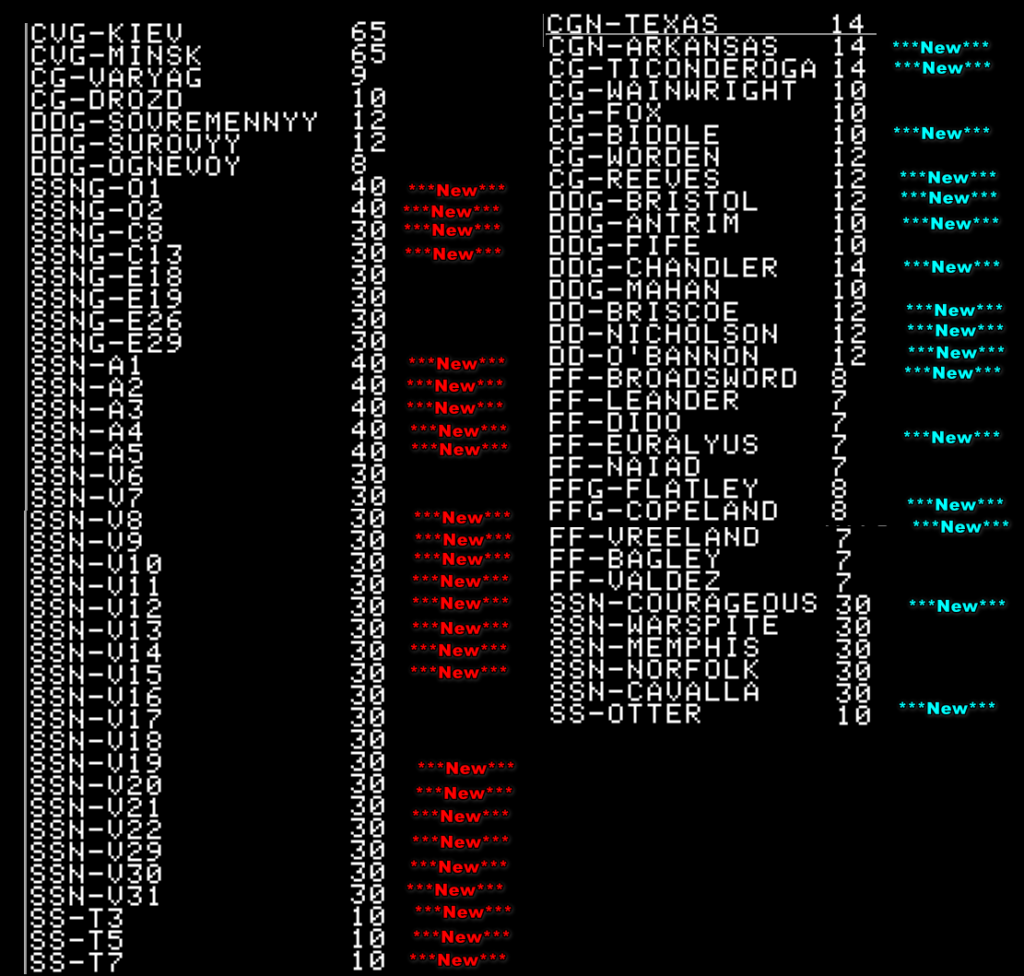
In terms of surface fleet, I am down to :
- 1 carrier once the USS Kitty Hawk arrives (so two lost for the campaign),
- 2 battleships (none lost),
- 6 cruisers (14 at the start of the campaign),
- 12 destroyers (20 at the start of the campaign),
- 15 frigates (25 at the start of the campaign),
- 9 transport ships that are not generic AK-XXX (21 at the start of the campaign),
I can probably mount one more expedition before the end of the game.
As for the good news, there are some :
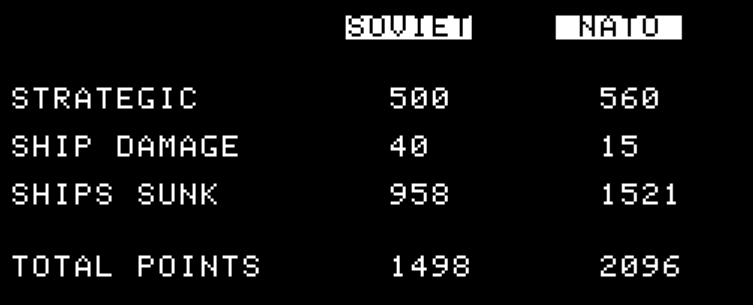
- I have a huge lead in points, that I should keep as long as I don’t lose Scapa Flow,
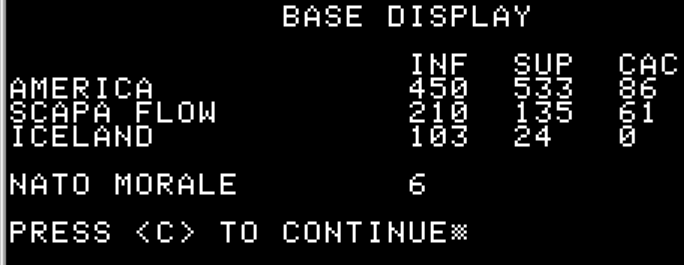
- Scapa Flow has enough reserve to hold until the end of the game if I am careful, and the planes to defend those reserves,
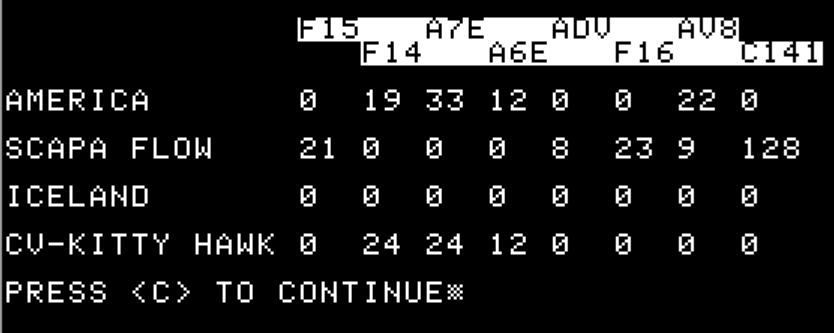
- The USS Kitty Hawk arrives with a full complement of Tomcats. If I replace some of its attack planes with the surviving F-14s from the USS Vinson, I can cram my new carrier with so many Tomcats that the USS Kitty Hawk will be worth almost two carriers in terms of air defense.
Soon, back to the DANGER ZONE for my next and last target : the Faroes. I’ll only get one chance !
Time played so far for this campaign : 7.5 hours