
By popular demand, I am back to Cosmic Balance II with an AAR of the first scenario that is not actually a tutorial ! If you haven’t done so, you should read the previous entry, Cosmic Balance II is not a game one can easily jump into.
If you are new to this blog, you may want to skip this article. If not, well, remember you asked for it !
4. Rebellion (293 – 347 H.E.)
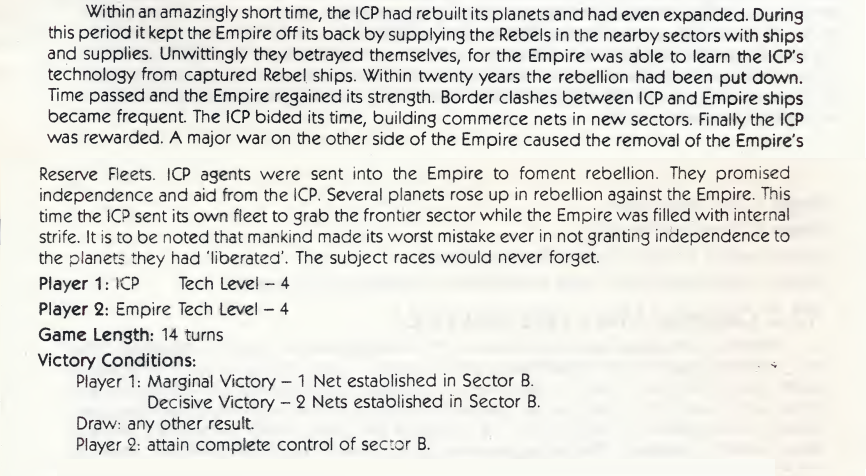
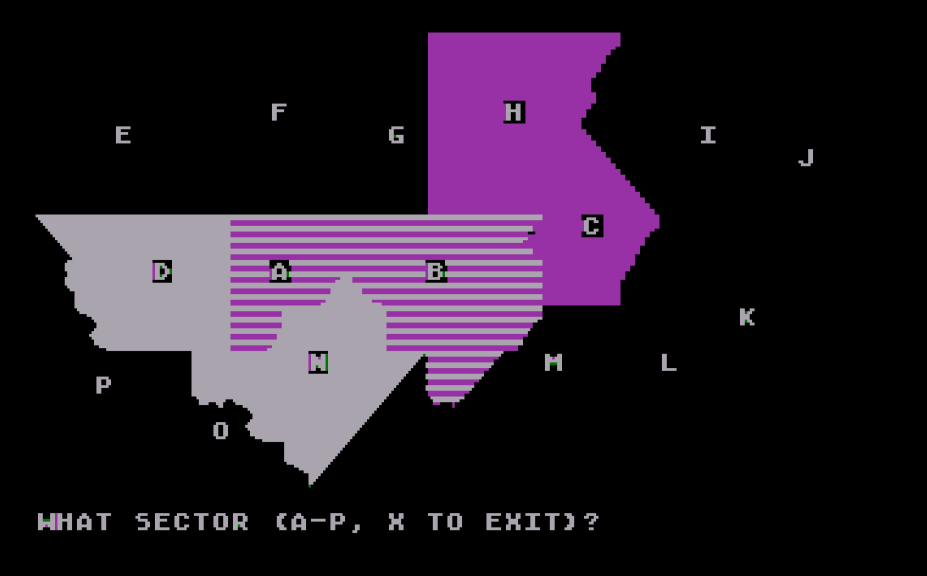
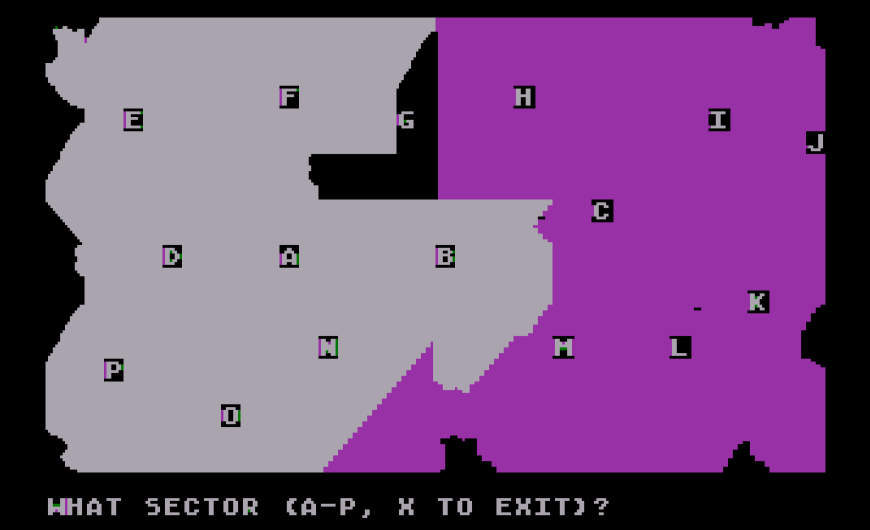
Well, this time this is a serious war, with 6 sectors involved :
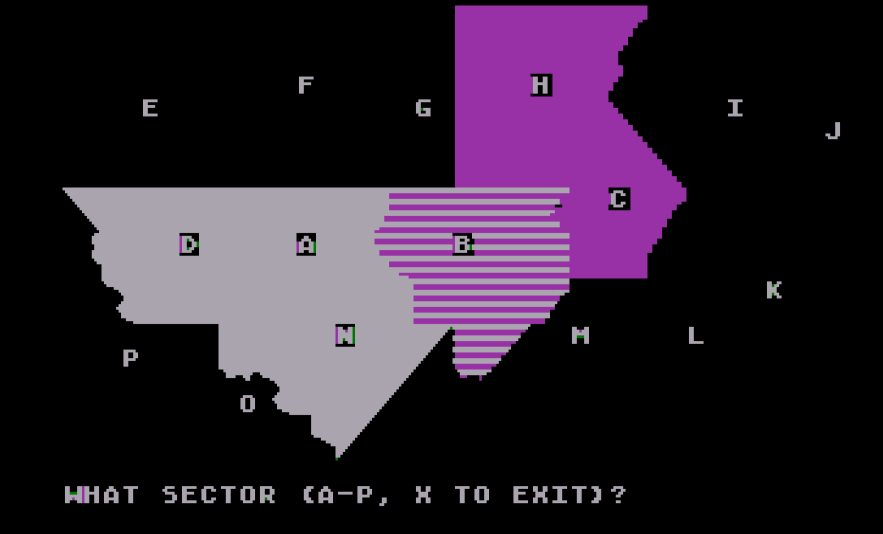
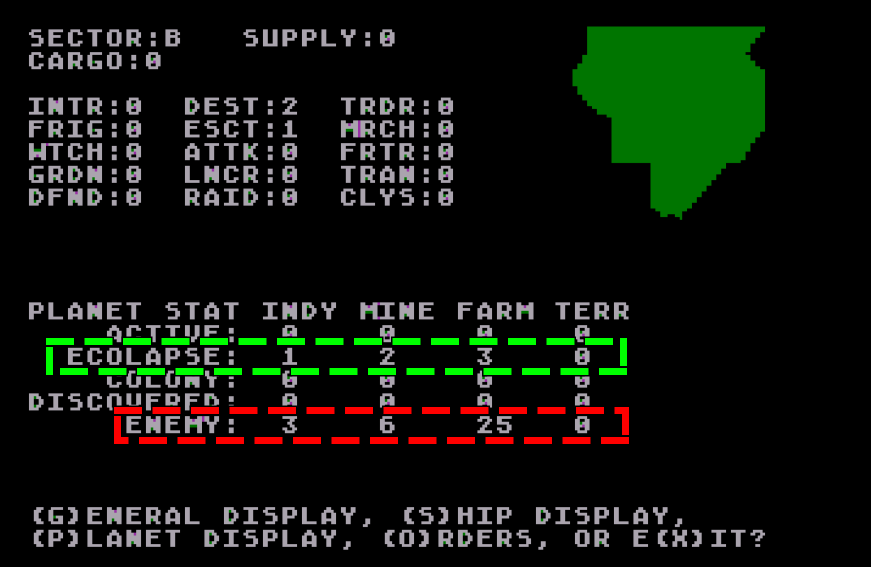
I own sectors A, D and N while the alien empire owns sectors H and C. Sector B is officially disputed, according to the scenario because mankind sent forces to support rebellions. In practice, the alien empire has 3 commerce nets in sector B, while I control a bunch of planets in ecolapse (= planets that have not been supplied last turn).
As for the rest of galaxy, the Alien Empire is maxed out, whereas I am two turns from acquiring a 4th commerce net in both sector D and sector N :

I start with a small production deficit compared to the aliens, aggravated by the fact that for 2 turns I will have to supply my colonies in sectors D and N. After that, I will be marginally more productive than the aliens. To get a real edge, I need to set up a commerce net in disputed sector B, and ideally break one of their commerce nets there.
This is going to be easier said than done. I start with a massive fleet, but I can only assume that the aliens start with something even larger, and this time I don’t have a tech advantage.
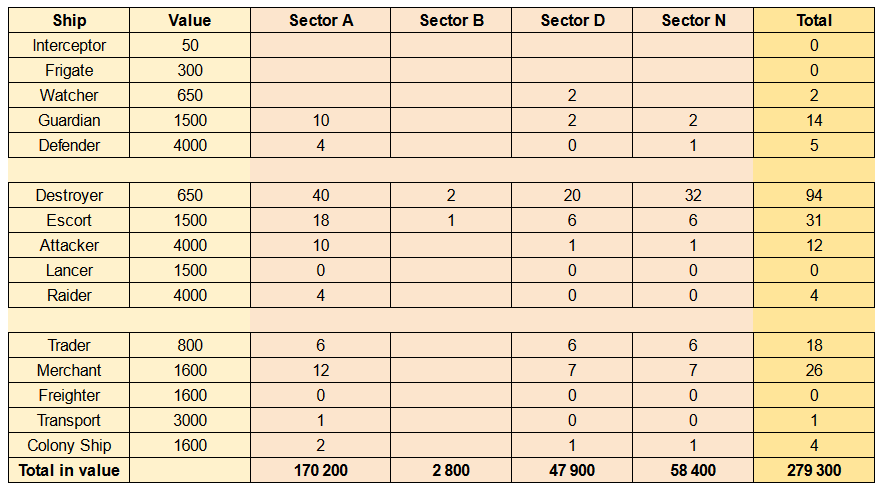
The starting situation calls for a few more observations:
- Sector D is perfectly safe as long as the enemy does not invade a planet in sector A or N, so I can remove all my ships there, except those ships necessary to maintain a commerce net (and initially to supply my colonies),
- Sectors N and D do not start with enough transport capacity to both maximize the commerce net and support the colonies, so I will have to buy cargo ships,
- Sector B has no supply production, so I need to transport a massive amount of supplies there, which means I need even more cargo ships !
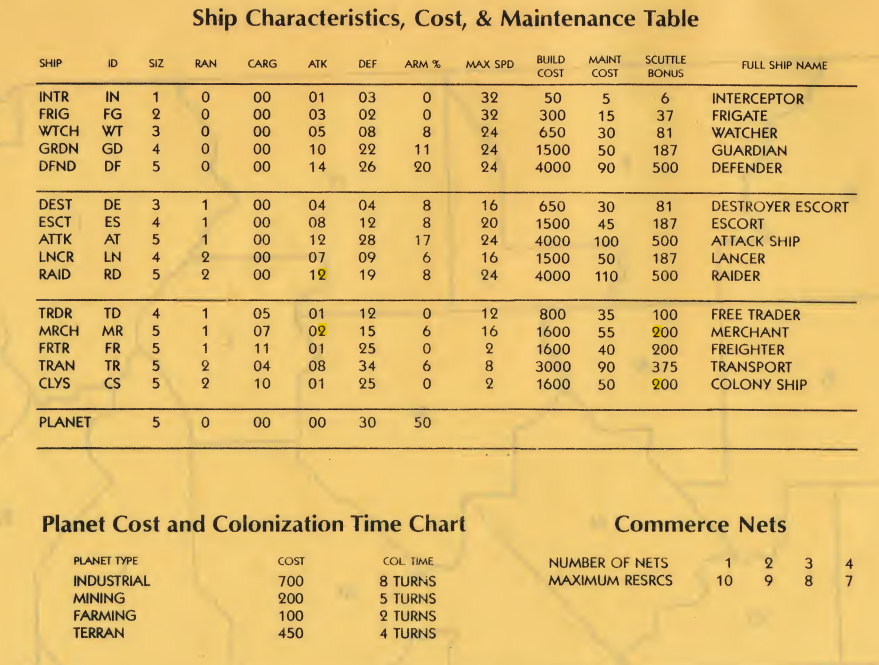
- Freighters are by far the most cost-effective cargo ship. Not only are they cheaper by cargo capacity, but their maintenance-by-cargo is roughly half the one of traders or merchant ships – they are going to be my standard cargo ship.
Part I : On the brink of collapse (turn 1-4)
My strategy is quite simple :
- Allocate the first turn to massive freighter production,
- Finish colonizing in sectors D & N
- Move most of my forces to disputed sector B, including transport ships carrying enough supplies for one turn,
- Use the second movement of long-range ships to return the cargo ships to sector A and pick-up more supplies for next turn,
At the end of the order phase, that’s what the situation looks like in sector B :
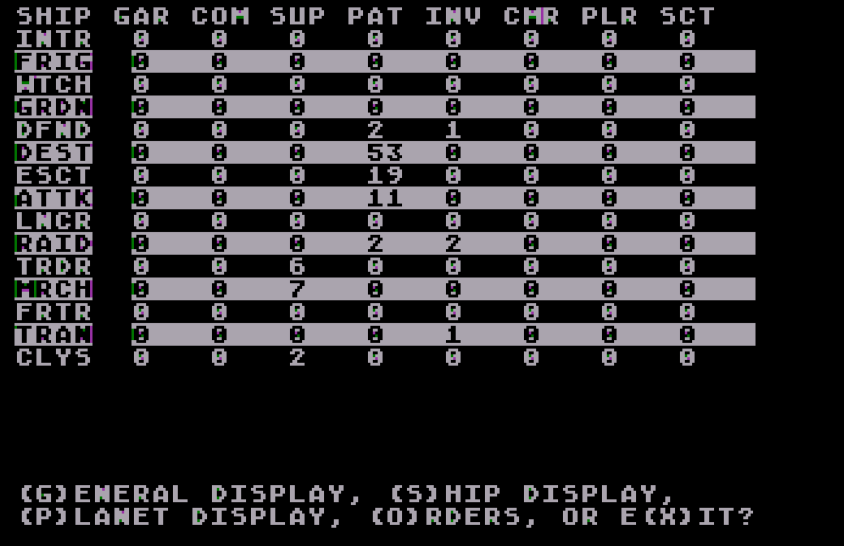
83 spaceships patrolling, a massive supply space bridge, and an opportunistic invasion using that one armoured transport I started with. In total, my force consumes roughly between 4000 and 5000 supplies every turn, and then I need to add colony maintenance.
The turn resolution is pretty long :

The general gist is that my invasion attempt was intercepted by an enemy patrol that was destroyed, and all sorts of alien hostile actions were intercepted by my own patrols, which usually outnumbered and destroyed the aliens. No planet lost, and no alien attempts on my home sector A either.
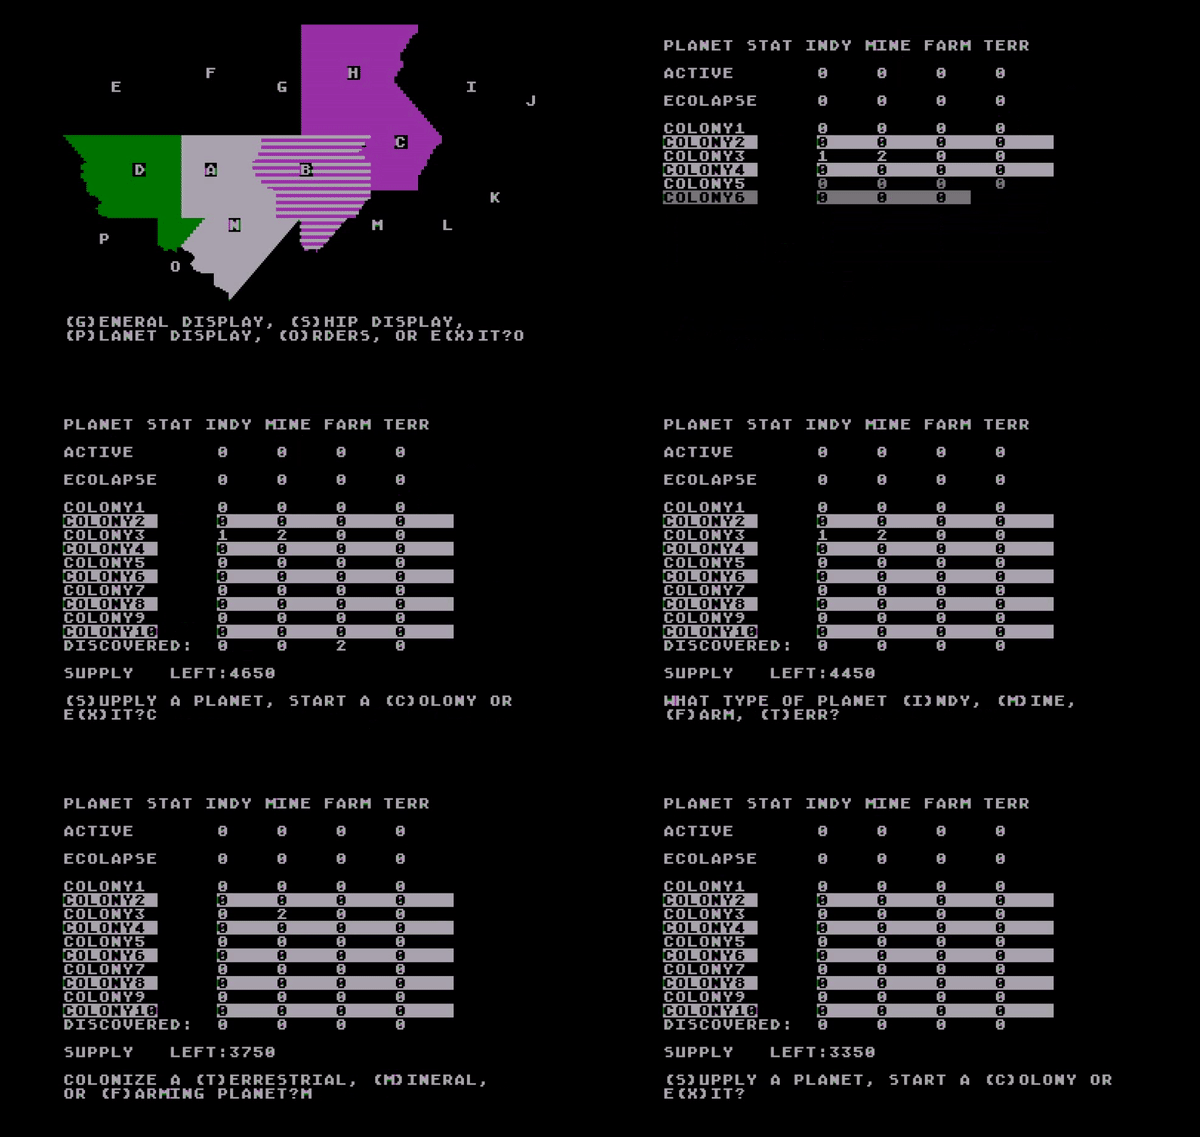
After that, it is the long procedure of supplying & colonizing planets. Here is me doing it for one sector :
I carry on my strategy the second turn, with a few more commerce raids on my part to start peeling off defenders. The aliens incur defeat after defeat in sector B…
… and then they surprise me in my home sector A :
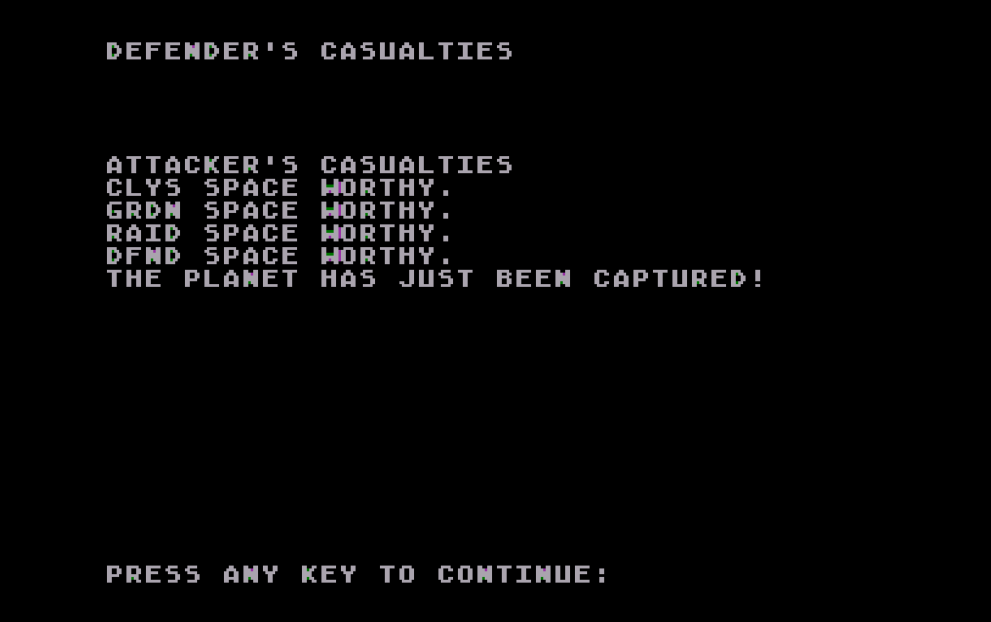
Three planets captured in my home sector A, a fourth planet saved by the timely intervention of a patrol, and one commerce net neutralized. Eh, I never expected my proxy war to have so much proximity.
Even more frustrating, the aliens can now jump to the totally defenceless sector D next turn. The AI has more teeth than I anticipated.
I need to react immediately. I suspect the aliens have no more than the 16 ships of their invasion force in sector A, but they will have time to bring patrol from sector B the following turn. I happen to have more cargo ships than I need after building all those freighters, so I order all the cargo ships in excess to organize invasion missions in sector A, escorted by my best combat ships. All the planets are captured without opposition. Where are the aliens you ask ? Well, half of them are doing pointless commerce raids in sector A that are all intercepted…
… and the second half is doing a massive invasion flurry in sector B. By the end of it, I am hanging on to sector B by the tip of my fingermail, with one last industrial planet :
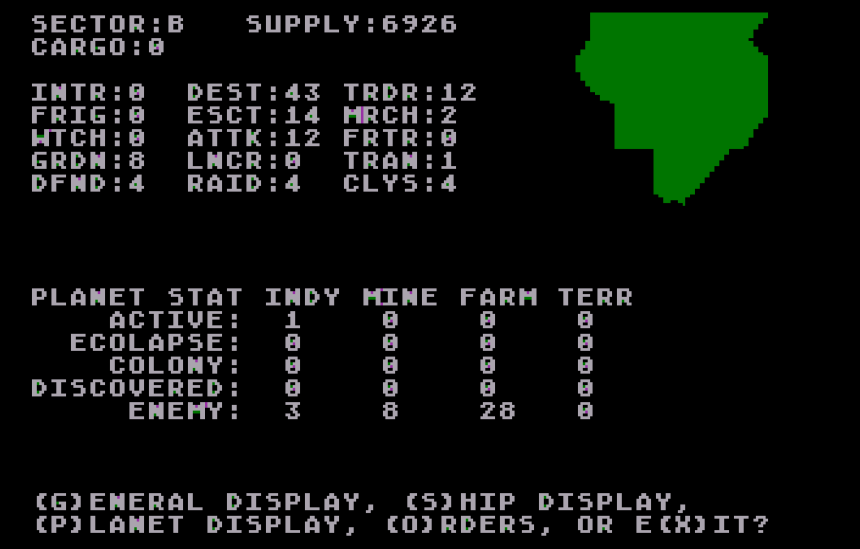
If this planet falls, as per the scenario, I lose the campaign !
At least, all my other sectors are now fully functional. I am ready to counter-attack !
Part II : The Great Stalemate (turn 5-9)
With only 1 world left in sector B, I have only one strategy …
… Waaagh !
Because I built all those freighters, I have a bunch of extra cargo ships I absolutely don’t care about and costing me maintenance. All of them are crammed with little flags and given a simple order : INVASION.
Of course, I accompany them with some of my best combat ships, and dispatch them in small groups so more of them dodge the patrols :
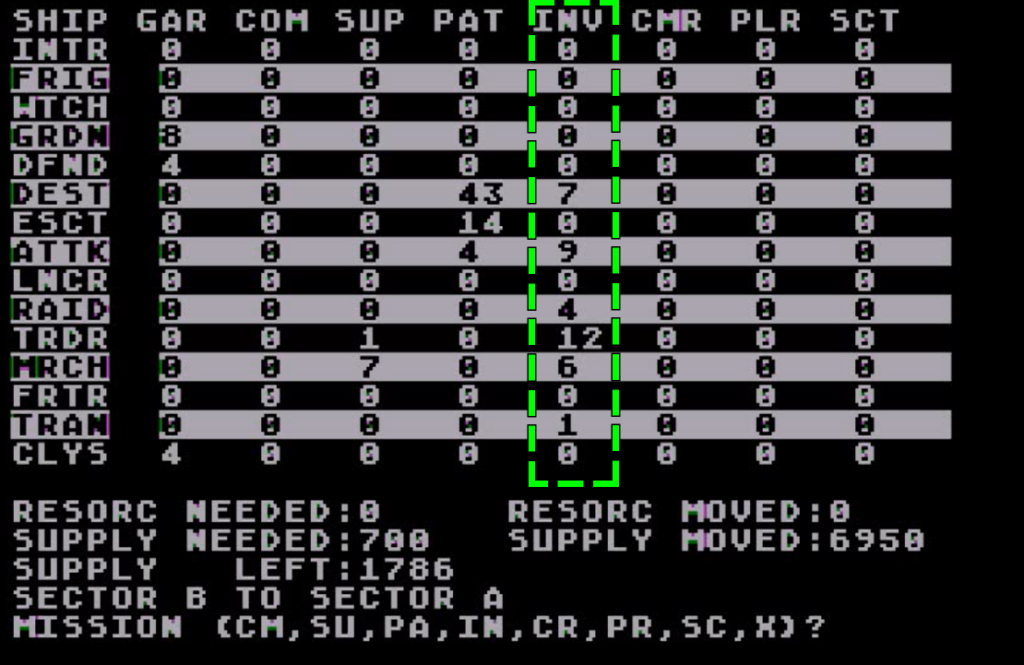
THAT part of the plan goes well. After 3 minutes of turn resolution, I am the proud owner of 10 planets in sector B including 3 industrial worlds :
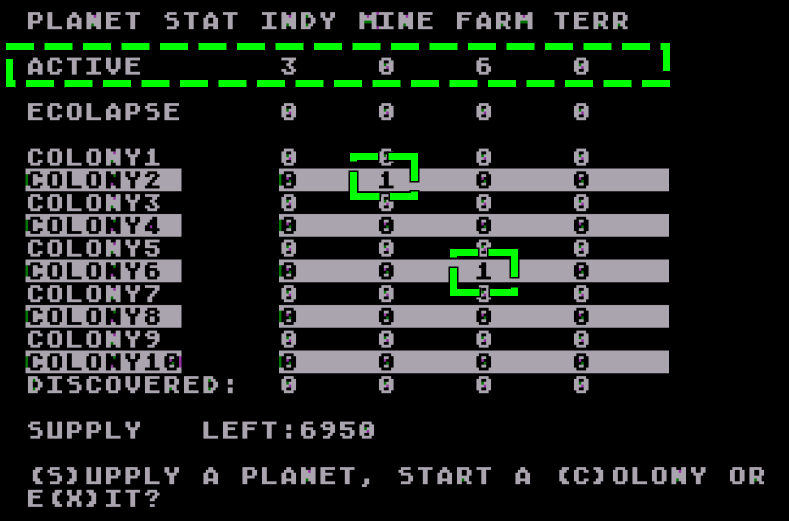
What definitely DOESN’T go according to plan is that my small groups of weak warships left to patrol the area are absolutely shredded by the enemy fleets. My losses are not sustainable :
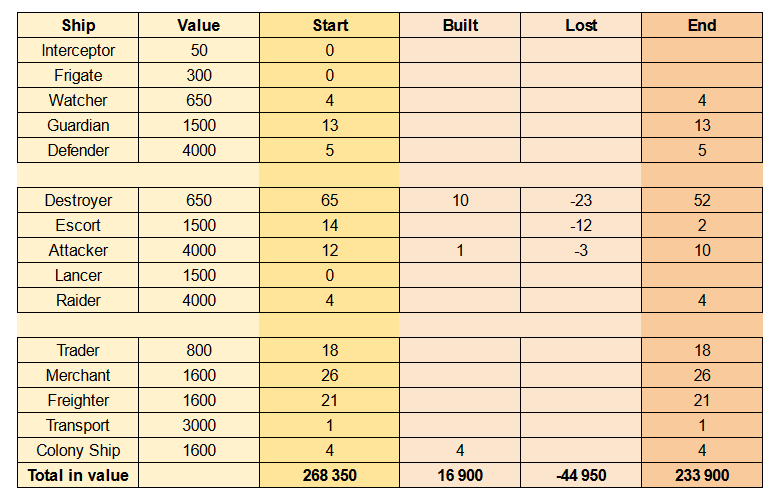
The good news is that with 3 industrial worlds in my hands, alien production in sector B collapses, and with some luck they don’t even have the resource to supply their fleet.
The following turn, I adapt my strategy :
- I use large groups, so I lose fewer ships in combat,
- this time the cargo ships are escorted by weak combat ships so the more powerful ships do the patrols
- I also send a trader for some invasion missions in Sector C, just for the lulz of it.
I also run a commerce mission in sector B, just in case I capture enough mines to have a full deck.
My strategy doesn’t really pay off : this time the aliens defend heavily, and my lightly escorted cargo ships are torn apart – all I have to show for it is one more farm world. My losses are terrible again, though at least this time it was ships I did not REALLY need. I also shoot down a lot more alien ships than last time, and they don’t produce as much as they used to. Every space debris has a silver lining, as I always say.
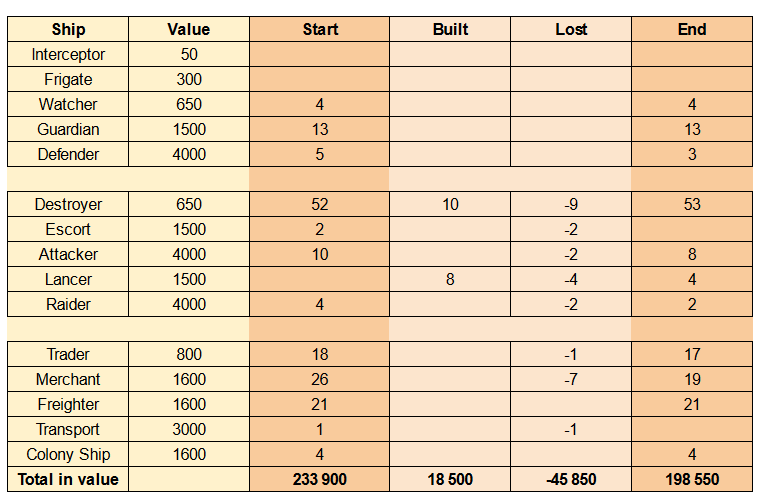
I try once more, with stronger escorts this time. Another costly failure :
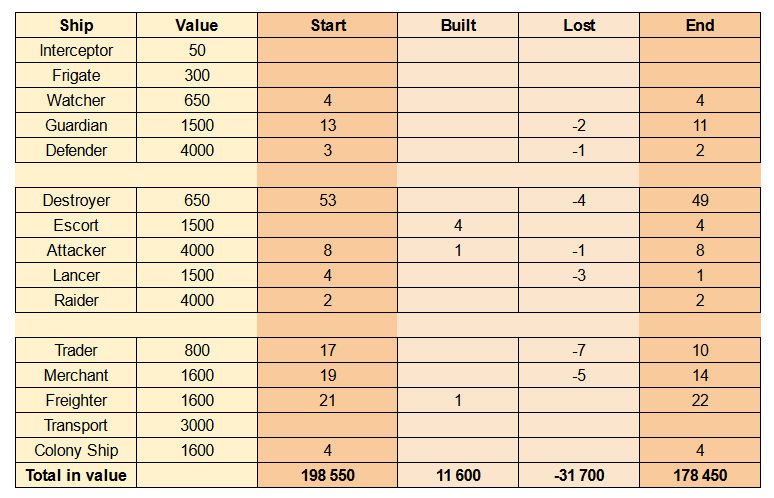
I need to change my strategy : instead of trying to conquer planets, I try to peel off the defenders with planetary bombardments (those missions don’t force you to bring weak cargo ships in your task force). I also start investing in research : every 400 invested gives me 1% chance to increase my research level, so with some luck…
The new strategy immediately yields dividends :
- I lose ships, but the aliens just as much if not more – and I can afford the losses more than them,
- Even though I only invested 4000 in research, this happens :

This lasts a few turns, during which I manage to stabilize my losses :
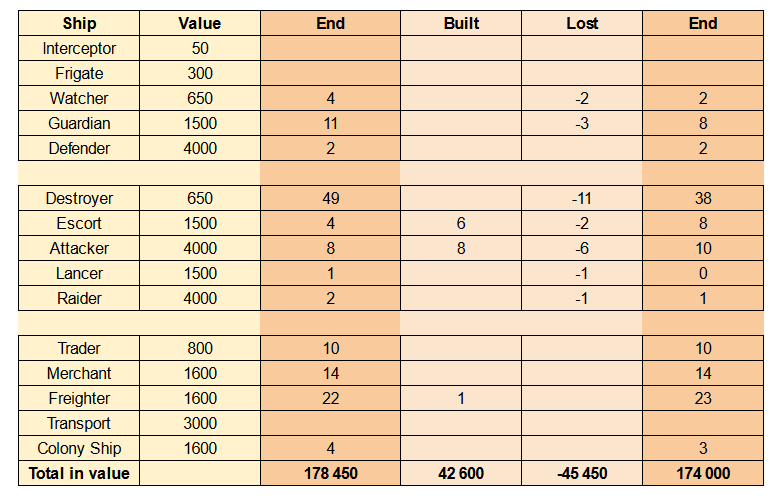
As for sector B, the situation has not changed much :
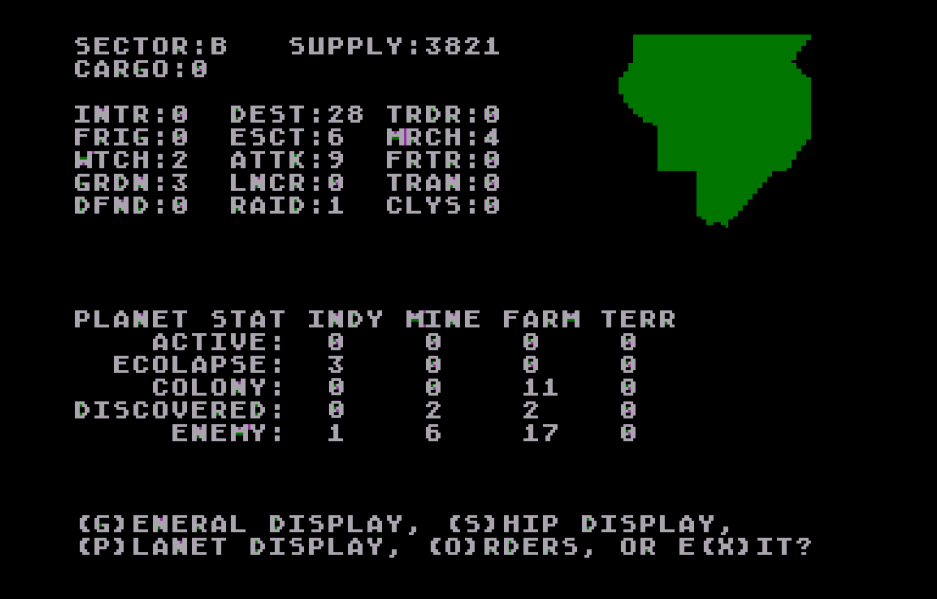
Part III : Assaults (turn 10 – 14)
There are only 5 turns left until the end of the game, so I need to capture the missing enemy planets right now, lest I need to “repair” some of them so they become active.
I go absolutely all-in, leaving no defence behind me – I just need to take a few planets !
I am crossing my fingers… but there is no opposition, except a few frigates. I capture all the mines I wanted to capture, the last hostile industrial world, and a bunch of farming planets. There are only 6 farming worlds still controlled by the enemy at the end of the turn !
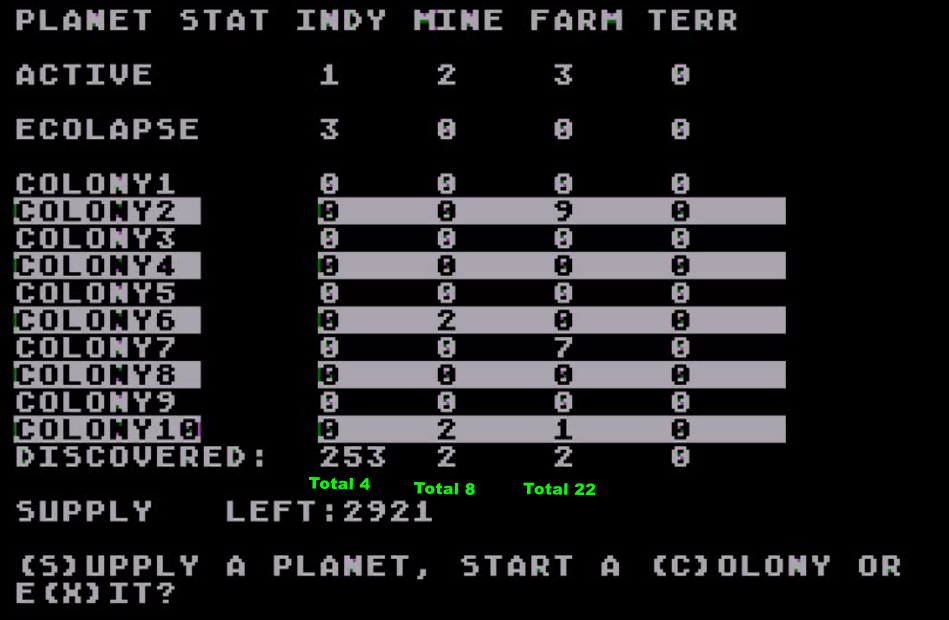
Of course, all those planets are in dire straits. The AI did not maintain all the planets that were not part of its one remaining commerce net, so those planets degraded first to “collapse” and then by 2 “colony levels” by turn. 4 of the 8 mining planets are out of operation and will take more 5 turns or more to bring back to “active” status – exactly the time I have before the end of the game. I immediately invest in them.
You may wonder “how come the planets were not protected this turn”. Well, just like last time, that’s because the enemy space force was invading my home system again !

Remember when I said I went all-in in attacking sector B ? Well, this means I had nothing to defend home sector A. I lose two commerce nets and enough planets to allow my opponent to run one of these in MY home sector !
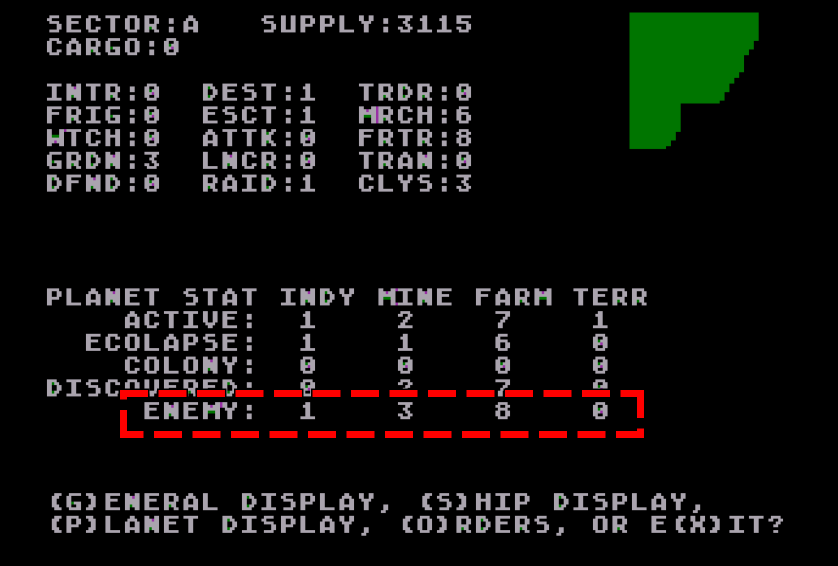
There is still some hope : the aliens used colony ships transporting zero-range ships for its invasion, so there is a good chance they planned to jump back to sector B to resupply from a now non-existing commerce net. It is therefore possible that they lost a good chunk of those ships. In any case, I don’t expect much defense.
I split my force in two : half of them trying to retake sector A – which I believe is unlikely to be well-defended – another trying to seize the remaining planets from sector B.
Alas, nothing goes according to plan.
Sector A is well-defended after all and I lose a good chunk of my attackers :

Still, I manage to grab enough farming planets to deny a local commerce net to my opponent.
As for sector B, it is not defended at all, because the aliens are running their own invasion missions, so there is some planet swapping. I gain some, but also lose some, including critically one of my good mining planets.
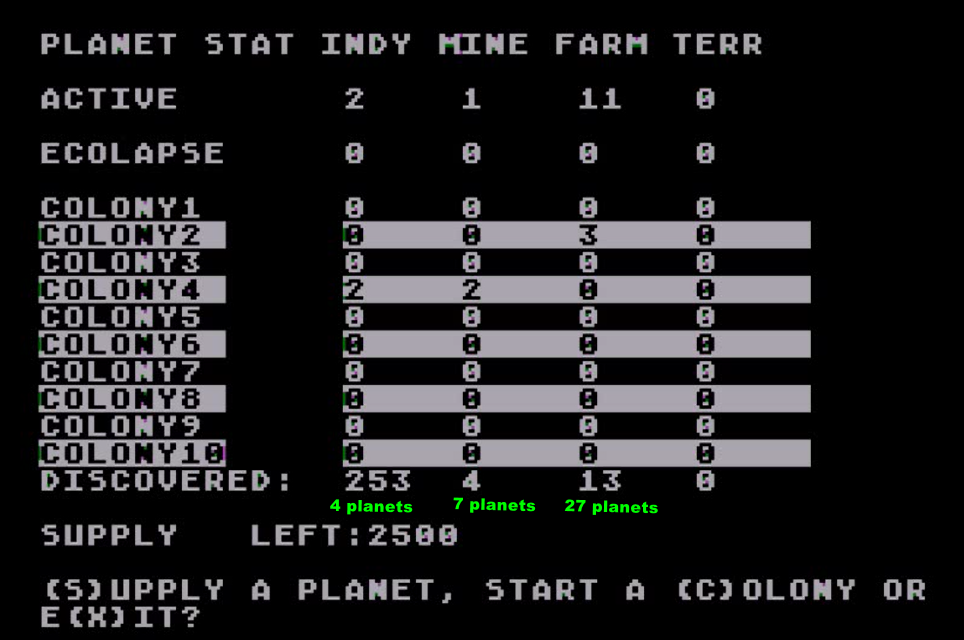
Turn 12 now ! My counter-attack on sector A destroyed a good half of my capable combat ships, but I can’t afford to wait.
With both sectors A and B not producing any supplies for the aliens, I suppose that the last remaining defenders of sector A have been scuttled (the transport ships that could have evacuated there were busy invading in B). I send brand new and largely unescorted trader ships to sector A, and everything else I have left to sector B. This time it’s going to work, I swear !
Unfortunately, the AI does not care about something as irrelevant as supplies. My trader ships in sector A are turned into more space debris. In sector B, it is another round of swapping planets.
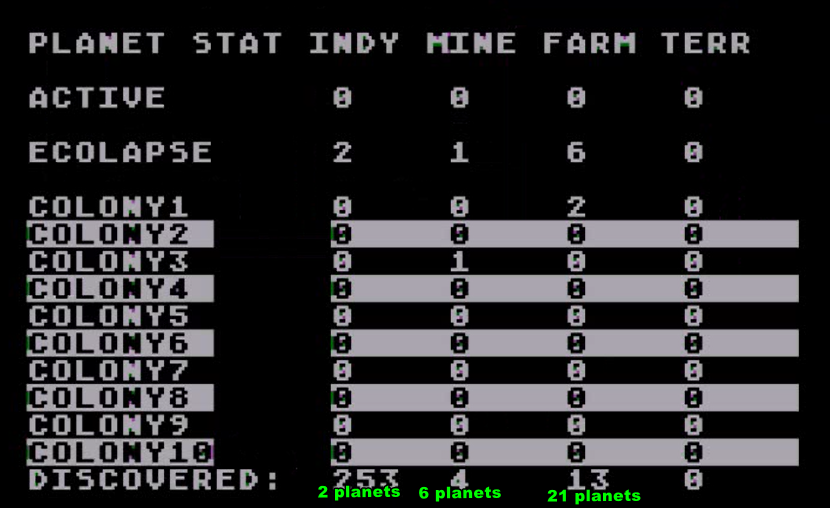
I am down to 2 industrial salvageable mining worlds. The decisive victory (2 commerce nets turn 14) is out of reach.
For a moment I think maybe I can still achieve a normal victory, but my hopes are in vain. I am totally depleted, the alien ships still numerous. I carry on swapping planets and that stops me from consistently upgrading the remaining mining worlds I need. At the end of last turn (turn 14) I am one turn away from acquiring a commerce net… assuming no more planet swap :
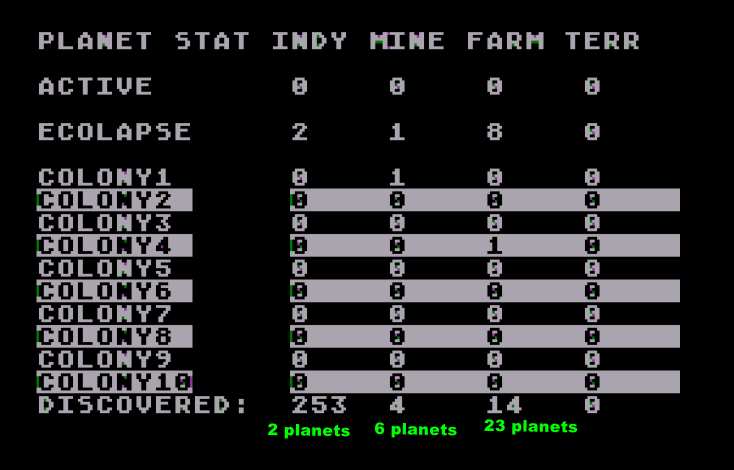
I am defeated. Sector B is now a wasteland – sorry rebels. Sector A is not looking too great either. More humiliating still, the AI inflicted three narcissistic blows to mankind :
- The aliens are still holding a strong position in sector A. I know the planets are too damaged to run a commerce net, but the AI does not seem to care and it still supplies its ships somehow – either that or it runs a pretty complicated supply chain from its home sectors.

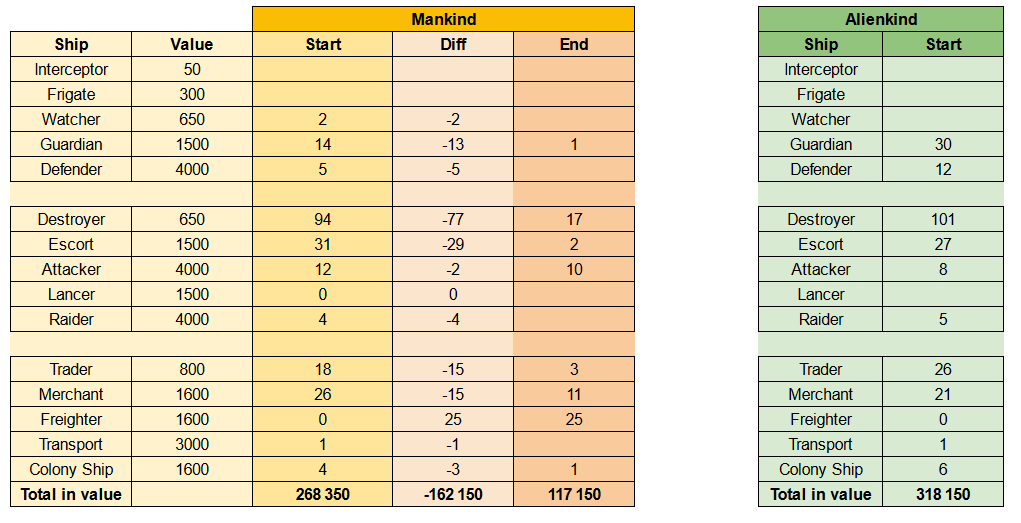
- I still have a fair amount of cargo ships (I lost only 3 800 over the course of the campaign), but my starfleet is pretty much gone,
- Finally, unlike the previous scenario, the AI did not even win with that much of a starting advantage. Of course, I am pretty sure it does not pay any maintenance for its units.
Oh well, there is still one last scenario to defeat the aliens !
5. The Final Conflict (403 H.E. – Present)
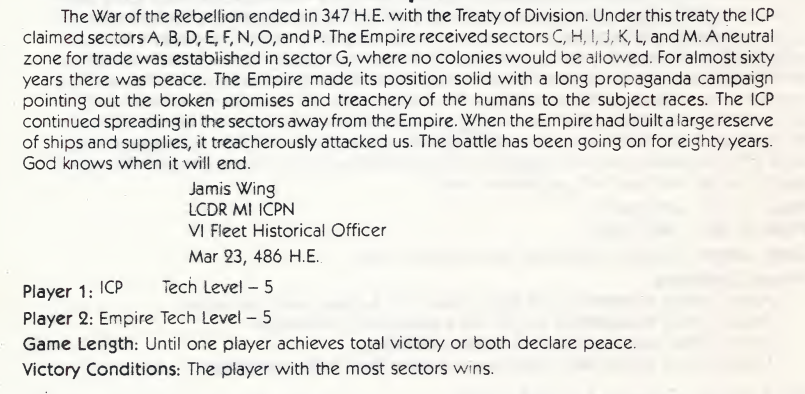
Let’s check this …

6. The Travel Back in Time
Upset at their setback in the battle for Sector B and not wanting to get into that huge time-consuming galaxy-spanning war, the humans travel back in time to the dawn of the space age again. Their objective : overrun the aliens before they start their empire.
I create a new scenario giving :
- My side : 1 Terran planet in sector A, 1000 in supply, 1 trader ship and 1 in Tech Level
- The AI : 1 Terran planet in sector C, 5000 in supply, 1 trader ship and 2 in Tech Level.
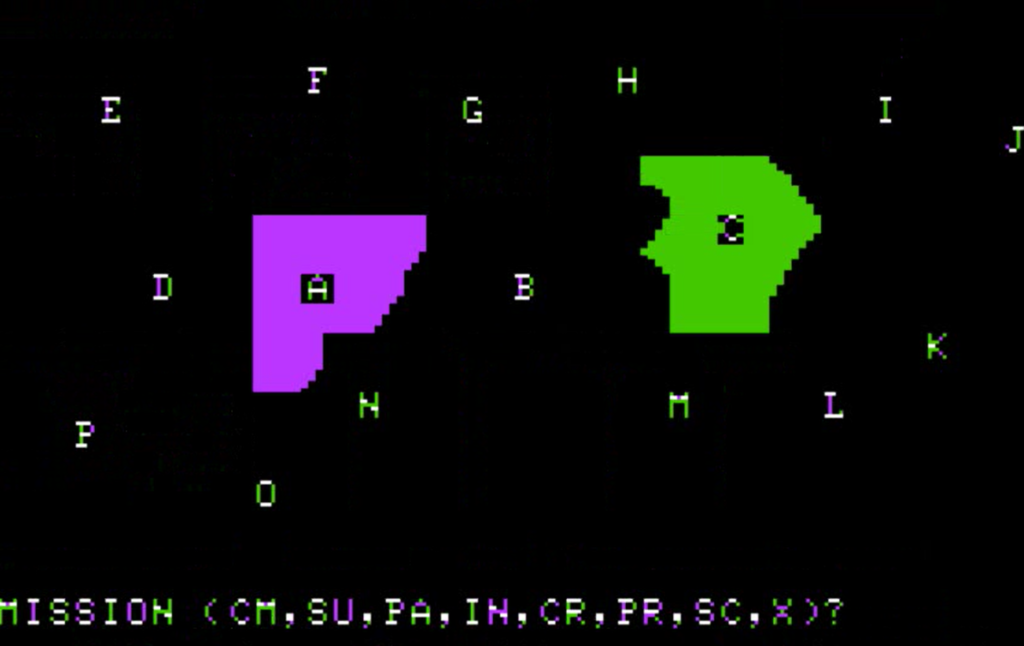
I want to check whether the AI is able to develop a spacefaring empire on its own.
- It takes me 12 turns to colonize 10 planets and create my first (and only) commerce net in Sector A. Meanwhile, the AI only has one Terran planet.
- It takes me 3 more turns to start colonizing sector B. It is only one farming planet, but that’s enough to store supplies starshipped from A.
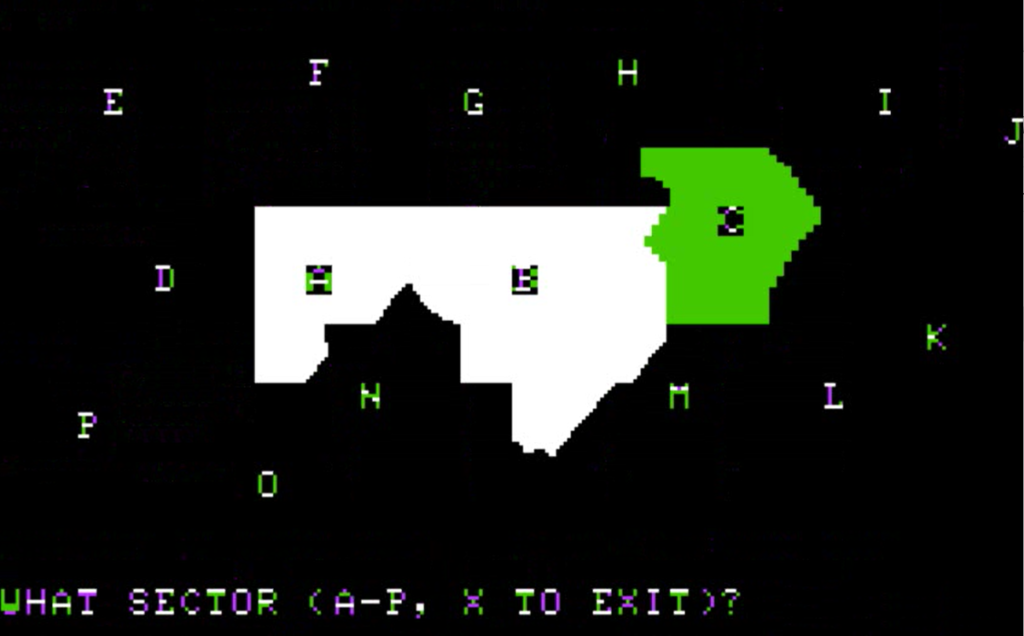
Meanwhile, the AI only has one Terran planet.
- It takes me 2 more turns to bring to sector B two raider attack ships.
Meanwhile, the AI only has one Terran planet.
- It takes me only one turn to invade the Terran world in sector C :

Well, we all know about cheating AI, but in this case Paul Murray himself cheated by creating scenarios where the AI has nothing to colonize.
That’s all for Cosmic Balance II for now. Hopefully I never need to launch the game ever again – though of course there will be a Rating & Review. But as a breather the next article will be about something more traditional, with tanks and guns and even some forest patches : Tactical Armor Command.
Cosmic Balance II‘s rating and review here