If I understand your plan : to take Malta, you plan to allocate hundreds of planes, major naval units, some of which will be sunk by submarines, almost all our transports, and what’s left of our paratroopers. Are you sure it is worth it ? Can’t we neutralize the island and bypass it ?
We cannot, General ! The island is worth 700 VP !
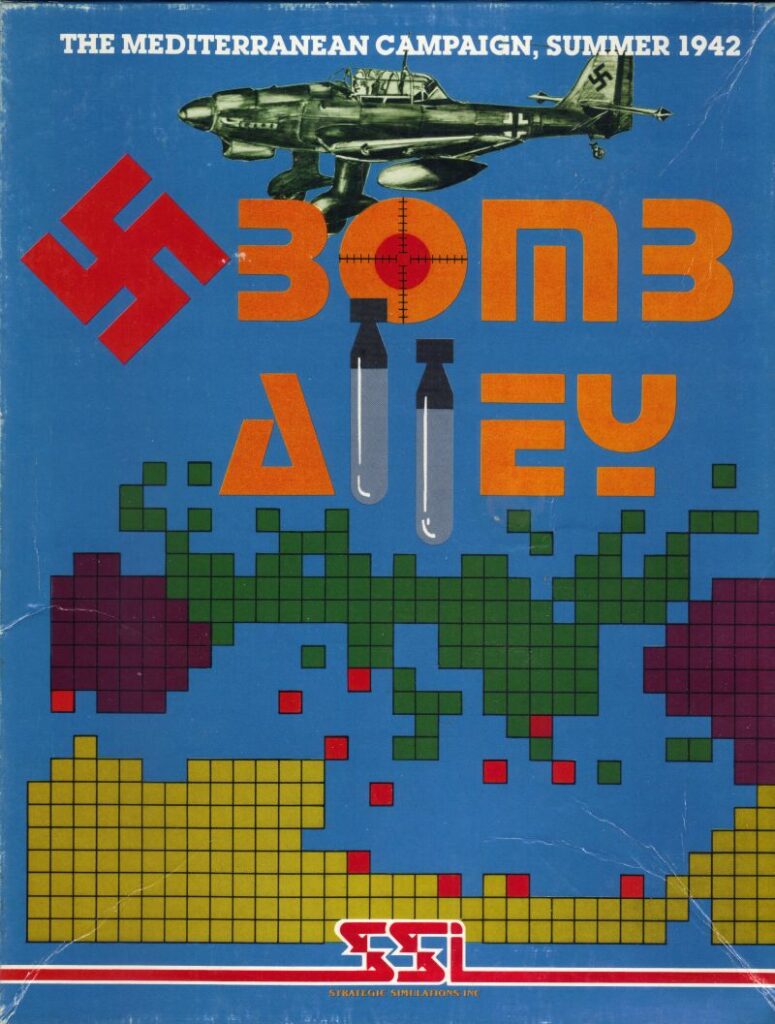
Bomb Alley is the second game by Gary Grigsby, who reused the engine of Guadalcanal Campaign and ported it to a new theater: the Mediterranean. It would be dishonest to say the game is just “Guadalcanal Campaign in Europe” – Bomb Alley has an improved ruleset, and more importantly, it has a lot more width. Guadalcanal Campaign had only 2 bases by faction, Bomb Alley has between 4 and 6. Guadalcanal Campaign had 1 objective to defend or attack, Bomb Alley has, depending on how you count, at least 3. The game lasts only 2 months and half, but there is lot more action than in the 4 months and half of Guadalcanal Campaign.
The general setting of Bomb Alley is the North African campaign, and in solitaire the player is playing the Italo-Germans. If the old adage “Amateurs study tactics, professionals study logistics” is true, then Bomb Alley is about being a professional for Rommel. The player must transport supplies, planes and men from Italy to Africa consistently enough so that the Afrika Korps can push the British 8th Army, roll over Tobruk and seize Alexandria.
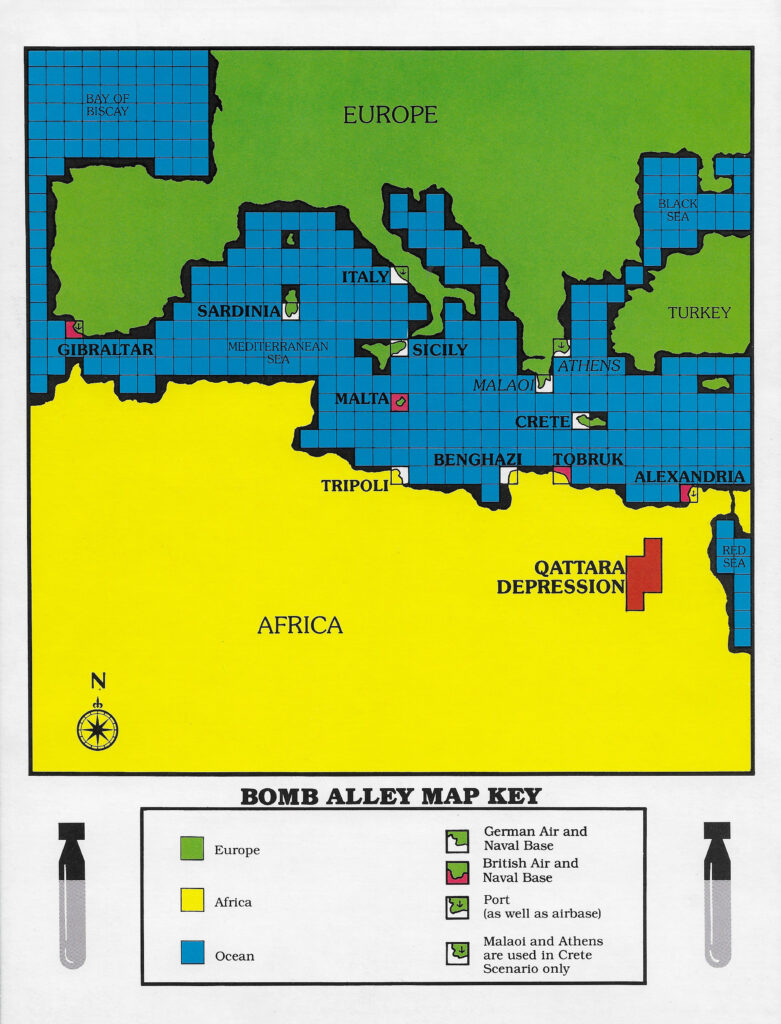
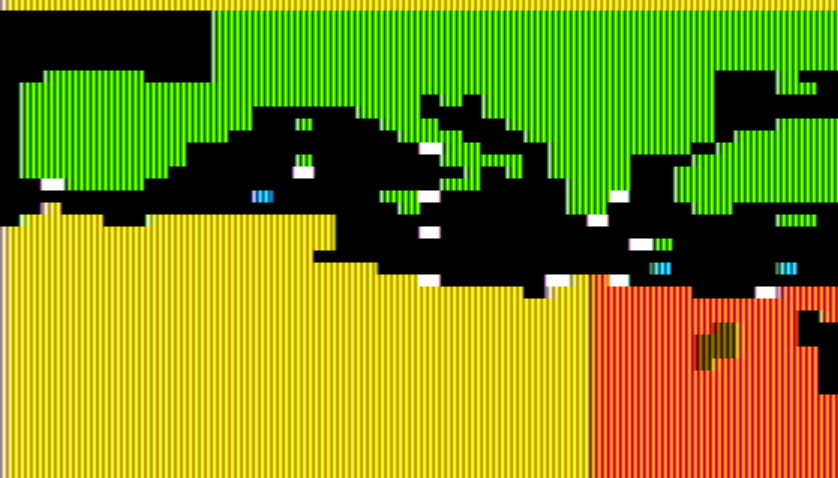
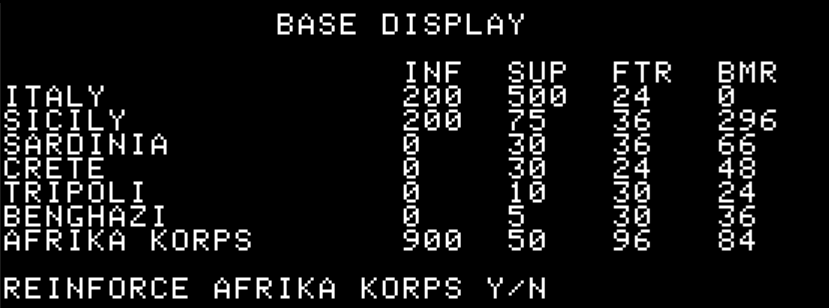
The game starts on the 11th of June 1942 with the German & Italians in control of the center of the Medditerranean. The axis HQ is in Italy, where the fleet is, and there are bases in Sicily (where most of the airforce is), Sardinia, Crete, Tripoli and Benghazi. In addition, they have the Afrika Korps, currently between Benghazi and Tobruk, with its own allotment of men, supplies and planes :
Supplying Africa from Italy would be easy, if it was not for one major obstacle : Malta, its 15 000 men garrison and its 150 or so planes. The Afrika Korps consumes 6 supplies by day by merely existing, plus 1 if under attack, plus the supplies required by its air operations and the air operations of Tripoli and Benghazi – maybe 10 a day all together. Transport planes can carry 3 supplies every day, the rest need to be carried by ships, ships that are easy to intercept from the island-fortress.
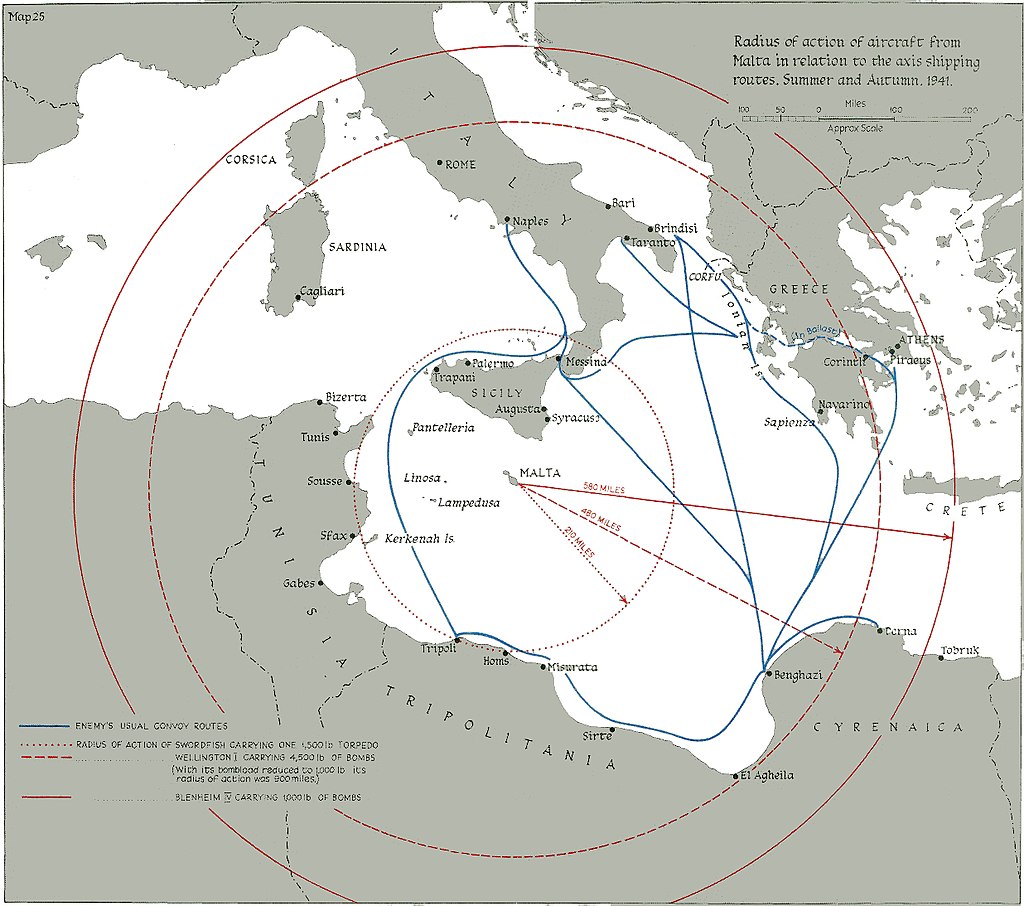
The manual says there are 3 strategies against Malta : occupy it, suppress it or ignore it and win quickly in North Africa. But holding Malta is worth 500 points for the British and 200 points for the Axis, for a total of 700 difference points, so you can be sure I am going to try to take it. Also, the game gives you paratroopers for a reason !
Malta has formidable defense (in land combat, damage to the defenders of Malta are reduced by 75%) , and seizing the island is not trivial. I only stand a chance if I manage to destroy all the Maltese supplies, as these allow the planes to fly defensive missions in addition to a flat bonus to the defenders. The problem is that unlike in Guadalcanal Campaign, naval bombardment won’t work – I can only do it from the air, brawling against 100+ Spitfire, while of course preventing supply convoys from reaching Malta.
So back to the game.
11th of June- Setting the plan in motion
I immediately assess the distribution of my planes :
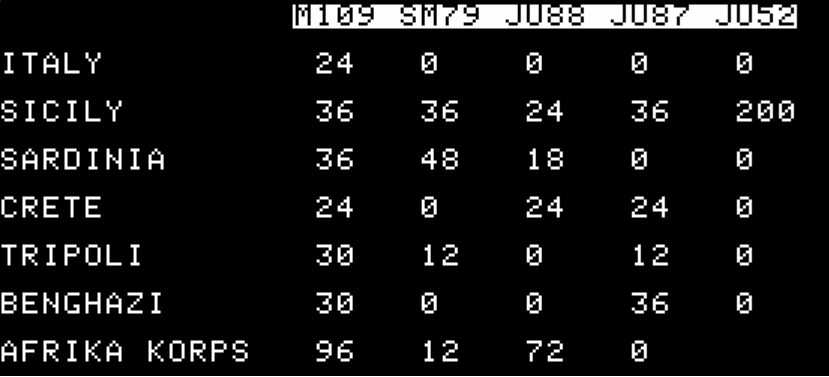
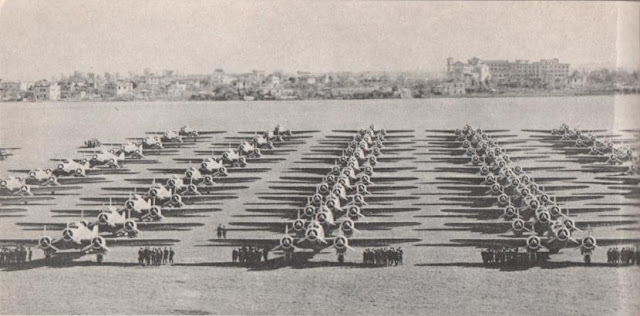
- The Messerschmitt 109 is a German fighter (equivalent to the F4F Wildcat in Guadalcanal Campaign),
- The Savoia-Marchetti SM.79 is a long-range Italian level bomber and torpedo-bomber,
- The Junker 88 is a long-range German level bomber,
- The Junker 87 is a short-range dive bomber, twice more accurate than the Junker 88, but particularly vulnerable to heavy fighters,
- The Junker 52 is a long-range transport plane, which can once by campaign do a paratrooper drop,
My objective is to challenge the British fighters over Malta by sending a few bombers escorted by a LOT of fighters. For this, I detach roughly half the fighters attached to the Afrika Korps to reinforce Tripoli, and bring the planes currently in Sardinia to Sicily.
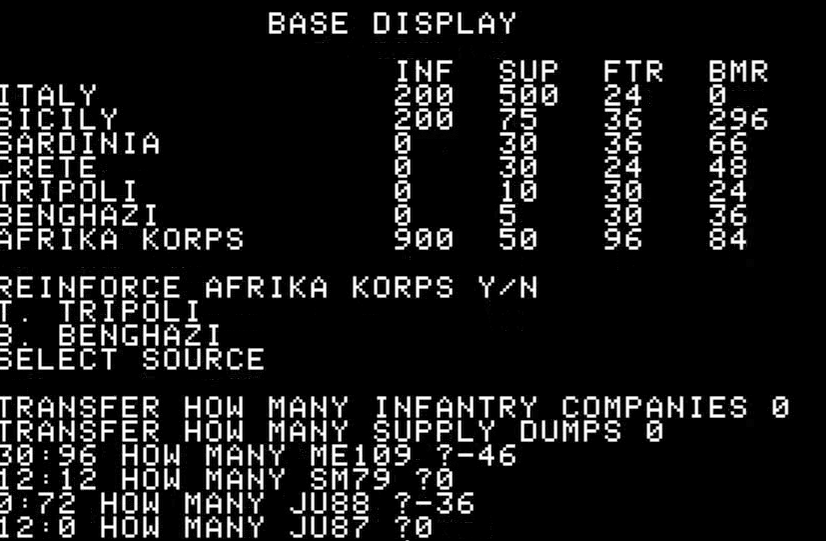
After that, the planes will fly “bombing” missions from Tripoli and from Sicily almost every day. Of course, those bombing missions will be 90% fighters, as my real objective is to shoot down the British Spitfires :

While I am trying to take Malta, I need to reinforce and resupply the Afrika Korps. I don’t really want to attack now and stretch my supply line even more, but I may have to take Tobruk quickly, as it is the only place from which the British can reinforce Malta with fighters.
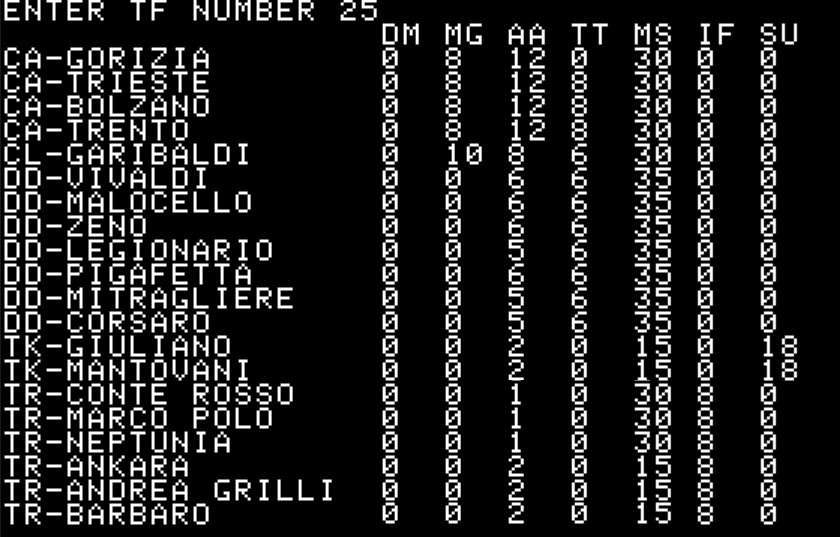
Here is my first convoy, with tankers (TK) carrying supplies (SU), and transports (TR) carrying infantry (IF). It is escorted by destroyers (DD) to fend off submarines, cruisers (CA and CL) to defend against bombers,
Of course, the Brits have their own plans, the first of which is to resupply Malta. I detect a convoy coming from Alexandria in the East the 11th already (the historical Vigorous convoy) and another coming from the West the 12th (the historical Harpoon convoy). Together, they constitute Operation Julius, the first attempt to resupply the island I will have to fend off.
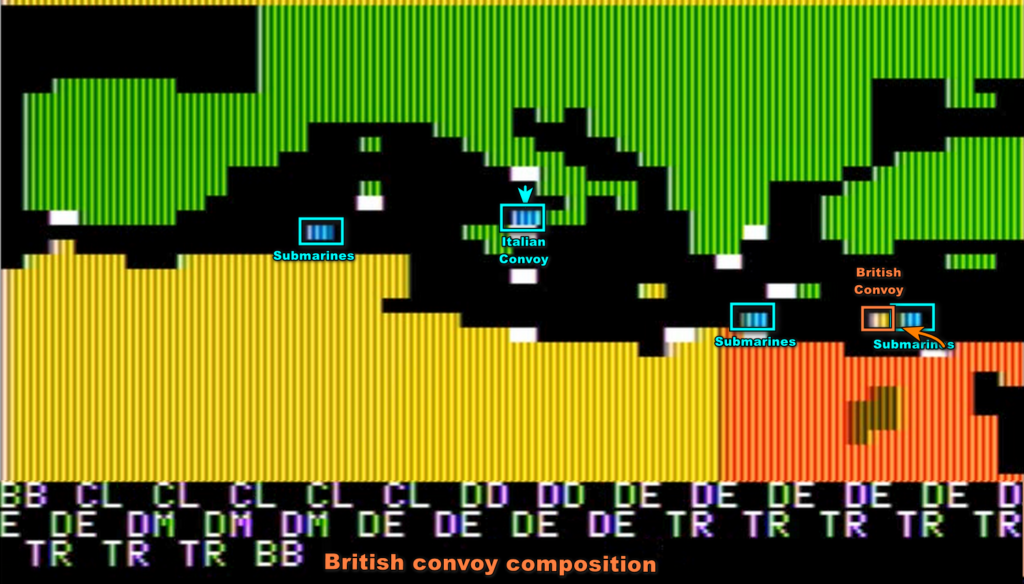
12th of June to 16th of June – Operation Julius
Starting the 12th of June, I have too many things to do: attack Malta, maintain an air cover over the Afrika Korps and destroy two convoys.
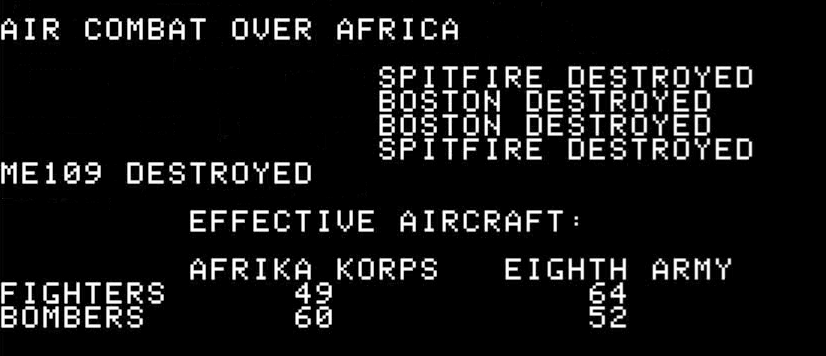
Let’s focus on the “wreck convoys” part. I very quickly feel like I have the Eastern “Vigorous” convoy under control : I have u-boat packs in the area, planes from Crete and from Benghazi. The night of the 11th already, my submarines torpedoed the transport City of Calcutta – it sank on the 12th – checking the manual (and Wikipedia), there are 10 more transports to go.
My pilots from Crete are the first to discover something new : a transport Battleship. The HMS Centurion was an old pre-WWI battleship, veteran of the battle of Jutland, obsolete already during the interwar period and converted to a target ship, but pressed back into service at the beginning of WWII. The main guns had been removed at that point, but the Centurion received a bunch of AA guns, 2000 tons of supplies for Malta and fake wooden turrets to masquerade as the modern King George V-class HMS Anson. It did not fool the Italians.
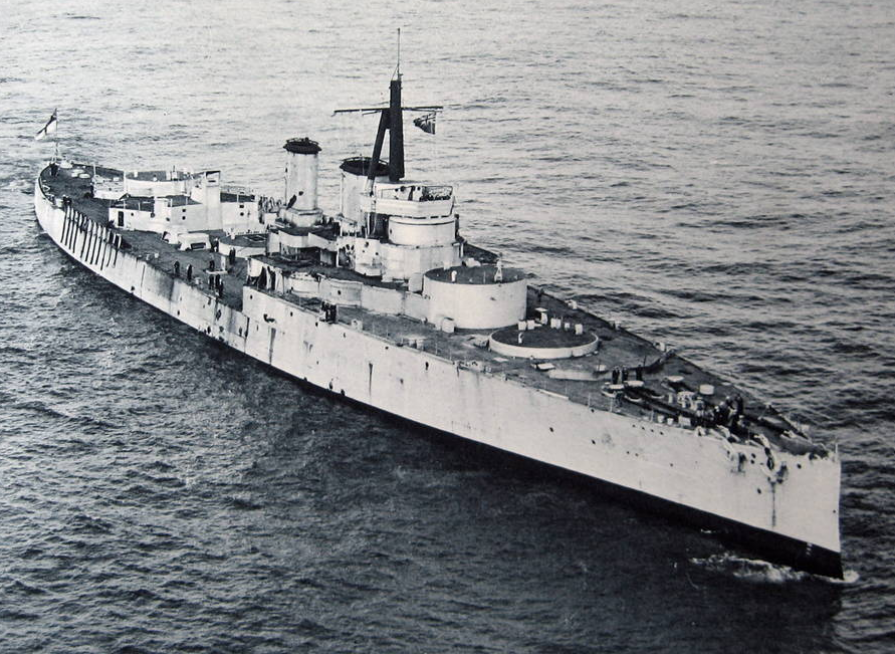
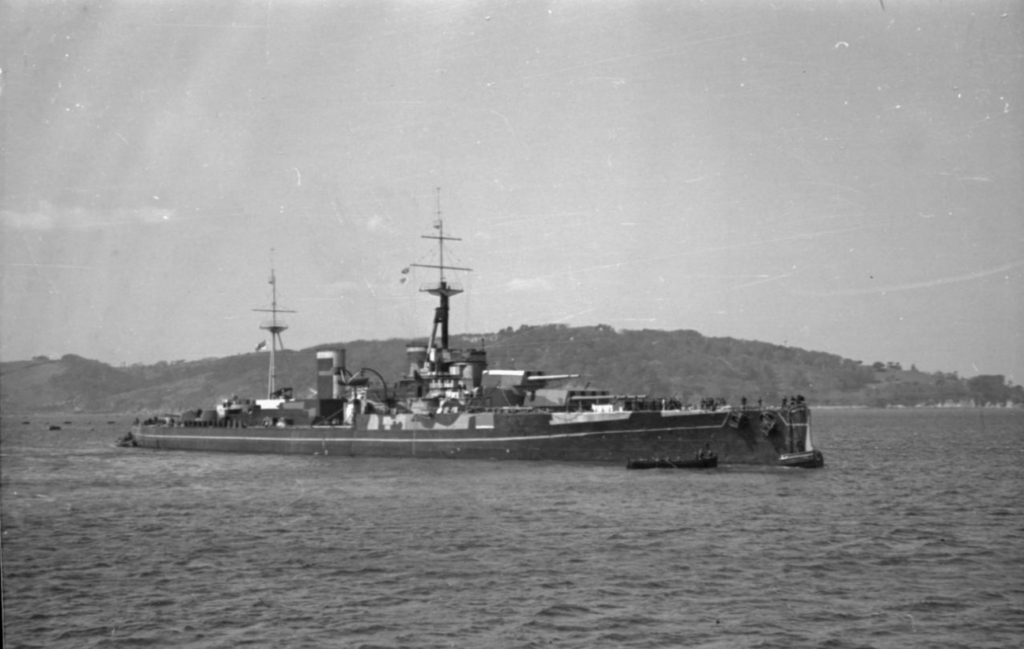
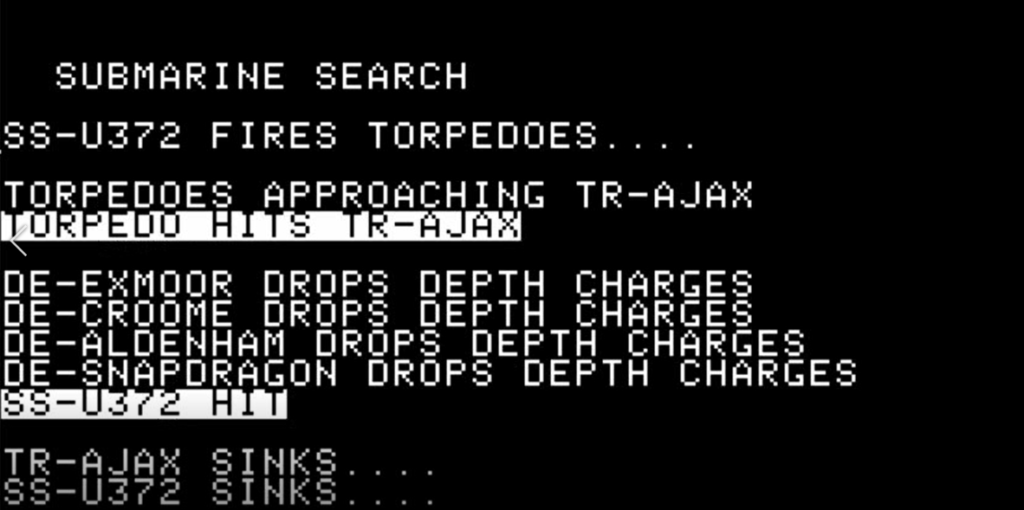
In any case, the HMS Centurion is certainly acting like a giant magnet for my bombers, and it is attacked by a large number of my bombers. Still, there are planes and submarines for everyone. By the end of the 12th of July, the transports Potaro, City of Pretoria and Bulkoil, in addition to the anti-air cruiser Dido, are all sunk, several other ships are damaged, including the Centurion who received both bombs and torpedoes. On the 13th, the convoy would lose the transports Rembrandt, Ajax and Aagtekerk, at the cost of a few planes and one unlucky German submarine. The transport Elizabeth Bakke is so damaged it is forced to turn back. Finally, the morning of the 14th, the cruiser Arethusa is sunk, a couple of the remaining transports damaged, but finally, Malta is within sight.
Meanwhile, the Harpoon convoy coming from Gibraltar initially faces less hostility : I had removed my planes from Sardinia, and most of the local Axis submarines are Italian – much less efficient than the German ones. As I cannot spare the planes, I decide to sortie two fleets the night of the 12th : a torpedo motorboat (MTB) fleet and a surface fleet including my two available battleships : the Littorio and the Vittorio Veneto.
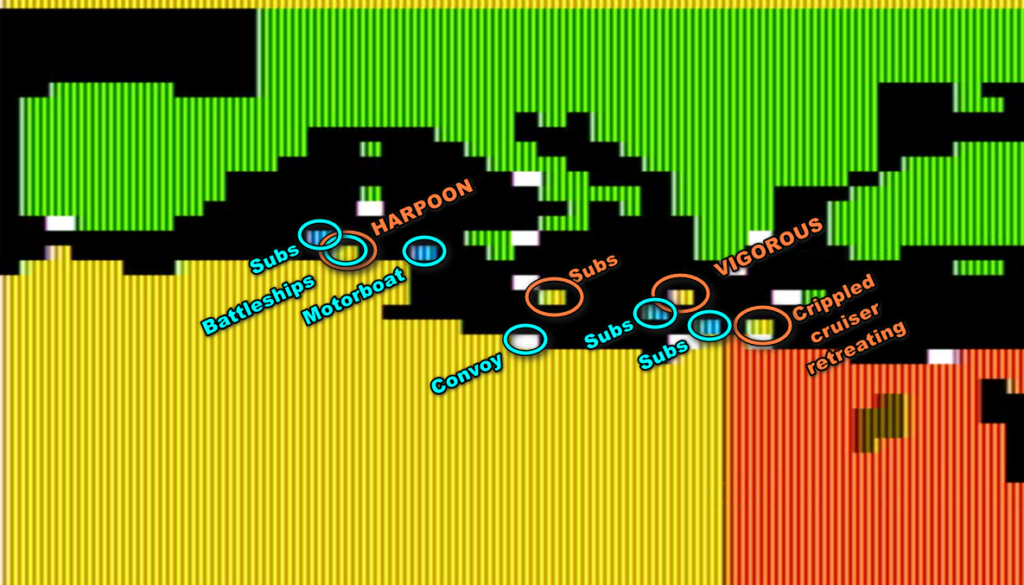
As I know the speed of the British convoy, I know exactly where to position my surface fleet to intercept it, and on the morning of the 13th my battleships attack !
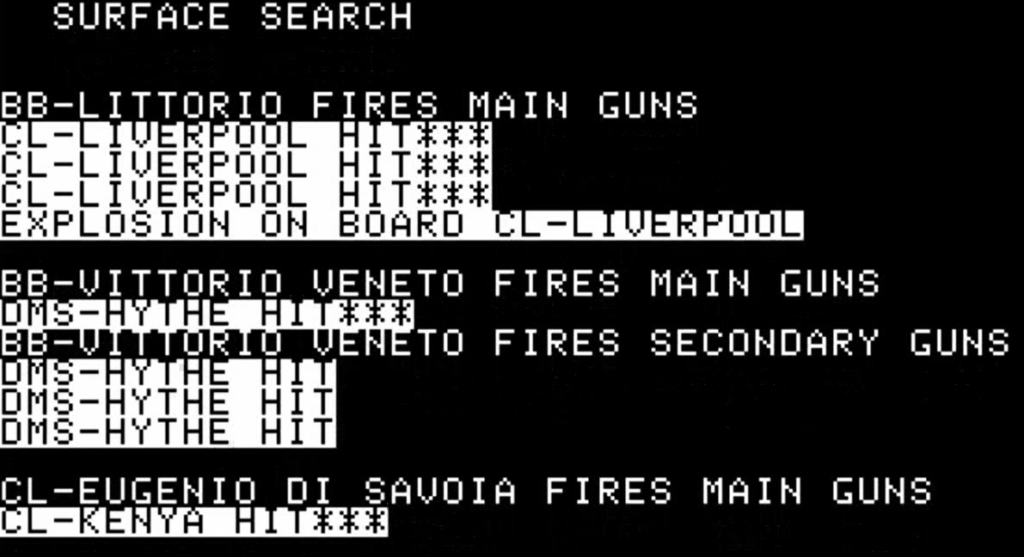
The light cruiser Kenya and the minelayer Hythe are sunk immediately. A large chunk of the rest of the escort is crippled, starting with the light cruiser Liverpool. The transport ships receive minor damage, but they carry on. As for my ships, they received only minor damage.
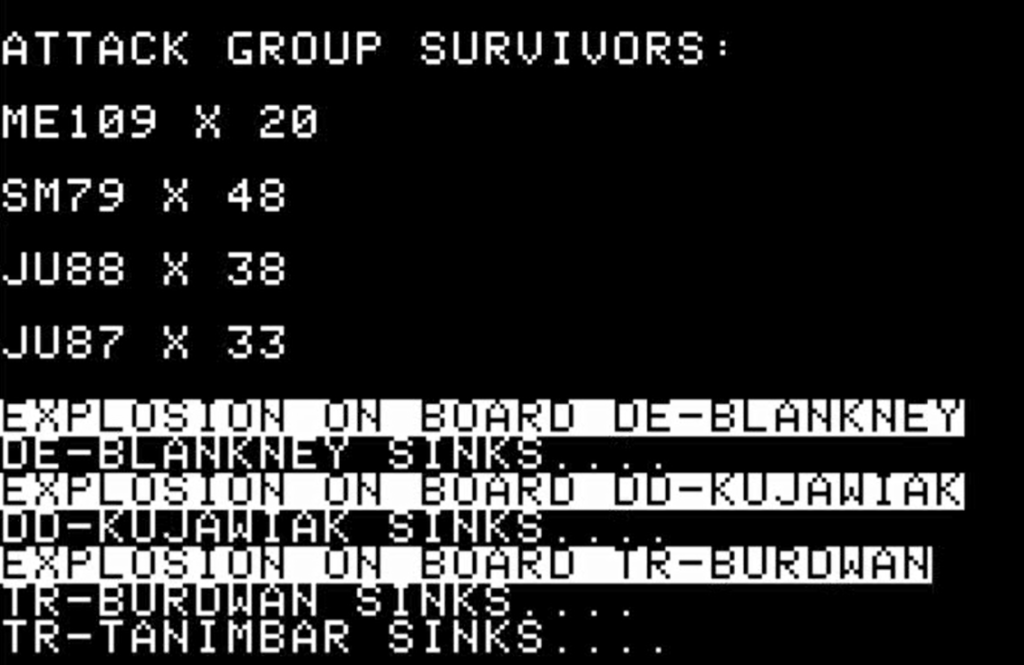
There is a glimpse of hope for the Harpoon convoy though, as I miscalculate their following (night) turn and don’t engage them in surface combat. But the morning of the 14th, I decide to stop bombarding Malta for a turn and to rerout my bombers to them :
The night of the 14th, the Vigorous convoy reaches Malta, but hasn’t docked yet – so I have one last opportunity for surface combat. My fast motorboats, which missed the Harpoon convoy, can’t miss the ships in the port of Malta :
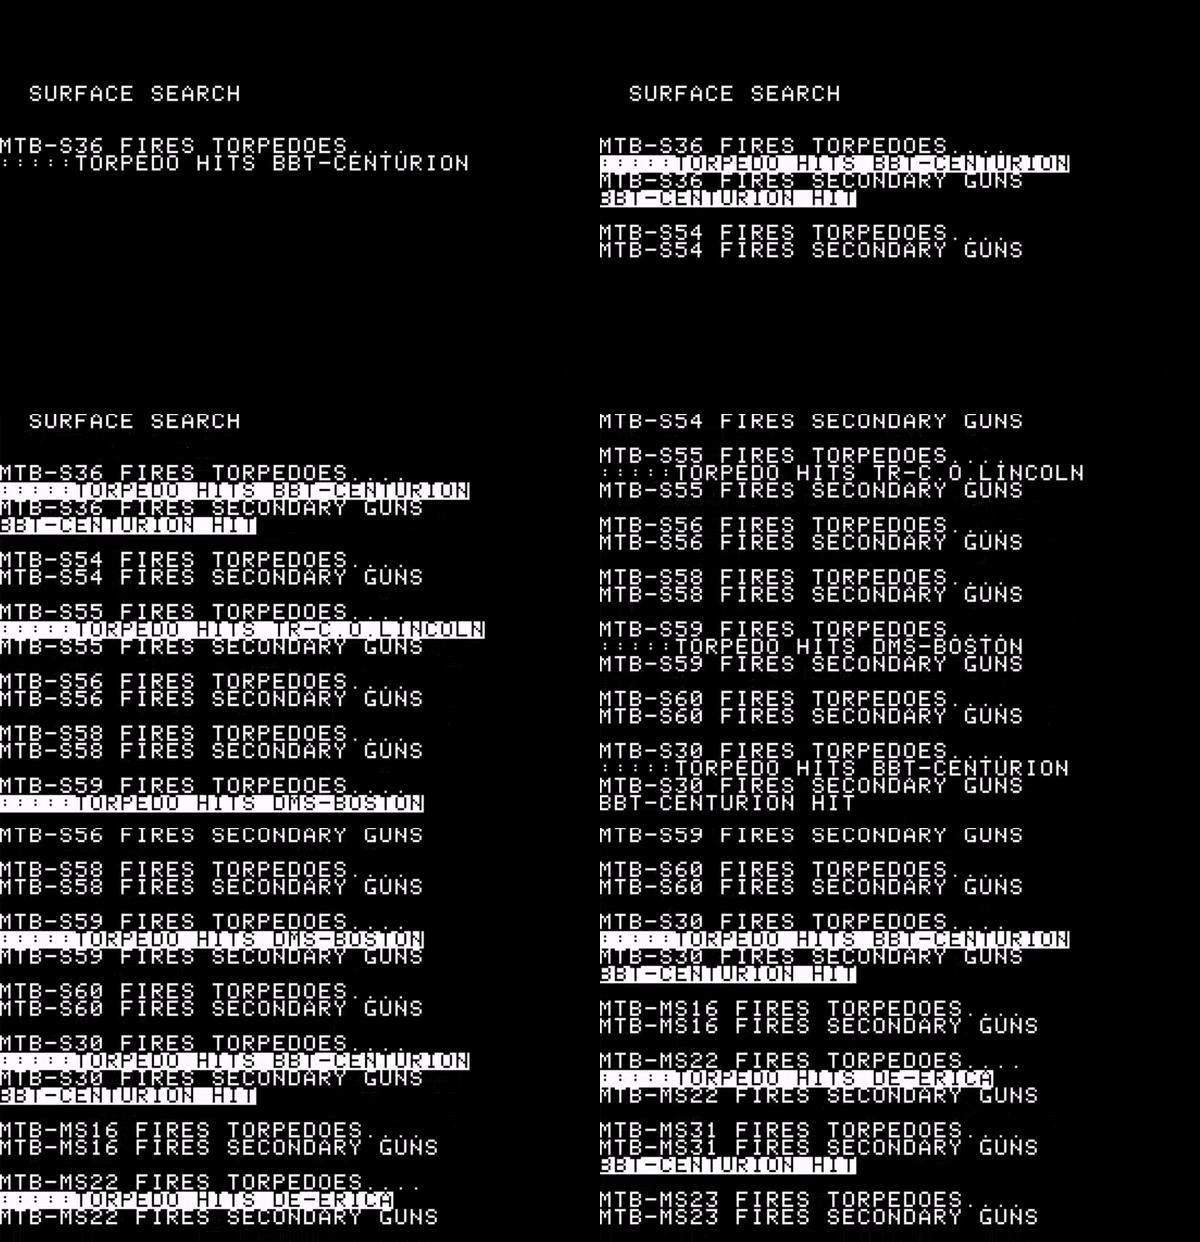
And right there, the Centurion is sunk, sadly not blocking the port. The rest of the fleet docks.
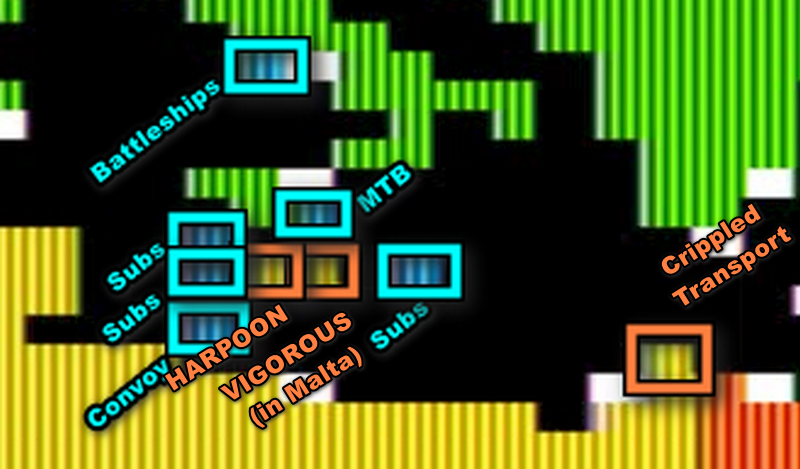
Docked ships are protected from surface attacks, but not air attack. There is still one turn, the 15th, before the ship can unload, where I can act with bombers from Sicily, sinking one last transport.
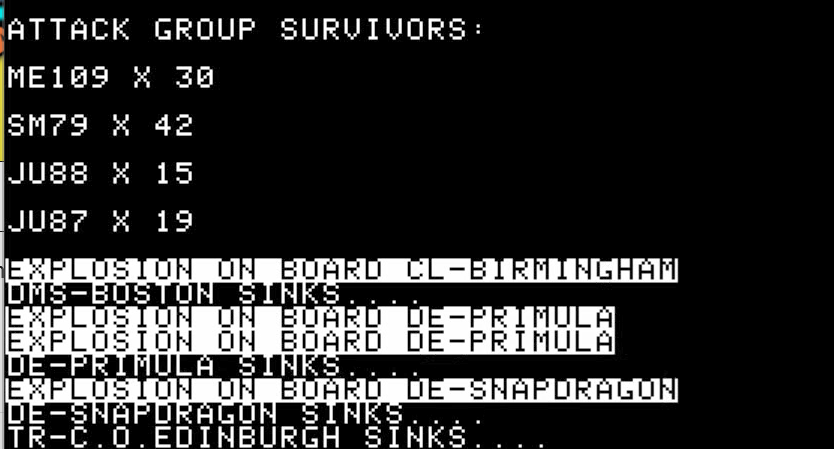
That’s it for Vigorous : out of 11 ships, 2 made it to Malta (the Bhutan and the City of Lincoln), delivering 10 supplies.
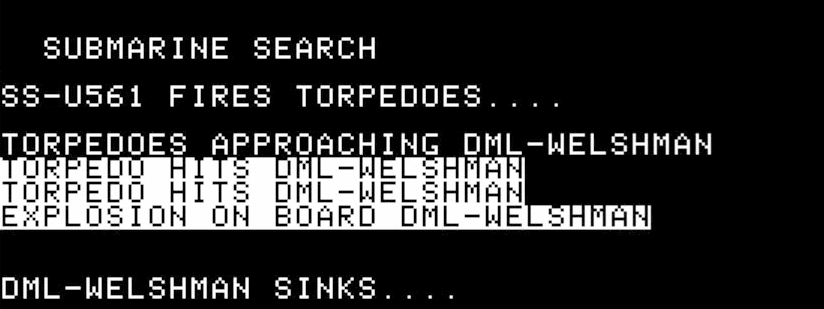
As for the Harpoon convoy, it is still 4 ships strong, but not for long. At this point, almost all my submarines are in the area, and it loses the tanker Kentucky and the heavy transport Orari to submarines, leaving only the Troilu and the Chant to load a total of 10 supplies as well.
Overall, the British performed better than historically, and their supply level ends up higher than it started with (25 supplies initially). Still the number of small of medium ships I destroyed is staggering :
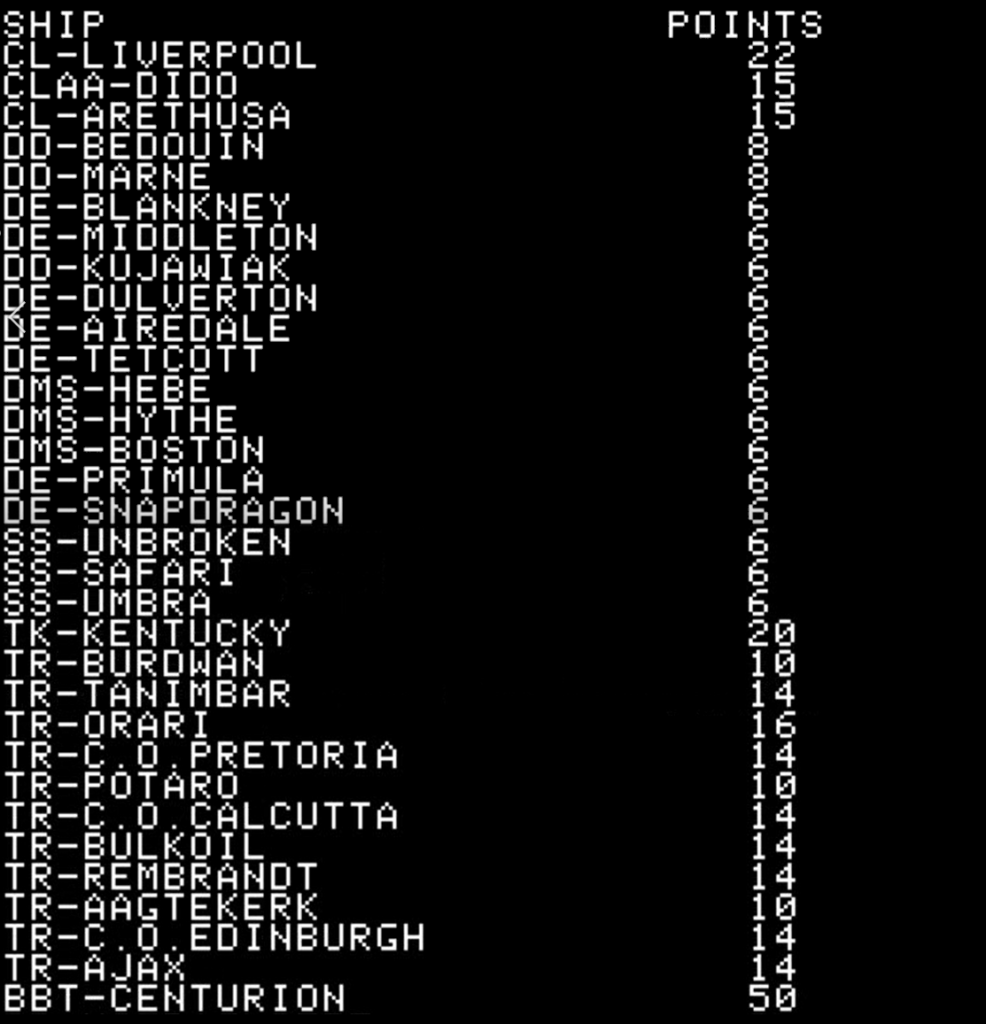
Moreover, even though I will be focusing again on bombing Malta in the following turns, only one of the transports (the Bhutan) will pass the gauntlet in the other direction.
The British were themselves active : while they only managed to attack my convoy from the air once, sinking a destroyer, the British submarines had a field day :
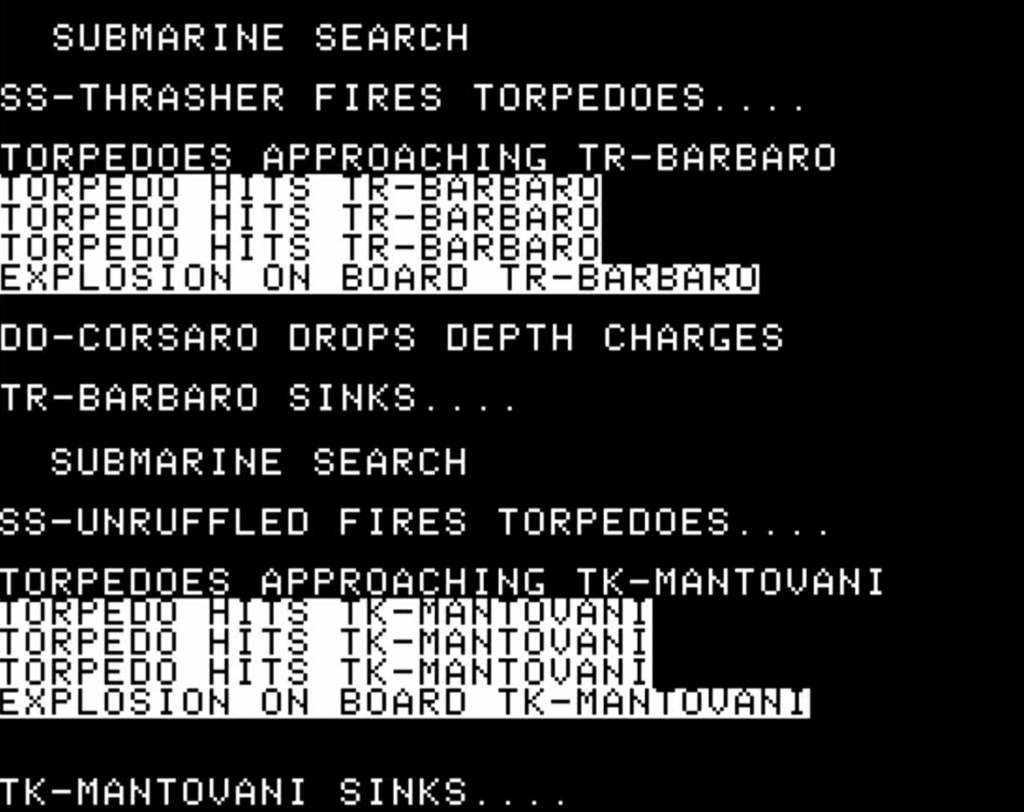
The sortie of my battleships represented another opportunity for the Royal Air Force to shine. Its planes crippled the Vittorio Veneto as it was trying to intercept Harpoon a second time :
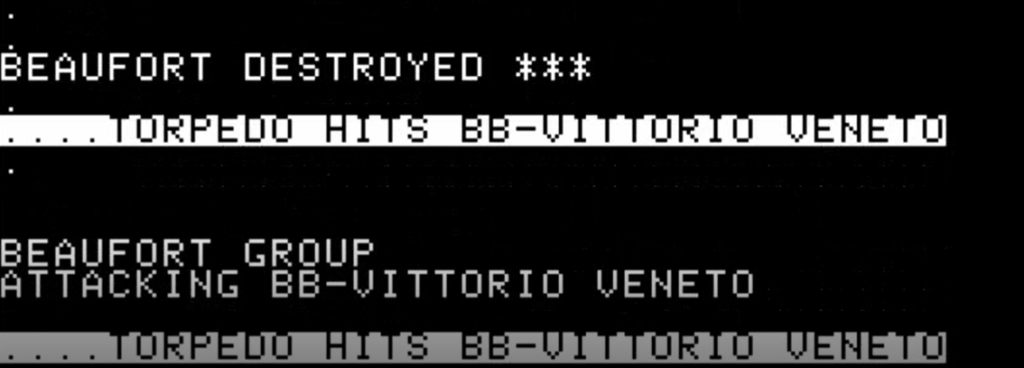
When the battleships returned to Italy, experts reported that the Littorio would be repaired within 2 weeks, but the Vittorio Veneto would need more than 2 months of repair – it was pretty much out for the duration of the campaign. Still, the Italian fleet had prevailed, and its losses were minimal :

17th of 19th of June – A new approach
Malta has been resupplied, but it has not received new fighters – yet. That’s the next logical step, so despite Malta still having a good number of fighters, I give all I have to destroy the supplies on the ground, from the 16th already. This means depleting the Afrika Korps almost fully :
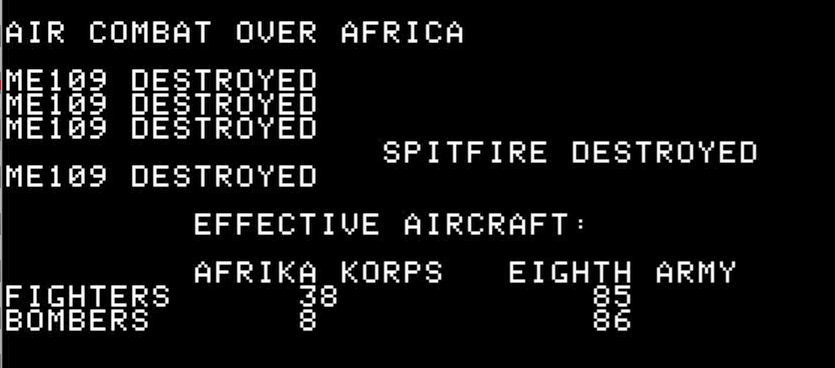
The British have not been very aggressive in Afrika, so I hope they don’t push forward. But in case they do, I also fully evacuate Benghazi, so I can afford to retreat if needed. I also bring back my planes from Crete, after a last mission to finish off the crippled transport Elizabeth Bakke.
And then I attack Malta with all my bombers – at this point the objective is not to shoot down the fighters, but to destroy the supplies before more fighters can arrive :
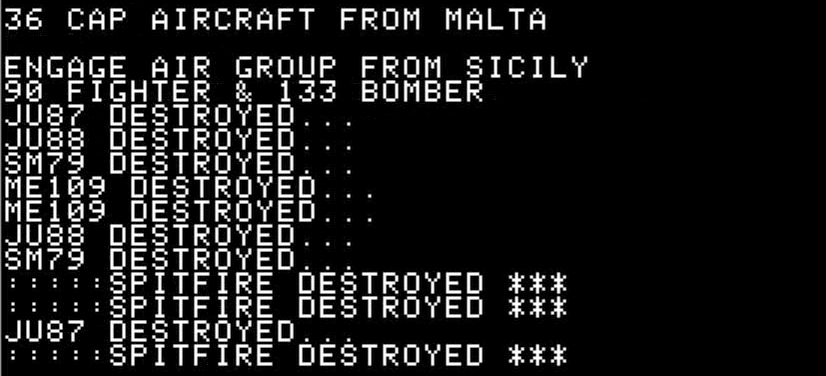
The losses are massive (bombers, in particular Ju-87, are easy targets for the Spitfires) but in a couple of days I manage to destroy some 20 supplies. The AI does not have the time, nor the will, to transfer its fighters to Malta, nor does it push particularly hard in Africa. In only a couple days, Malta loses maybe 15 supplies, and is put back in the danger zone – at the cost of close to 50 planes on my side. Meanwhile, I give my submarines the task of harassing the remnants of the Harpoon and the Vigorous convoys as they return to their ports. As I said, I intercepted all the remaining transport ships except one, but also several cruisers (the Birmingham, the Hermione and the Cleopatra).
Speaking of submarines, all my submarines having followed the convoys, they are now together in the center of the map, where they were reinforced by extra submarines from Italy. In total, I have 36 submarines around Malta. On the other hand, it seems like the British have a lot of them too in the area, and they will wreck any convoy I send to Africa, and I cannot allocate the planes to find and destroy them anymore. But reading the rules, I have a very efficient solution :
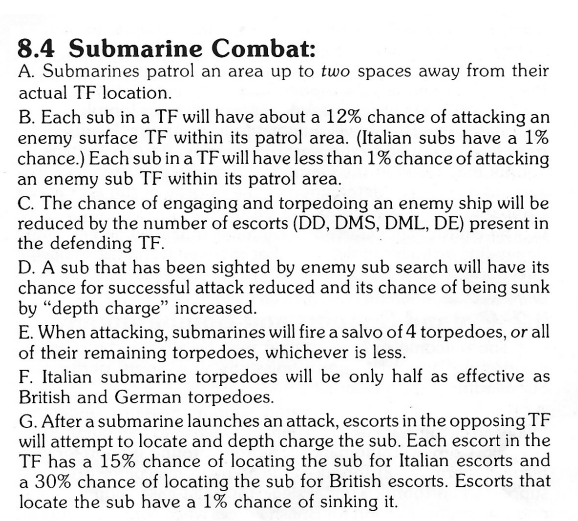
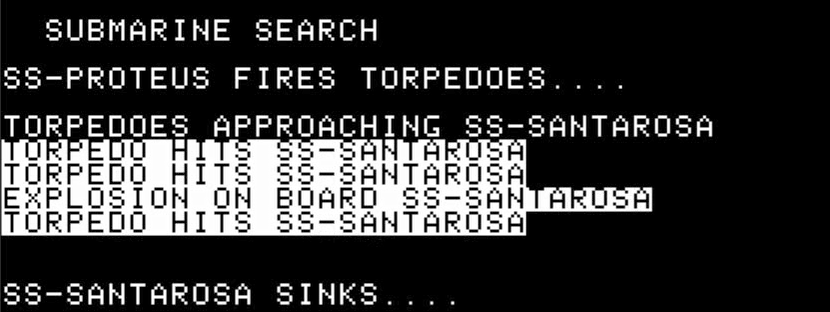
You see, a submarine has only “less than 1%” of chance of finding an enemy submarine, but if she finds one, the latter is dead as chance to hit a target depends on “the number of escorts”, and of course submarines have none. But 24 of my local submarines are Italian, and Italian submarines have only 1% chance to find a surface convoy anyway. Plus Italian torpedoes do half-damage, but half-damage is always still enough to sink a hostile submarine. This means that the Premier way to sink English submarines, especially when my bombers are occupied with Malta, is to use Italian submarines : I have a lot of them, and there is no opportunity cost as they are just as bad at sinking submarines as they are at sinking surface ships. From now on, all my Italian submarines are dedicated submarine hunters, while my precious German submarines will focus on shipping.
20th to 22nd of June – Operation despair
On the 20th, as I am chasing the last remains of the Harpoon convoy, my scouts detect two fleets approaching Malta :
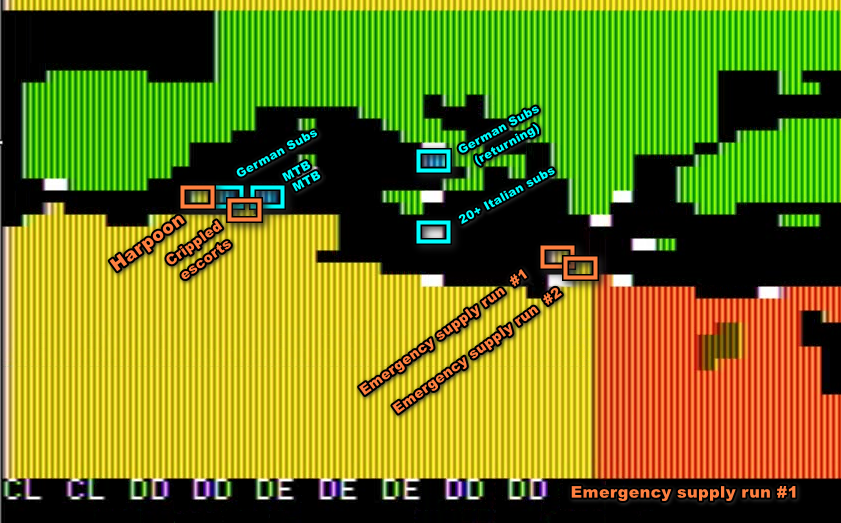
Those two fleets (one with cruisers and destroyers, the other with only destroyers) seem to be a (unhistorical) “Emergency Supply” run, a new mission-type in Bomb Alley allowing any type of ship to carry some limited amount of supply, at the cost of greatly diminished combat capacity. Given the speed of these fleets, they will reach Malta the evening of the 21st – if I had kept planes in Crete I would have had more forewarning.
My reaction to this new development is… to carry on attacking Malta. There are only a handful of fighters left, and once the last supplies will be destroyed these will be grounded too, and I will destroy them with bombs as well :

And according to my intelligence, that last raid made the difference :
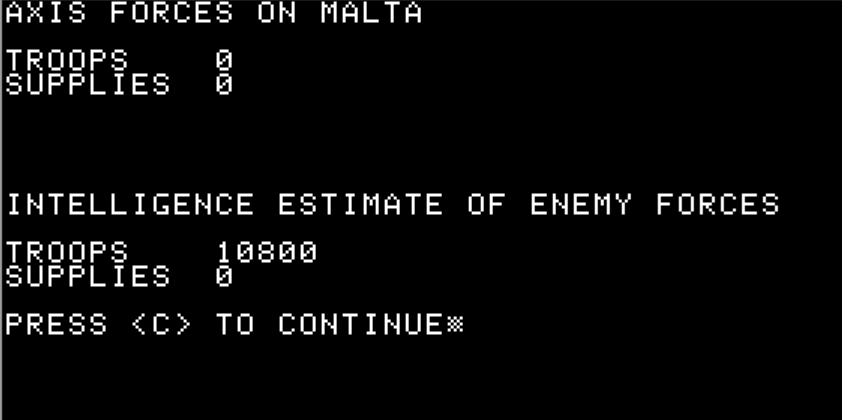
And indeed, the 20th was the last day of resistance. On the 21st, just as the enemy fleet arrived my bomber raids destroyed the British Spitfires on the ground – it is much easier that way !
To unload its supplies, the Malta-Express has to pass a gauntlet of submarines and then motorboats, which cost them 4 ships to finally deliver their supplies the night of the 21st…
… supplies I fully destroyed from air the morning of the 22nd.
And with that, I can now prepare the last part of my plan to conquer Malta.
23rd to 28th of June – The Battle of Malta
The night of the 21st already, a large of transport ships filled with supplies had departed from Italy. The morning of the 23rd, it was in front of Valetta. I cand now send my 20 000 Fallschirmjäger :
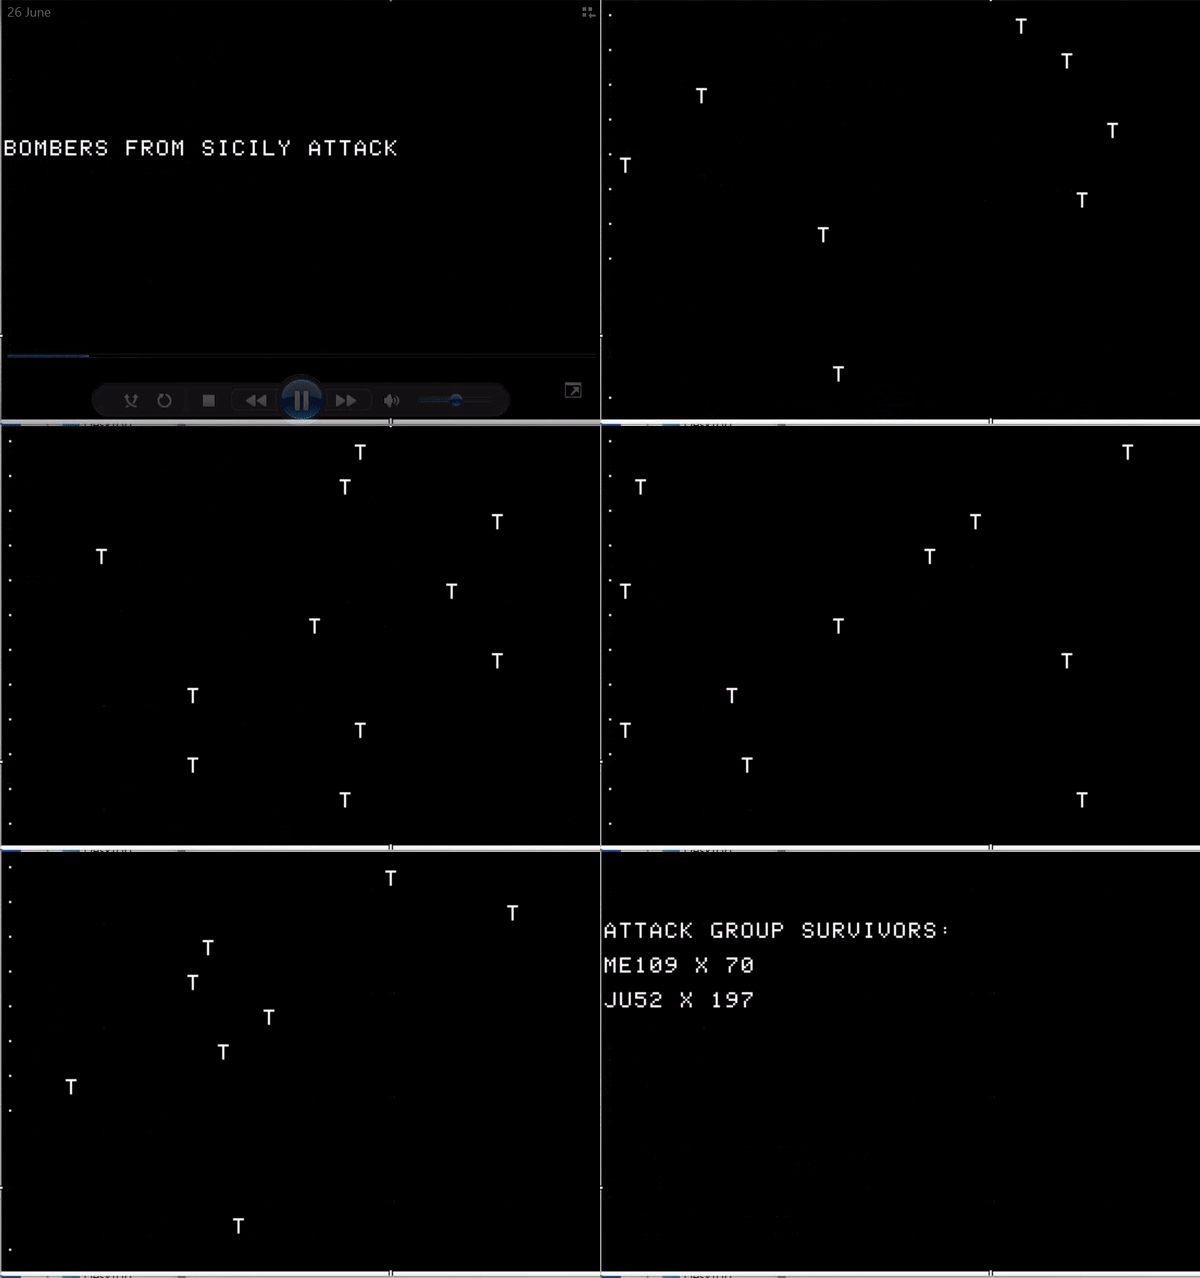
Using supplies coming from the transport ships and close air support coming from bombers in Sicily I assaulted the English lines, causing the first losses :


On the 24th, I have got a bit of a surprise : an enemy fleet is on this way, with what looks like a battleship inside. It is probably a fleet with a bombardment mission, which could alone counter-balance a large part of the effect of my close-air support.
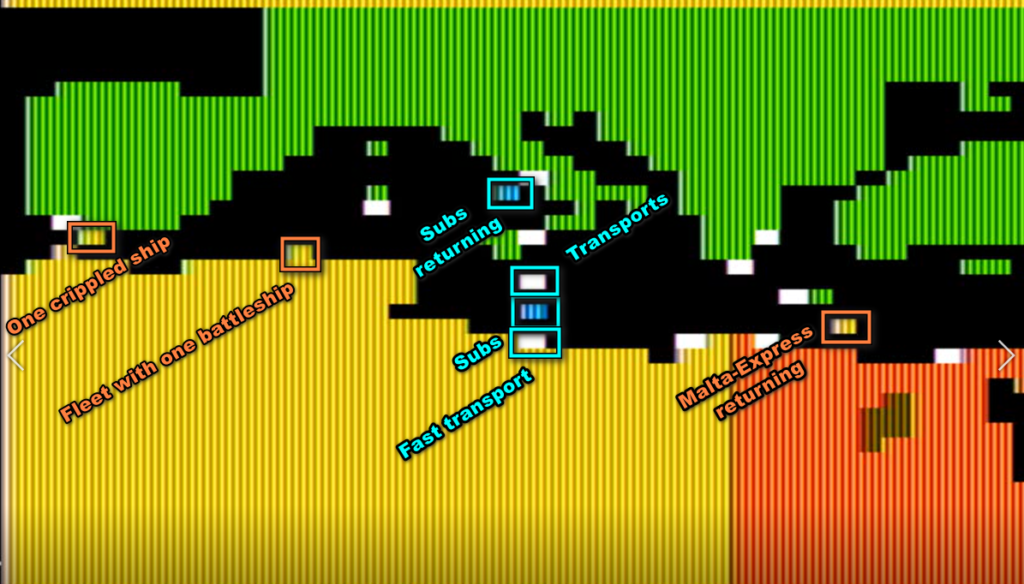
Of more immediate concern, the British submarines are absolutely wrecking my transport ships and their escort : I lose the transport Ankara and the light cruiser Montecuccoli.
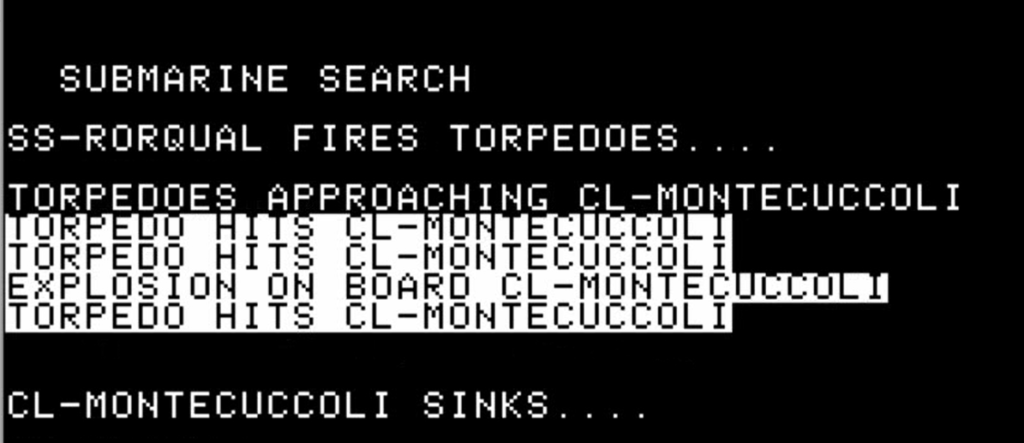
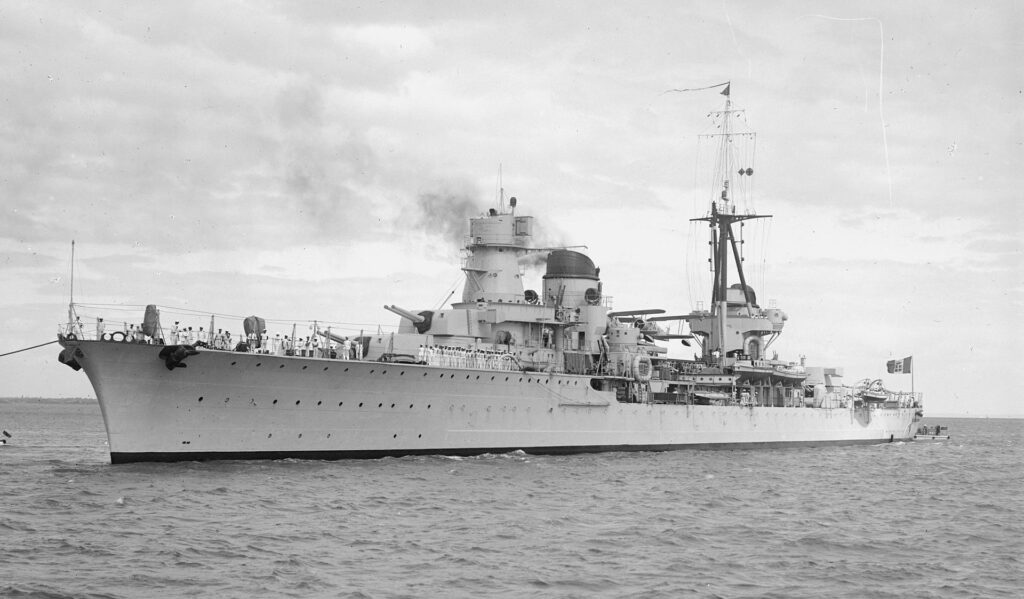
The night of the 25th though, my battleship problem almost immediately ends : two German submarines manage to hit the enemy battleship, the HMS Malaya, with a total of 3 torpedoes. Immediately after that my motorboats attack :
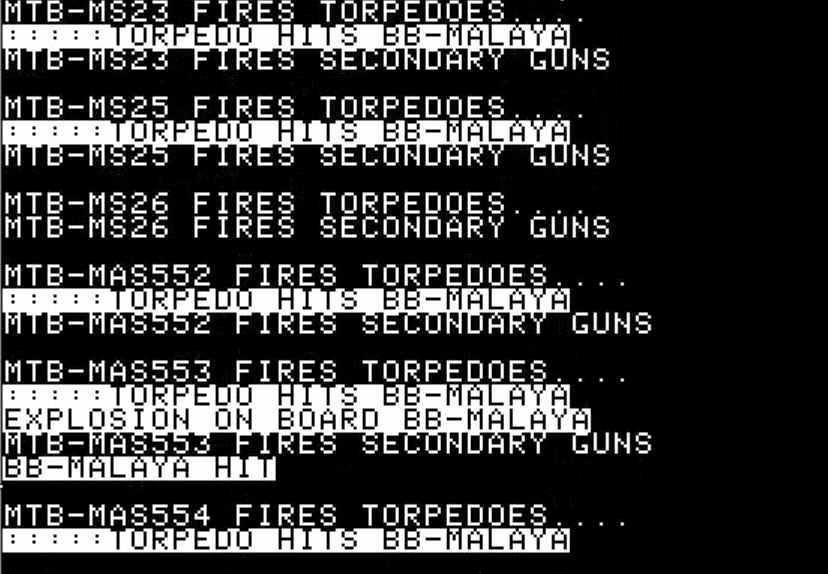
And, of course :

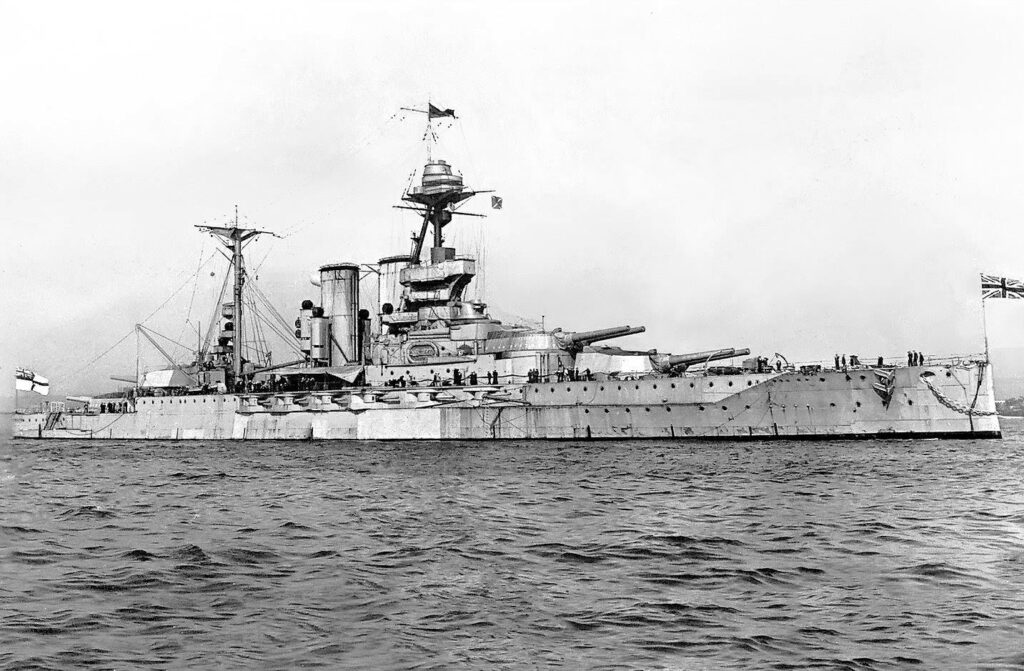
For the cost of one torpedo ship, the HMS Malaya is sunk one day and half after entering my game.
The English fleet carries on its route to Malta, but it is toothless – bombardment mission with light cruisers is ineffective, all it does is give me opportunities to add more victims to the tally of my submarines : the light cruiser Charybdis and later the light cruiser Cairo, plus a lot of destroyers. Meanwhile, I sortie my own ships for naval fire support, to compensate that some of my bombers have been reallocated to attack the English fleet :

And finally, the 28th :

The future
Malta is taken, and I can now focus all my efforts on Africa. The situation there, though, is difficult. I was afraid of the British submarines and of the Maltese bombers, so I only tried to resupply Tripoli with my five fast transport ships (30 knots, compared to 15 knots for normal transports) that followed a long route West of Sicily, but still were vulnerable in their final approach. As they got damaged, I had fewer and fewer fast ships available, and the Afrika Korps is starving :
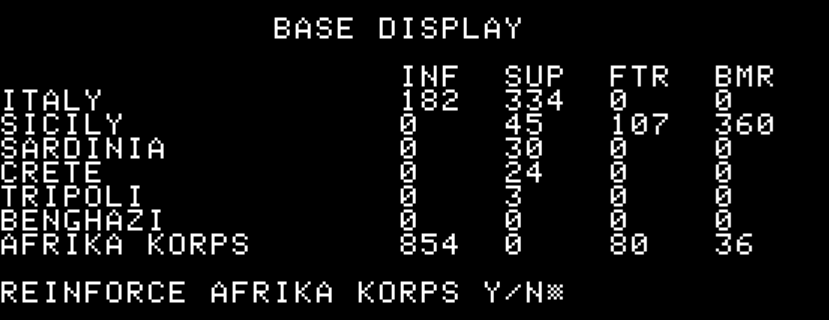
There is still a trickle of supplies brought by planes, but I need to send Emergency Supplies as soon as possible.
In the air, the conquest of Malta has been costly : I had started the campaign with 276 fighters, I am now down to 187 in total. Worse, out of my 354 starting bombers, I am now down to 193 – most lost during those final assaults against Malta.
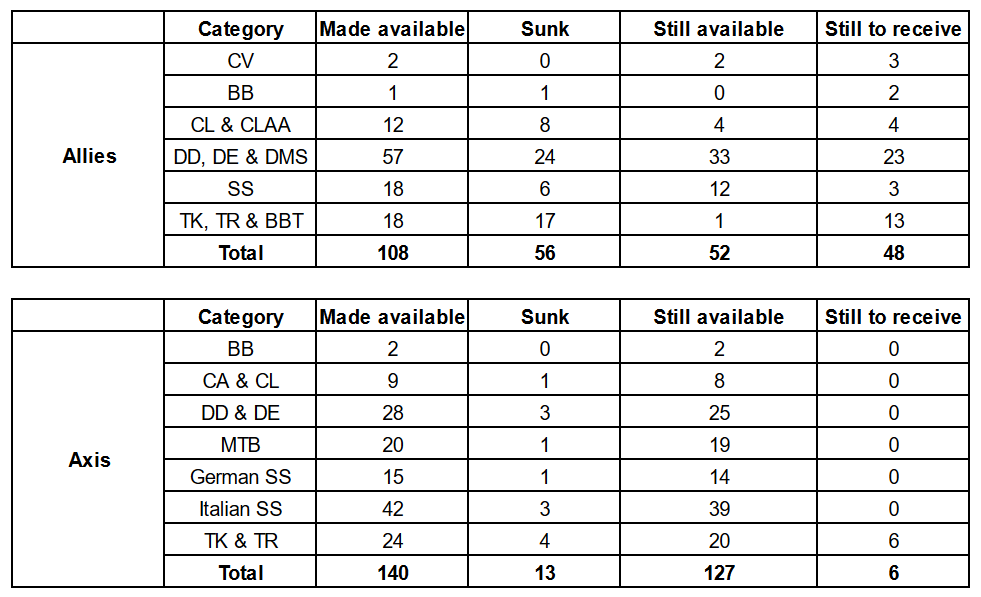
The good news is that I’ve sunk a staggering amount of British ships – pretty much half their available fleet actually – for minimal losses on my side.
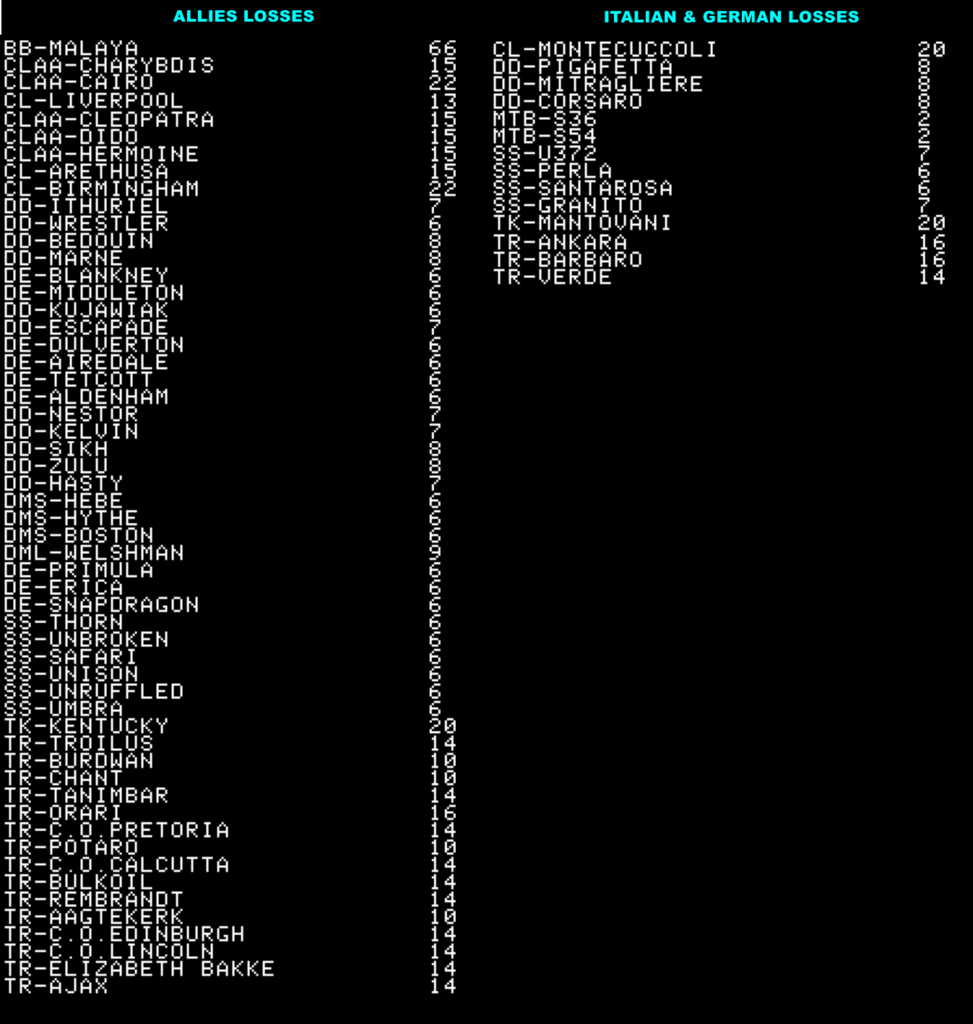
Of course, the British are still going to receive the massive reinforcements corresponding to Operation Pedestal… but that will be in almost one month and a half, and there is no more Malta to save anyway. For now, their only assets are their 2 carriers, so far mostly hanging around Gibraltar
As for my personal experience, the game is lot more action-packed than Guadalcanal Campaign, there is almost no turn without combat of some sort. While the AI is not really smart (it missed opportunities to push in North Africa or to reinforce Malta), at least it does not feel bugged and inactive like it was in Guadalcanal Campaign. If it carries on being passive, I will easily reinforce the Afrika Korps, and maybe push to Alexandria before the reinforcements ever come. If the AI wakes up, all of that may turn out different.
Total hours played so far (campaign only) : 3 hours 40 minutes