[Color Computer, Ark Royal Games]
– Phil! I coded a wargame that you will love! It is about the Desert War campaign in WW2. You control the Axis and race toward Alexandria with your Panzers while the Luftwaffe opens the way!
– I love to hear that, Carl! Speaking of North Africa – I went to Tunisia recently! Great place! There is a desert there too, you know. You should definitely put it into your game. You just need to adapt the map a bit.
This is pretty much the only way I could imagine this game came to be.

Ark Royal’s Battle for Tunis is quite a surprise! The WW2 North African front has been less popular than I imagined with developers with only two titles thus far: Knights of the Desert and Bomb Alley, and even then the latter focuses on the naval aspect of the war. Within the larger Desert War, the battle for Tunis (aka Operations Vulcan and Strike in April-May 1943) would not have been my first choice either: it is the final phase of the Tunisian Campaign (November 1942 – May 1943), itself the final phase of the Desert War. There is nothing at stake as everyone knows nothing can save the Germans and Italians surrounded and blockaded in Tunisia.
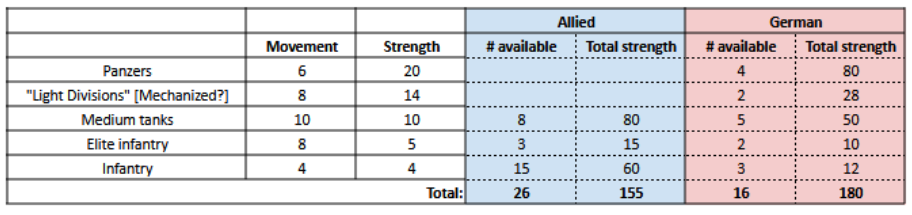
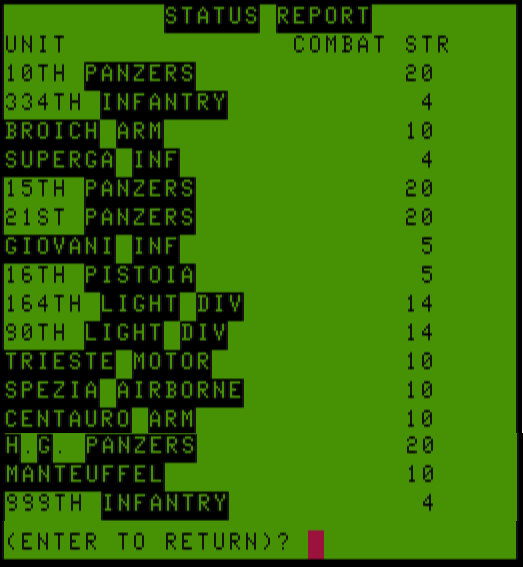
On the Axis side – the only one available in solitaire – the objective is simple: with a mix of German and Italian forces, the player must prevent the Allies from reaching Tunis for 15 turns. This is a challenging task, but not because of the balance of force. Historically, the Axis was on its last leg, with maybe 200 tanks or fewer between the Italians and Germans against more than one thousand (generally better) Allied tanks. In Battle for Tunis however, it’s springtime all over again for the Axis: the German-Italians field more and better tanks than the Allied and the massive number of Allied infantry units does not compensate for this gap. Cherry on the top, the Germans can somehow count on limited air support while the Allies have grounded their thousands of planes for no reason at all.
The real problem is that Carl Carpenter’s Battle for Tunis uses the same engine as his later Battle of the Bulge so there is no zone of control. The terrain is large and mostly desert (1 movement point/square), with a few patches of mountains (2 movement points/square) here and there. The British, Americans, Canadians, Indians, Moroccans, Algerians, Neo-Zelanders, South Africans and Australians are all racing toward Tunis, and there is barely any natural obstacle to slow them down!
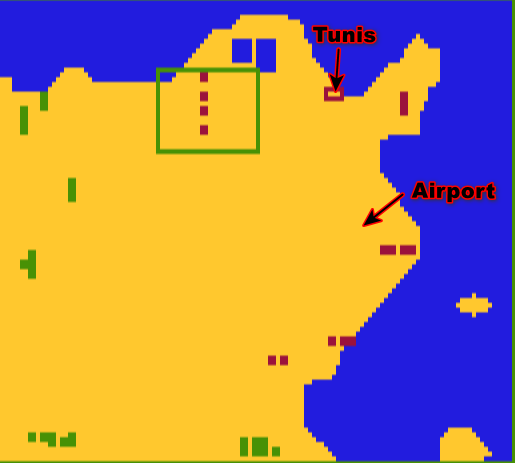
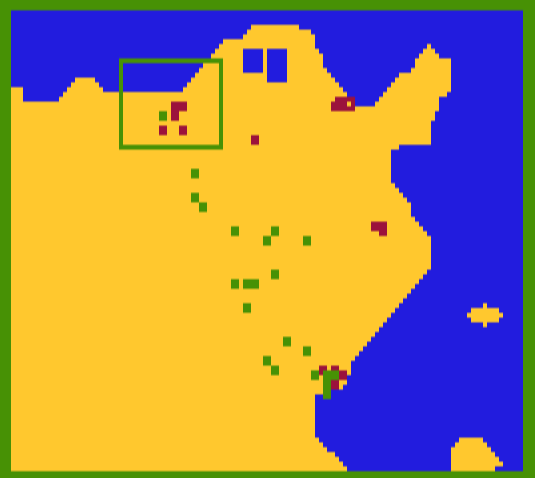
Unlike Carpenter’s later game, Battle of Tunis features a strategic map, which tells me how spread out my forces are:
My strategy is the following:
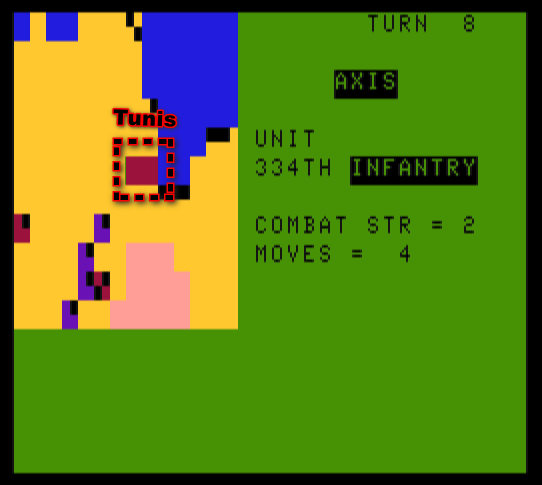
- Keep 2 infantry units in Tunis, just in case,
- Allocate 3 units (1 panzer, 2 infantry) to defend my airport,
- Try to slow down the allies coming from the South by forming walls of units,
- Meanwhile, transfer my Panzers to the West to decisively defeat the forces there, so I only have to face units coming from the South.
Forming barriers is not easy given how open the terrain is. For instance, this is my line in front of advancing British and Commonwealth infantry turn 3…
… and that’s the Allies showing me how they don’t really care and side-stepping it:
I manage to slow down some units and force others in combat at a small disadvantage, but that’s a lot of effort to slow down the slowest British & Commonwealth troops a bit more.

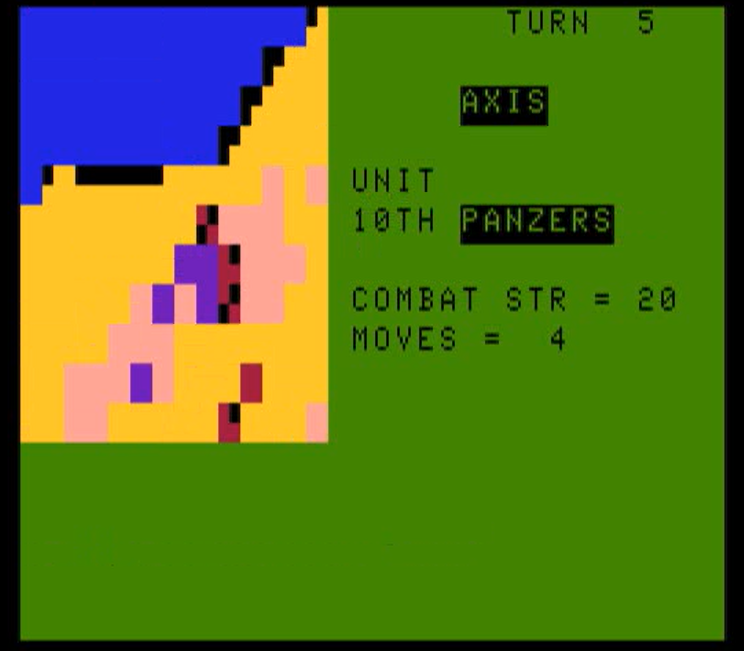
Meanwhile, in the West, the battle is going a bit better, owing to the poor quality of the enemy units (slow infantry), their smaller number, better defensive terrain and the fact that I ridiculously overcommit:
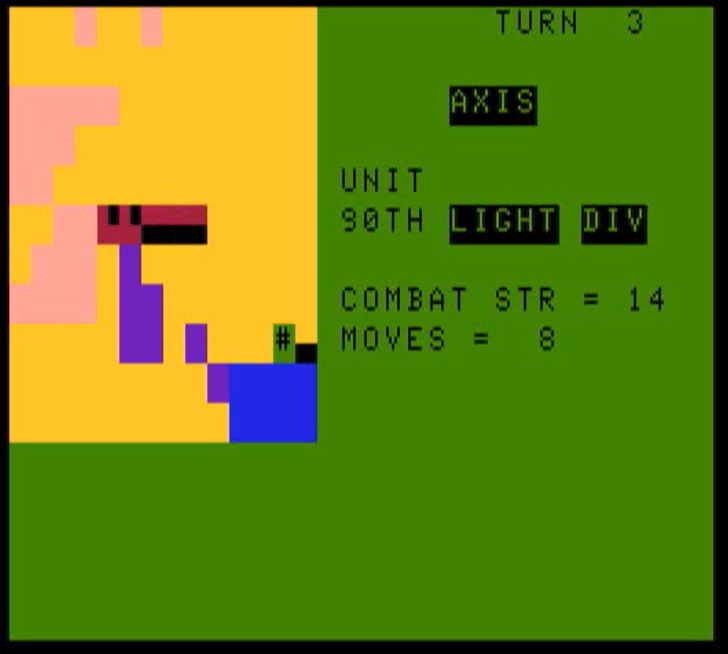
I also have an infantry around, which can call one air strike by turn:
By turn 6, I decide that the enemies in the West are weakened enough and that I can finish them off by attacking.
They are easily eliminated and I chalk that as a tactical victory, but strategically the situation is dire. The allied have advanced unopposed from the South-West.
On turn 7, a British armoured unit even reaches Tunis. Some weak Italian infantry manages to win the battle and push the British back.
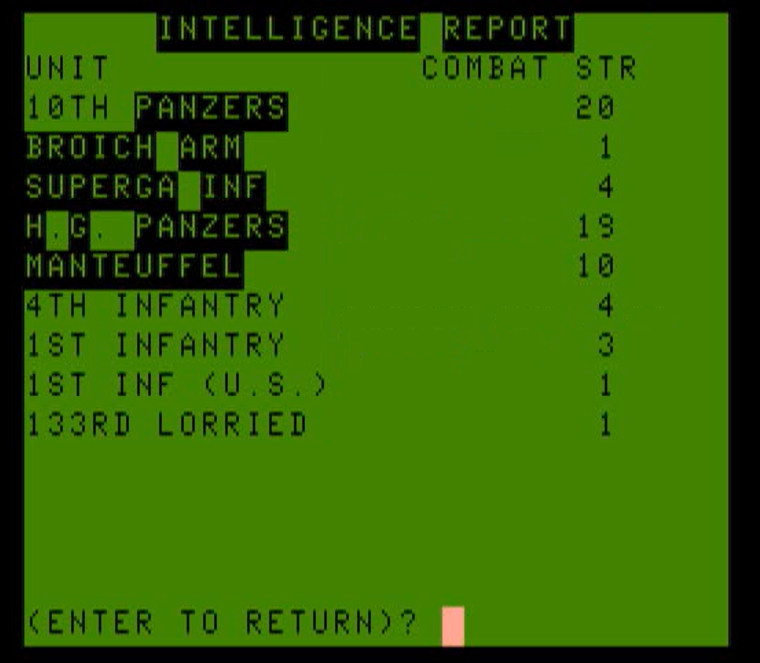
That’s only a short respite, because at the start of turn 8, there are 4 enemy units in range of Tunis, 3 of them full-strength!
I replace the Italian infantry with better units in Tunis, and use everything I can to block the way of the 3 British armours the furthest away from Tunis – forcing these to make even a short detour is enough to prevent them from reaching Tunis this turn. For the British armour the closest to Tunis, well, I just hope to be lucky.
I endure one more turn. I have a good defensive roll against the unit that I left unopposed, and the other armours try to go through my units but receive great losses and don’t make much headway.
At the beginning of turn 9, I am facing 5 units, but the first “layer” of 3 has been badly damaged by the previous combats.
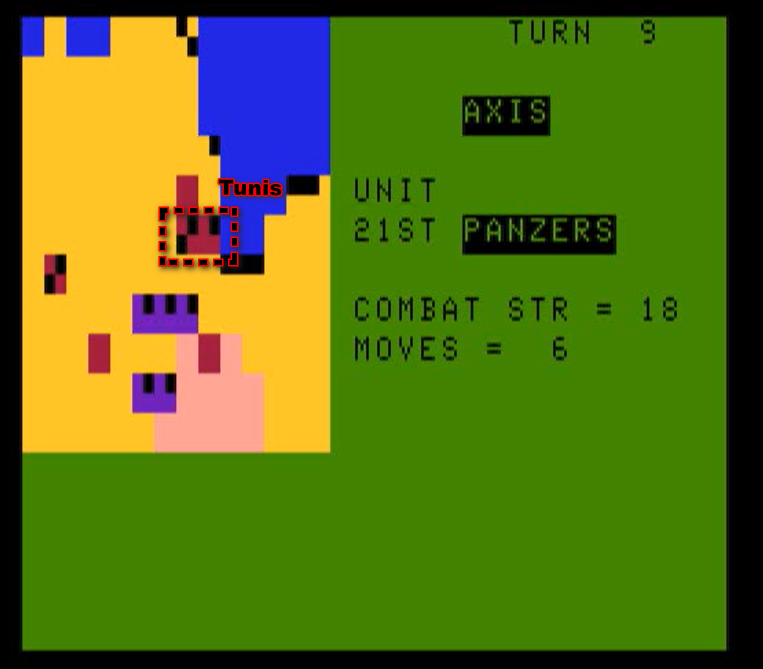
I manage to push back those weakened units with my Panzers, before making a new “wall” in front of Tunis.
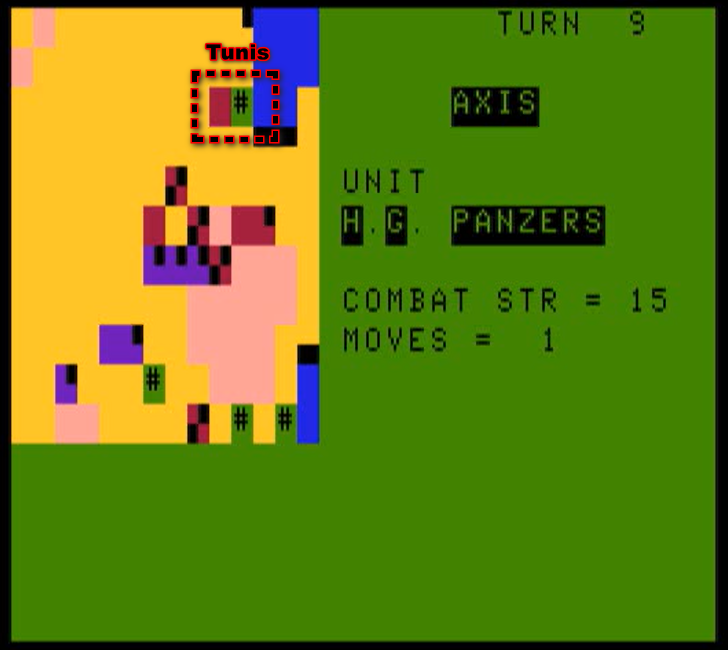
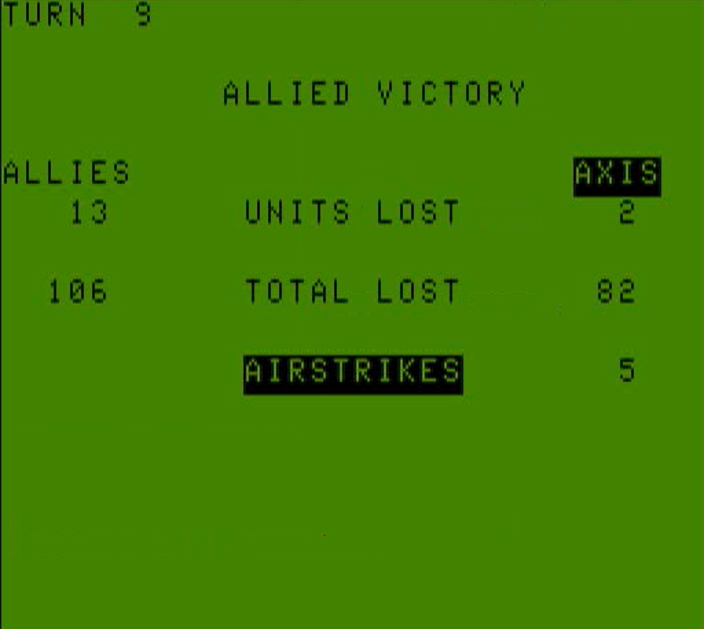
Alas, I have had a string of lucky rolls thus far, but the bill is due. The 8th British armour wins a statistically unlikely victory against one of the Panzer units forming my wall, and then drives straight into Tunis, where it defeats the Italian infantry guarding the city.
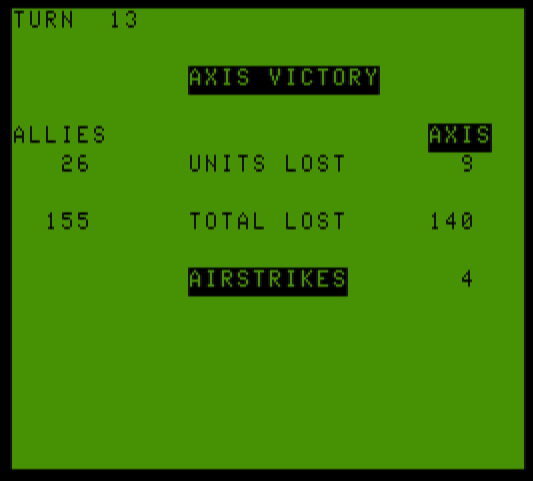
And that’s the end of the AAR. I have only survived 9 turns out of the 15 required!
This British unit was lucky, but I should not have let it have an opportunity to be lucky. I reckon my strategy was horribly flawed, as I allocated my best units to counter the slowest and weakest units and let the powerful enemy armours dash without opposition. I think I wanted to play Battle for Tunis like one usually plays defensive scenarios in other games, without taking into account that Battle for Tunis‘ peculiar ruleset required a more aggressive approach. I did not love the game, but I feel I have to try again with a new tactic – more on this in the Rating & Review.
Rating & Review
Battle for Tunis by Carl Carpenter, published by Ark Royal Games, USA
First release: August 1984 for Color Computer
Genre: Combined Arms Tactics
Average duration of a campaign : 2 hours
Total time played: 3 hours
Complexity: Low (1/5)
Rating: Obsolete
Ranking at the time of review: 80/151
Context – I have already discussed the little I know about Ark Royal Games and Carl Carpenter in previous articles, so I have nothing to add there, except maybe that Battle for Tunis is Carpenter’s first game and that, lacking a manual, I would have skipped it if it did not use the same engine as his Battle of the Bulge.
Traits – There is a rule of the thumb in wargaming that the more niche and narrow the topic, the more simulationist the coverage. It is therefore odd that, after choosing a topic with as little brand recognition as “the Battle for Tunis” and doing enough research to have the “correct” unit names, Carpenter designed a game that is so unrepresentative of the battle for Tunis.
Battle for Tunis is about trading space for time in the Tunisian desert and intercepting the Allied armours before they reach Tunis, with the support of the German air force. In reality, the Allied had total air superiority for the entirety of the battle, which was about piercing a heavily fortified defensive line that spanned along the Northern half of modern Tunisia. I reckon that very low unit density and lack of zone of control precluded any attempt to have a “historical” gameplay, and so we end up with a battle of Tunis that plays like a reversed Operation Crusader.
As for the game itself, separated from any historical background, it’s not great. All combats are duel (no “support units”) and unlike Battle of the Bulge it is rare to be able to leverage the terrain defensively, so the “strategy” is to attack the computer’s best units with your own best units, destroy them all because you have a point advantage and only then finish off the infantry. I know that, because that’s what I did on my second attempt and I easily won by mopping up all the Allied units.
Did I make interesting decisions? Not many. I tried to be smart, but the winning strategy did not involve a lot of tactical decisions.
Final rating: Obsolete. Not unpleasant to play, but pointless. My second session was out of duty to test whether my analysis of the balance was correct.
Reception
No one following this blog will be surprised to know that Battle for Tunis received only one review, that it was in Rainbow Magazine and that it was very positive. This review is by Harry Elman, the same reviewer who beat around the bush in his CINCPAC – The Battle of Midway review. This time, the spin is that Battle for Tunis is “Perfect For The War Game Beginner” – that’s the title of the review. It starts with high-grade copium: “In an unusual move for a 32K war game, it has no game save feature. That in itself is an advantage to the war game newcomer. Battle for Tunis plays fully in an hour or less and thus is a good introduction to the sport.” The rest of the article is a mix of descriptions of the game’s features and frequent assertions that yes, Battle for Tunis has both tactical and strategical depth why do you ask? The review would have carried a lot more weight if it had not ended with: “To round out the list of nice touches in Battle for Tunis, it even blows a bugle call to announce certain victories.“
We’re almost done with Ark Royal Games for 1984. Their game Legatus is lost media, leaving only their tactical game Company Commander to cover, though I have had trouble launching it. Before that, we’ll check again what our carriers are doing in the Pacific.