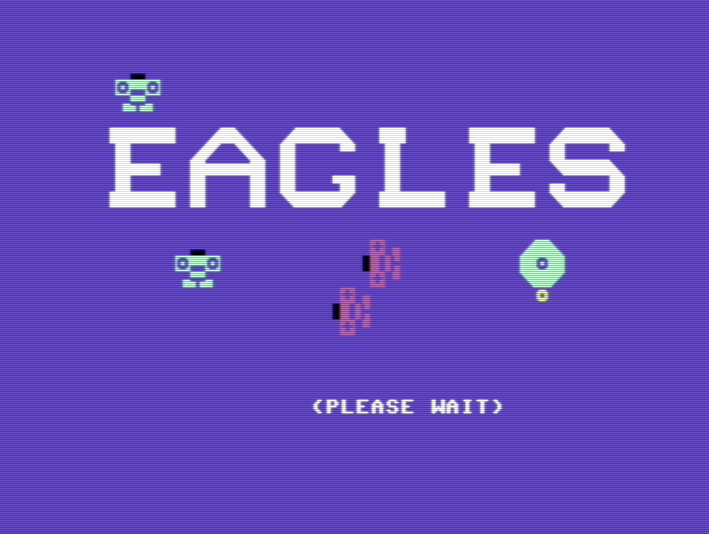
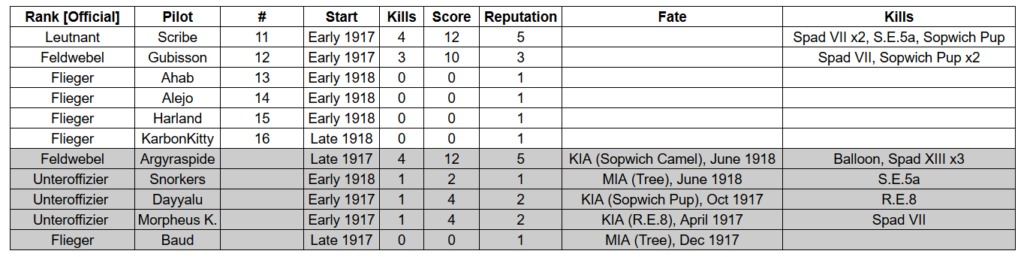
January 1918
Back for the third part of our Eagles campaign. The last mission – balloon destruction above the allied lines – ended as a disaster with one pilot MIA and two veteran pilots (myself and Gubisson) wounded ; only Argyraspide came back in good health.
The minimum patrol size is 5 in 1918, so we have 4 new pilots. Our line-up is :
- Flieger Snorkers on Pfalz D.III (plane #11)
- Unteroffizier Argyraspide on Albatros D.V (plane #12)
- Flieger Alejo on Pfalz D.III (plane #13)
- Flieger Ahab on Pfalz D.III (plane #14)
- Flieger Harland on Pfalz D.III (plane #15).
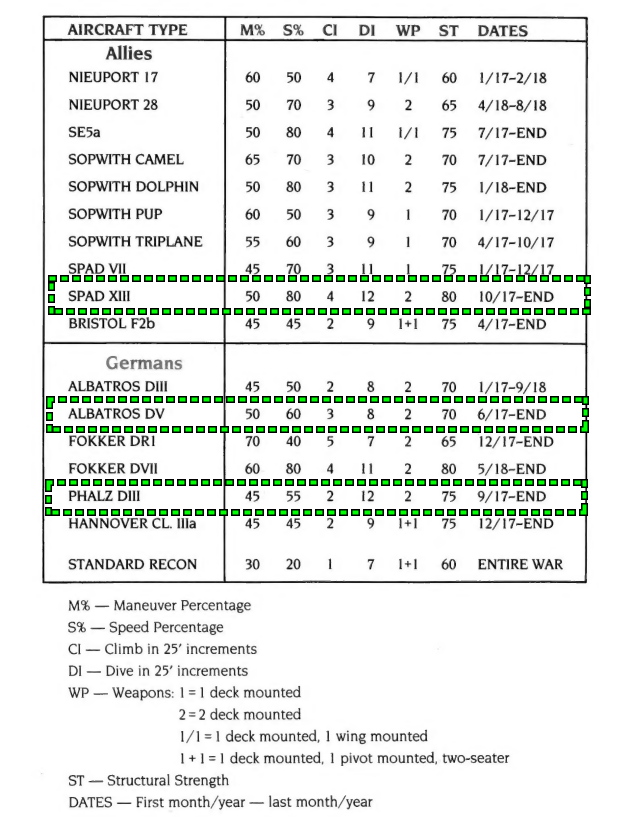
The Pfalz D.III is not a new plane, but we never used it so far. It is a sturdy plane with impressive diving capacity, but slower and less maneuverable than the Albatros D.V.
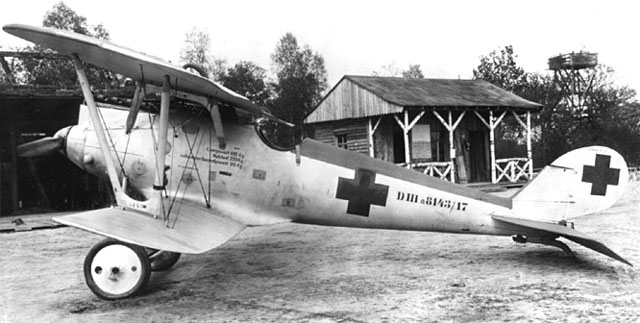
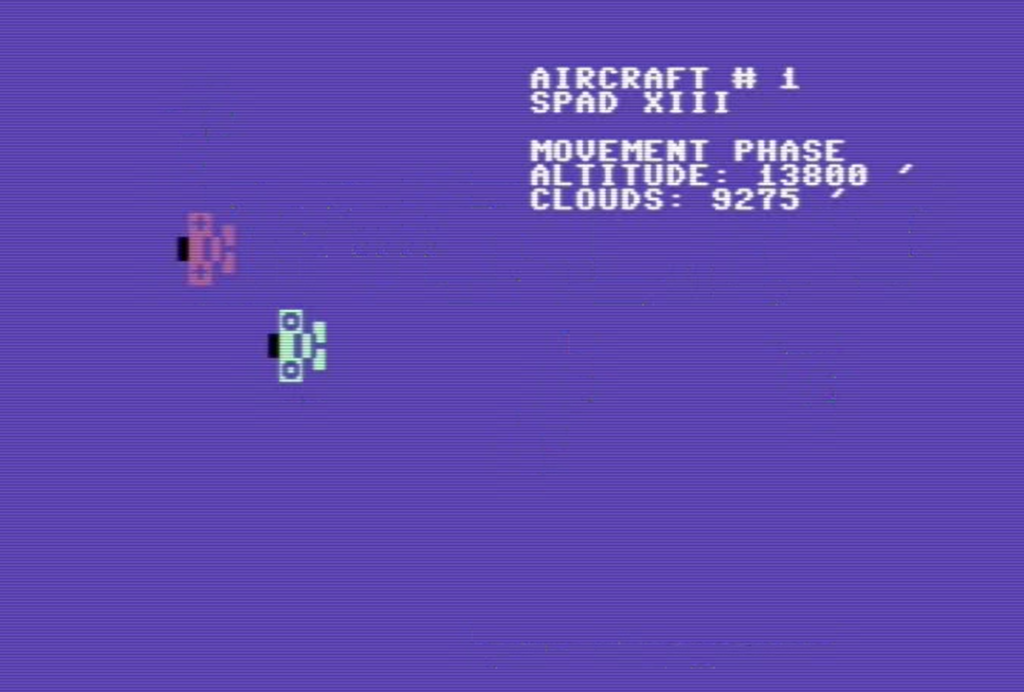
Our jasta encounters a patrol of French SPAD XIII, another plane new to us. The SPAD XIII is quite simply the best allied fighter of the war and the game stats reflect it. It is faster and sturdier than anything the Germans have and has a decent turning rate to boot.
To make the situation as difficult as possible, the French fighters appear behind the German planes. That’s a patrol I am happy not to be a part of :
The German planes spread out in all directions, and fortunately the only category in which the SPAD XIII is not great is the turning rate. Between the planes turning to the left, the planes turning to the right, the planes failing to turn to the left and the planes failing to turn to the right, the battle becomes a confusing melee.
Harland passes in front of a French plane at some point, and is immediately punished :
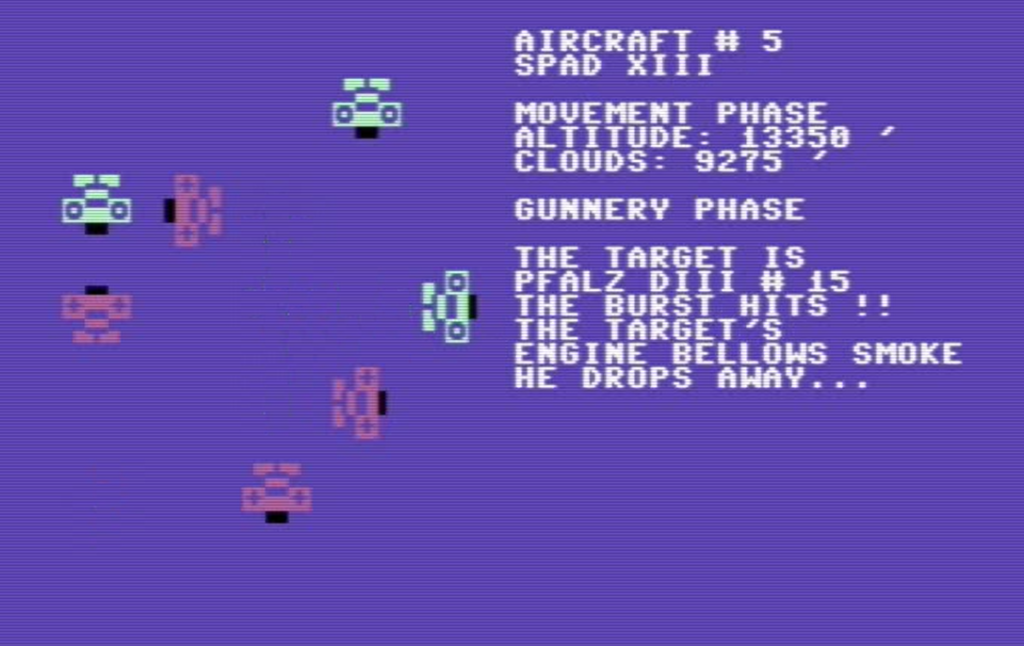
Shorly thereafter, Argyraspide avenges Harland by shooting down his killer in a frontal pass.
The combat continues with the French planes generally having the upper hand. The French planes manage to hit the German planes from time to time while evading most of the retaliation. Still, as everyone keeps turning, the German pilots avoid most of the bullets, and the sturdiness of the Pfaltz keep them flying after receiving those bullets they don’t avoid.
The combat continues until the French planes run out of ammo and start to leave the battlefield, using their speed to escape West. That’s what Argyraspide was waiting for. He pounces on the French planes going straight ahead (wih some massive luck at the “speed” dice rolls) and shoots down two SPAD XIII one after the other.
When the battle ends, 3 of the French wünderwaffen (“armes merveilleuses” does not have the same ring to it) have been shot down :
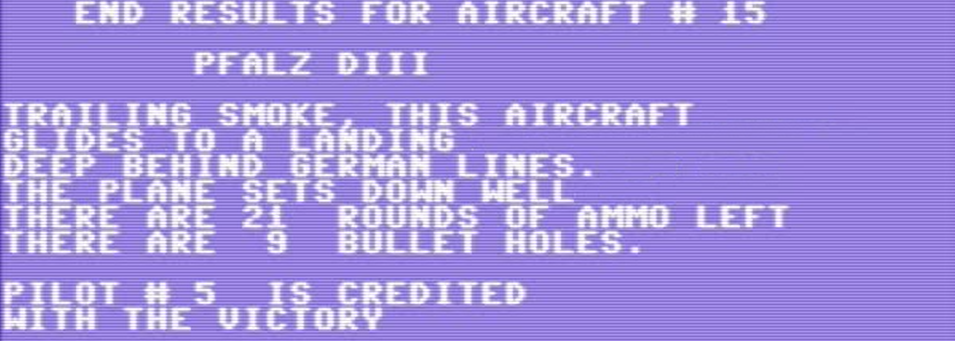
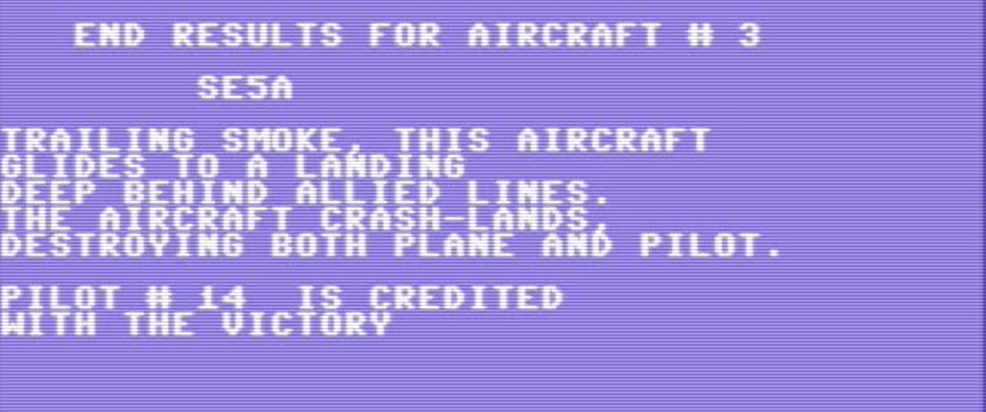
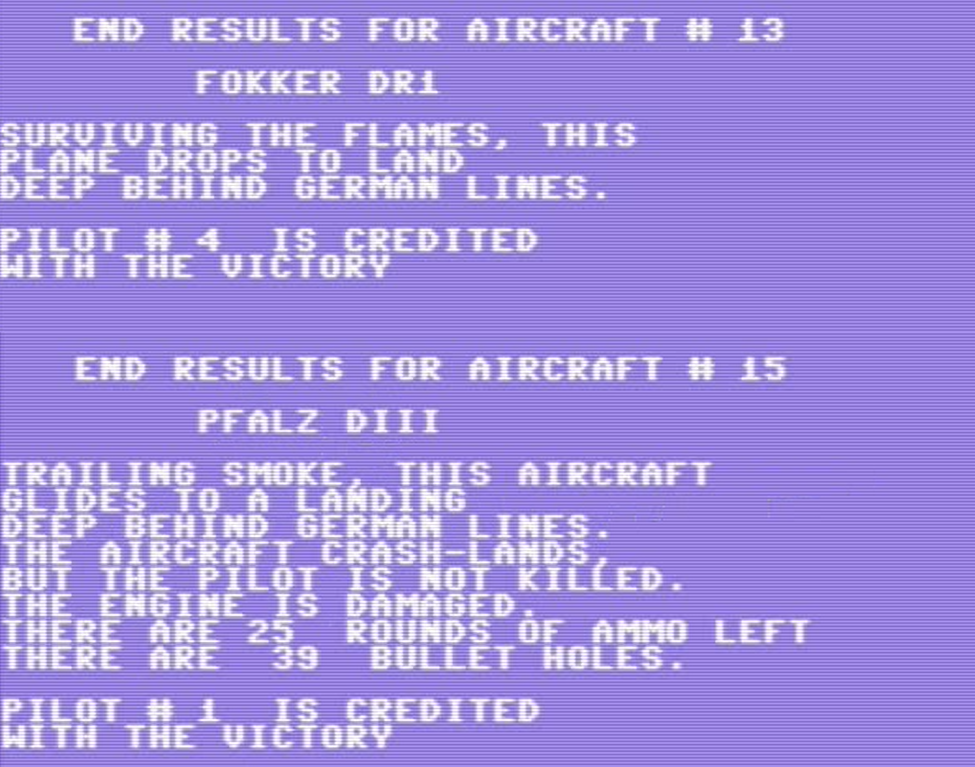
Argyraspide only receives half points for planes #3 and #5, as they glided into allied lines and as such are considered unconfirmed.
On the German side, the return was particularly difficult for Alejo and Ahab. They were wounded during battle as their planes received respectively 18 and 24 bullet holes. As for Harland, he is waiting for everyone in the mess hall :
April 1918
Alejo and Ahab have been wounded and cannot participate, which means that Gubisson and myself are back. The line-up is therefore :
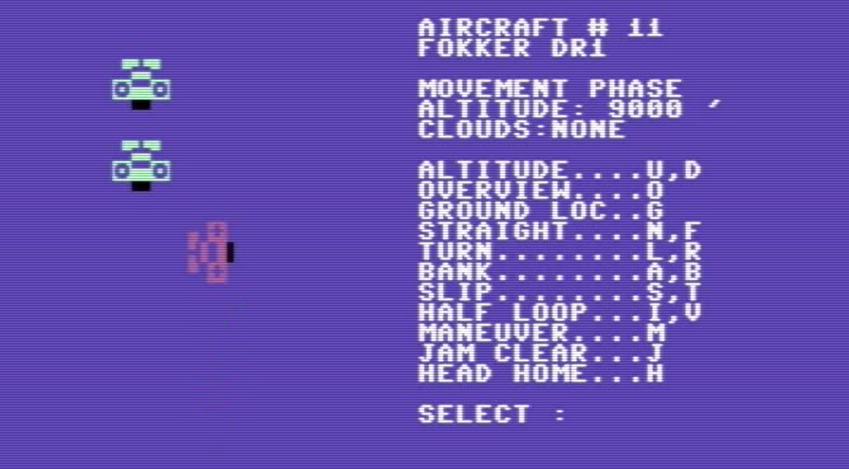
- Leutnant Scribe on a Fokker Dr. 1 (plane #11)
- Unteroffizier Gubisson on a Fokker Dr. 1 (plane #12)
- Unteroffizier Argyraspide on a Fokker Dr. 1 (plane #13)
- Flieger Snorkers on a Pfaltz D.III (plane #14)
- Flieger Harland on a Pfaltz D.III (plane #15)
The Fokker Dr. 1 is the plane made famous by the Red Baron but it had more reputation than real capabilities – except in the hands of excellent pilots. In game, the plane is the nimblest but also the slowest and the most fragile in the roster. It also climbs faster than any other plane, but does not dive well.
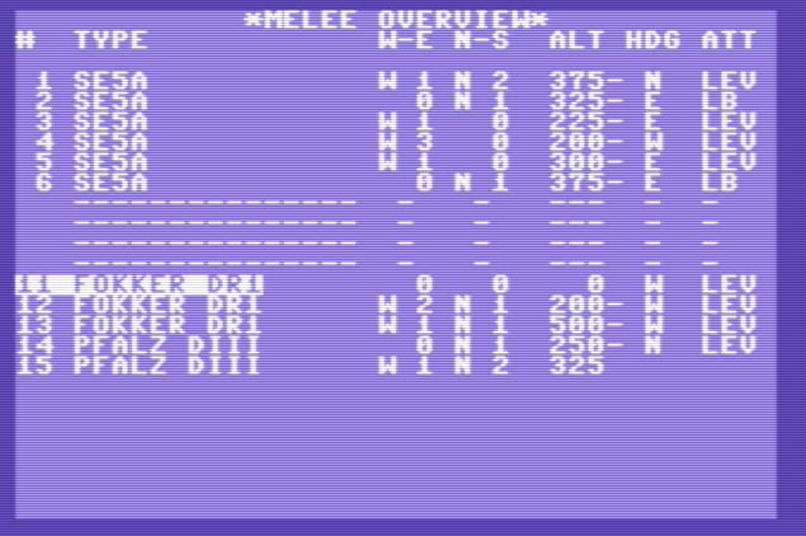
We are meeting some old friends : 6 S.E.5a, including a “super-ace” (plane #6), but he won’t perform any better than the others so you can already forget about him. We are agile, they are fast.
The British planes come from our the rear.
While the other German planes spread out in all directions like headless chickens, I use the superior climbing speed of my plane to gain altitude, putting me out of harm’s way.
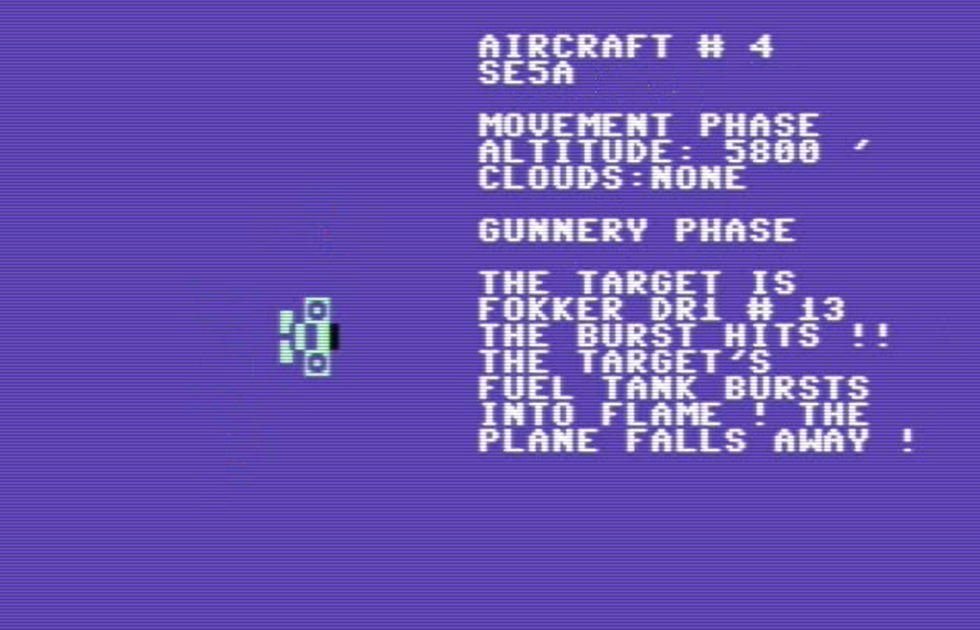
Using the superior turning rate of my plane, I then position behind one of the S.E.5a and start shooting, matching every one of its turns. I shoot four times in a row with 75% chance-to-hit, but only hit once. The fourth time, my guns jam, and there is nothing I can do to fix them.
Everyone else enters a turning match, which the Fokker easily win. Gubisson damages a S.E.5a which escapes West, Gubisson behind it. Alas, the British plane is of course much faster and all Gubisson manages to do is remove himself from the battle for a time. Meanwhile, Argyraspide spreads bullets over too many targets and run out before shooting down any individual plane. Out of ammo, he returns to base.
As another S.E.5a had jammed and headed home, Snorkers and Harland are left to fend off 4 British planes. More accurately, Harland is fending off 3 British planes while Snorkers fights his own personal war against only one S.E.5a. When Snorkers finally defeats its opponent, the duel has moved him so far away from Harland that he has lost sight of him. Without any target, he turns East and returns home as well.
Harland is now alone, but Gubisson has turned back and is coming to his rescue. Harland flies defensively and keeps turning while waiting for his wingman, but he is hit again and again by the S.E.5a. He finally goes down just as Gubisson arrives.
Gubisson’s shot at glory is short-lived, his machine-gun immediately jams. As he flies straight ahead to repair it, the remaining S.E.5a comes behind him and shoot him down with one burst.
The battle is over. The British only lost one plane, shot down by Snorkers :
The Germans lost two planes but – miraculously – both pilots survived.
June 1918
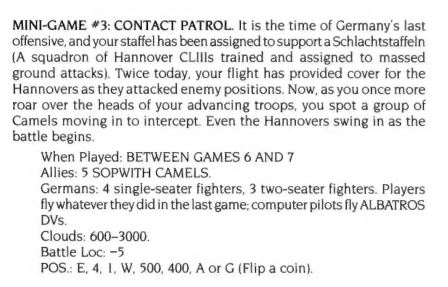
Time for our quarterly special mission. This time, it is an escort mission : a patrol of 4 planes must escort 3 Hannover CL. IIIIa. The Hannover CL. IIIa are jack-of-all-trades two-seaters, capable of reconnaissance, ground attack but also air combat,

The opposition is going to be 5 Sopwith Camel. The Sopwith Camel is possibly the most iconic British fighter, and unlike the Fokker its reputation is fully deserved : it almost as agile as a Fokker Dr. I but faster than almost anything the Germans have. Its only weakness is that it is relatively fragile and has sub-par climbing capacity.

With 7 planes against 5, this should be an easy mission. There are only 4 seats for “human” pilots though, so I leave Gubisson on the bench and replace Harland with Ahab. If they want to join the fun, they should try to preserve their planes next time.
Our line-up is the following :
- Leutnant Scribe on a Fokker Dr. 1 (plane #11)
- Unteroffizier Argyraspide on a Fokker Dr. 1 (plane #12)
- Unteroffizier Snorkers on a Pfaltz D.III (plane #13)
- Flieger Ahab on a Pfaltz D.III (plane #14)
- A pilot and a gunner on Hannover CL. IIIA (plane #16)
- A pilot and a gunner on Hannover CL. IIIA (plane #18)
- A pilot and a gunner on Hannover CL. IIIA (plane #20)
The combat happens at low altitude (400 feet), with the clouds not being very high either (600 feet). The two formations arrive head-on, but not on the same “line”.
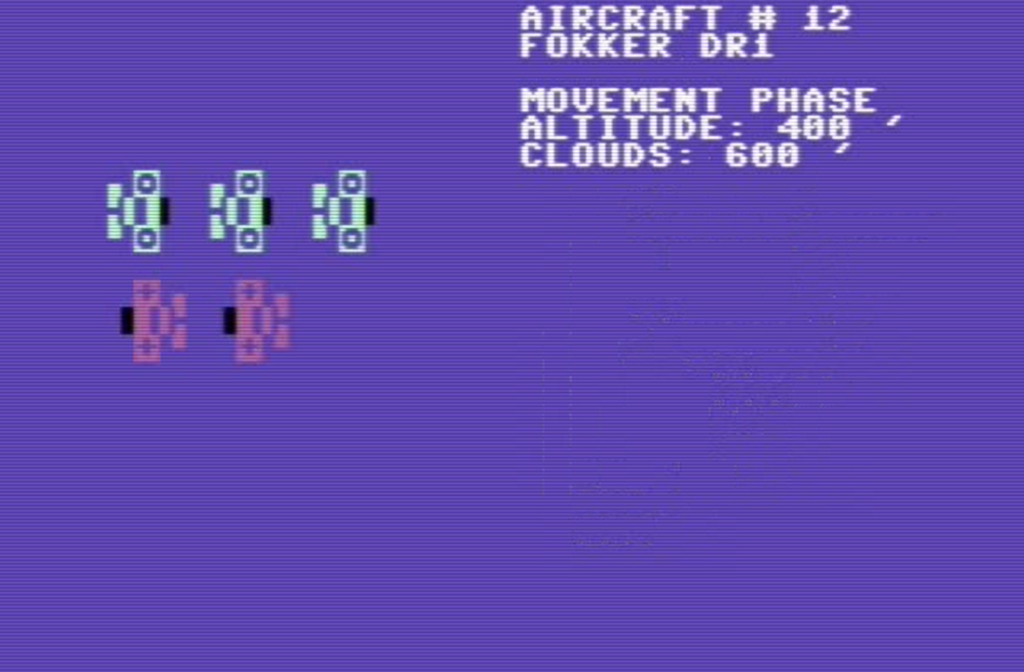
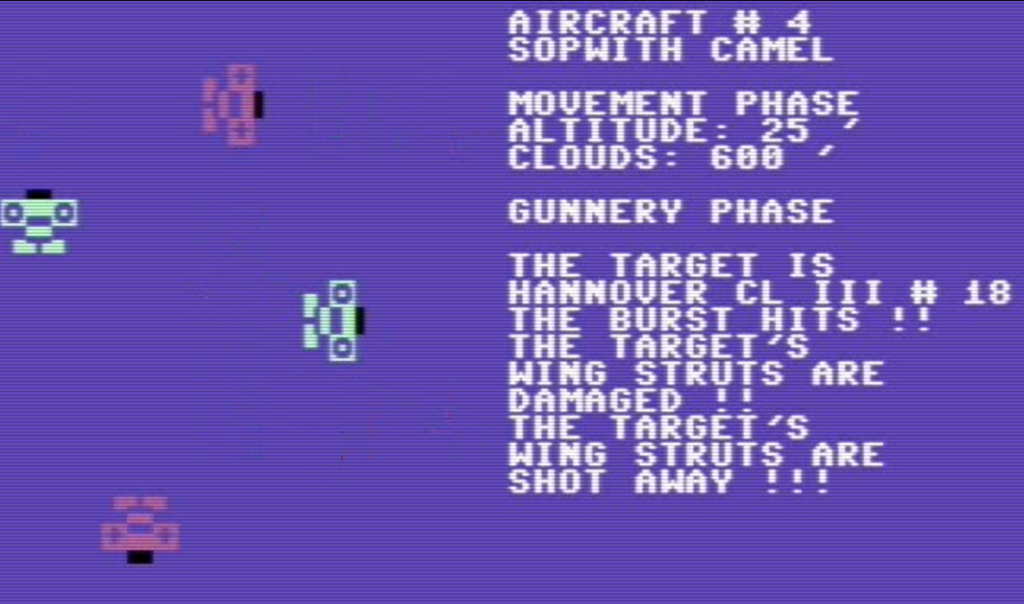
The beginning of the battle goes extremely well for the Germans : we manage to turn toward the Sopwith and hit them just as they pass by. The Hannover gunners then finish one of them, so we are now 7 against 4. The surviving Sopwith turn to their right, and engage.
Suddenly, this happens :
This Hannover had not been hit at all, and now it is gone !
Then the Fokker’s fragility strikes again when a Sopwith turns right and shoots Argyraspide down with a short burst :

Argyraspide’s killer’s attacks moved him in the back of one of the two remaining Hannover CL. III. He attacks the following turn :
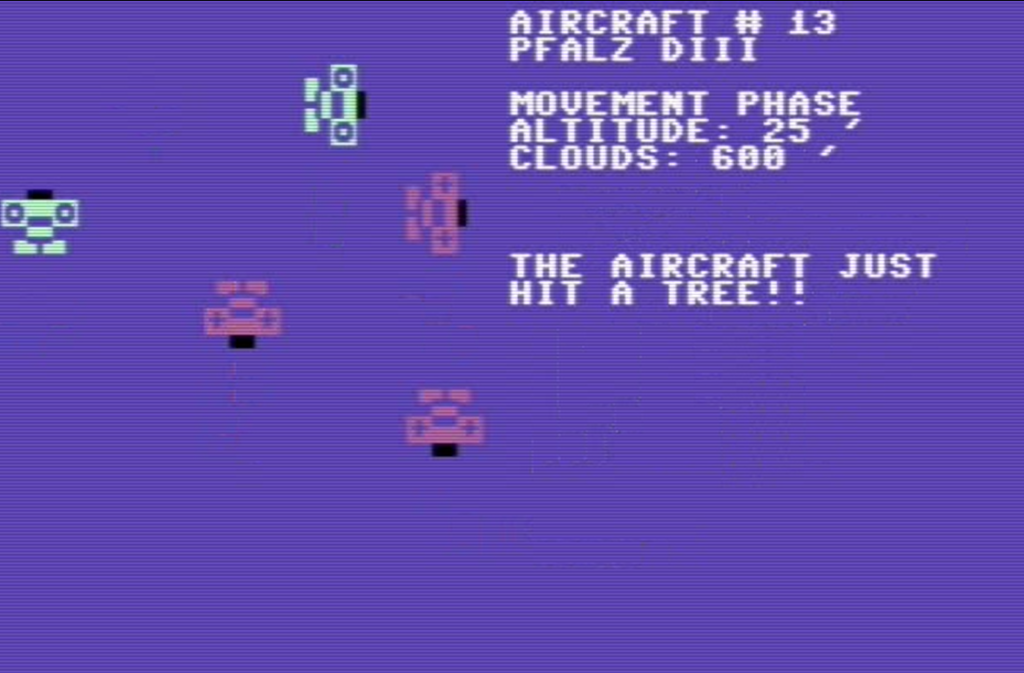
Then the trees jump into the melee, killing (probably) Snorkers who was flying too low :
We are now 3 planes against 4 better planes. I am facing two planes, Ahab one and the last Sopwith pursue our surviving Hannover CL IIIa. The trees weigh in once again and one of them throws itself between the two planes, destroying the Sopwith.
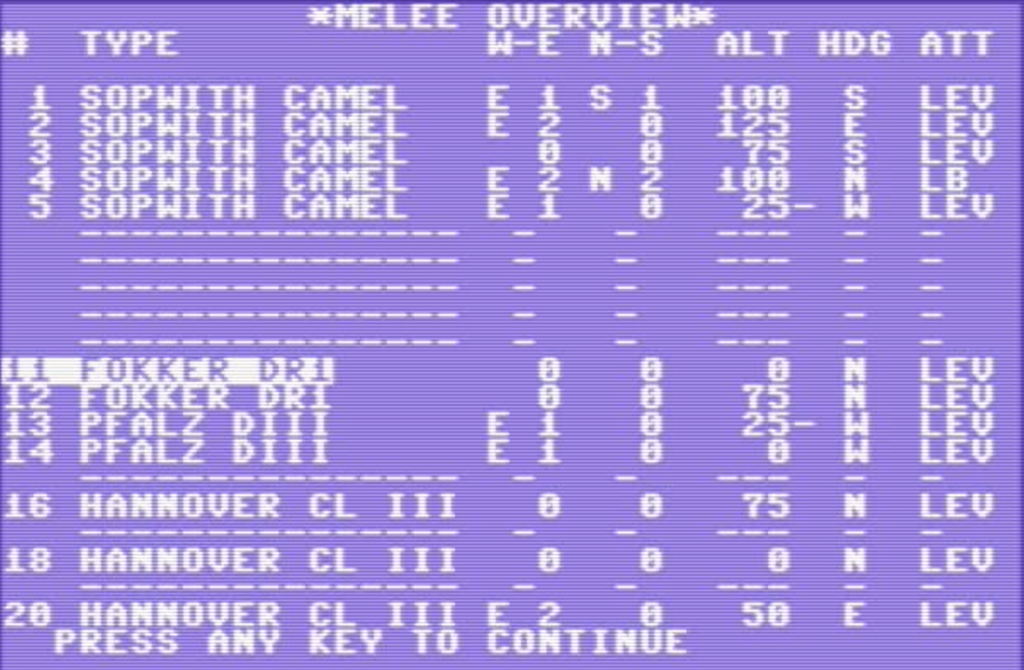
As for me, I manage to stay behind one of the Sopwith and damage it enough that its engine “starts to miss”, but then I run out of bullets. Unable to outrun the two Sopwith, I instead decide to use my climbing speed to disappear into the clouds :
Once in the cloud, I am invisible but also unable to see anything so I miss the end of Ahab’s duel. I am sure he is going to be OK !
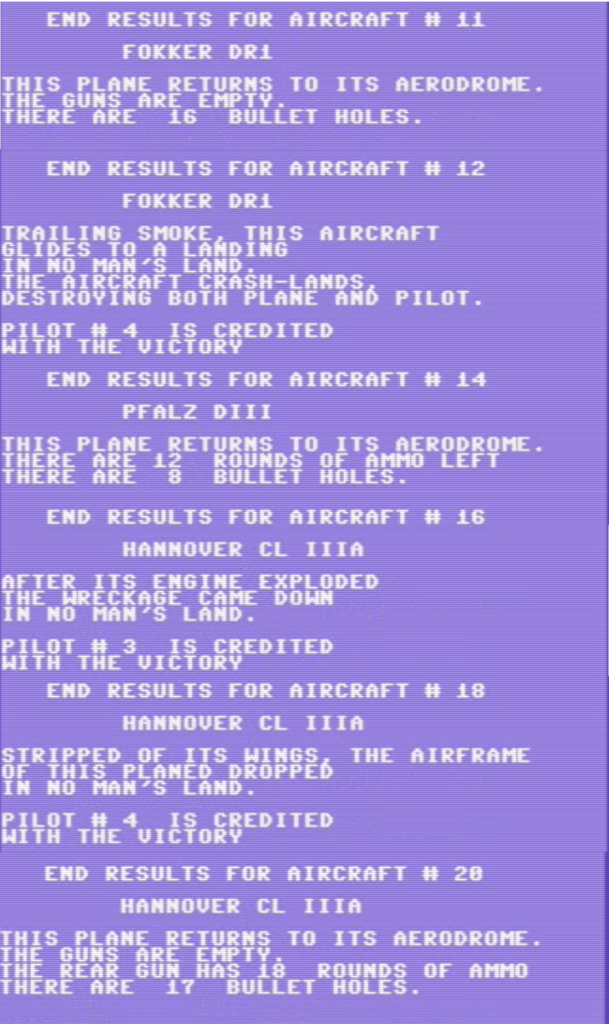
Back home, I have a lot of explaining to do : we lost 4 planes out of 7, and the British lost 2 out of 5. Losses among the trees are still unknown. Our promising Argyraspide is dead, Snorker missing in action.
H1 1918 was not great but I survived ! I am sure the war will end soon !
We may even have enough pilots !
Next : Late 1918 with very low odds of survival (the last mission is almost designed to kill you) and the review and rating for Eagles !