Are my instructions clear, Lieutenant Narwhal ? We start tomorrow !
Yes, I am not sure about the timing ! Are you sure you want to try to take Arnhem Bridge before we even land in Normandy ?
That’s the only way to be truly sure we surprise the Germans !

Operation Apocalypse, released in March 1981, is the second game by Roger Keating, after Conflict/Rebel Force, which was 50% of the content and probably 90% of the value of Computer Conflict. It was teased in the first SSI Catalog and described as an “expanded version of Rebel Force“.
The description of Operation Apocalypse was exciting indeed, with ambitious content. I will showcase one of the scenarios and briefly describe the 3 others.
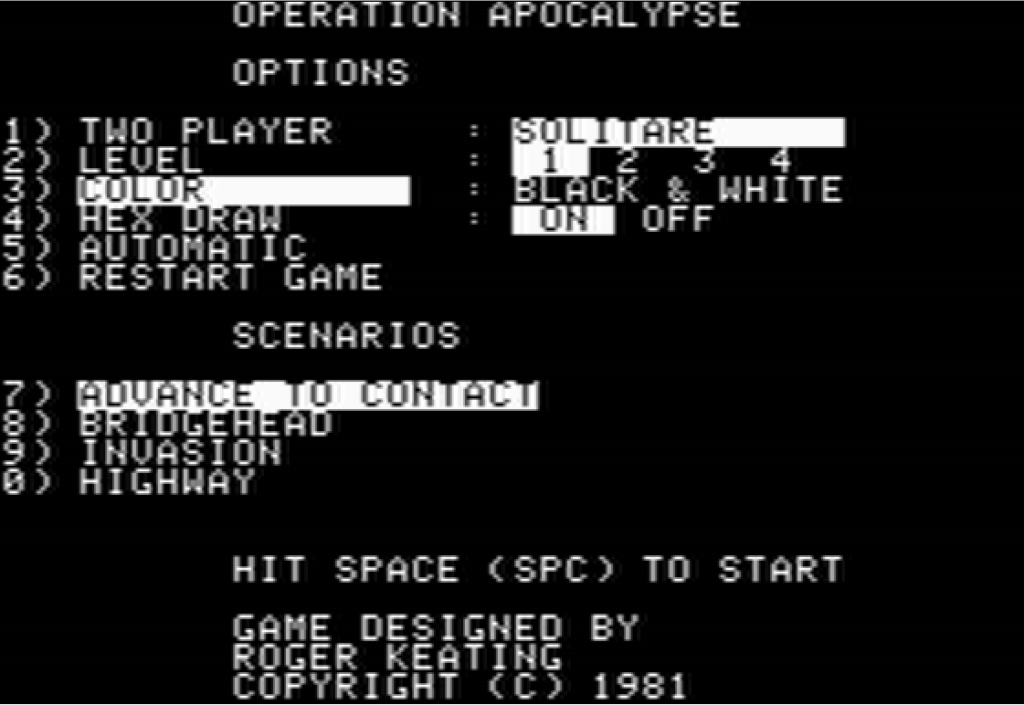
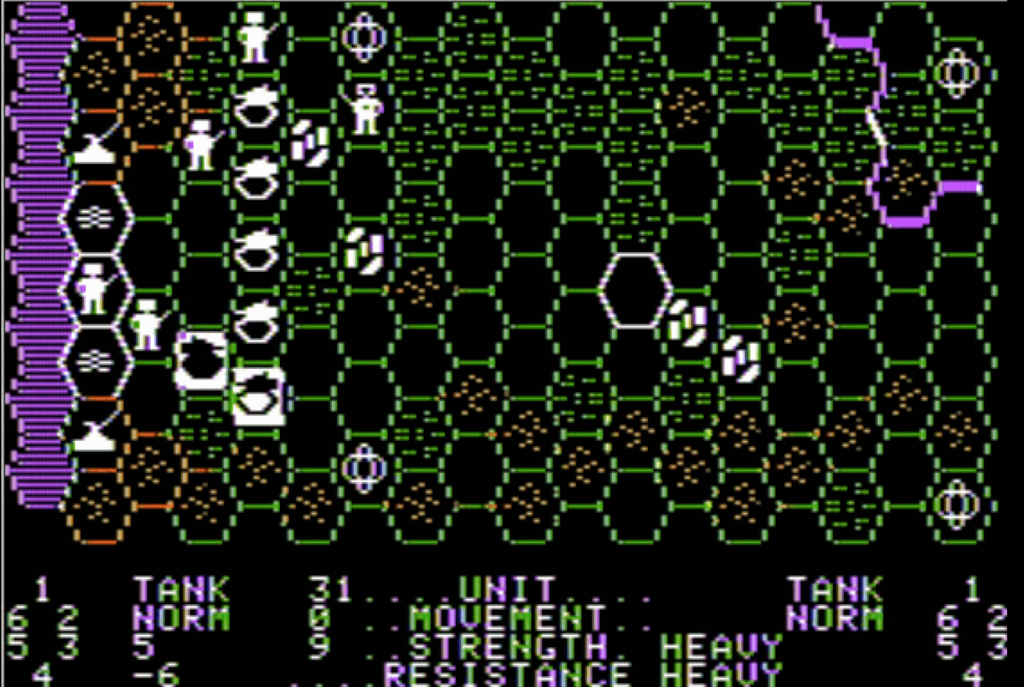
You may need this to read the showcase :
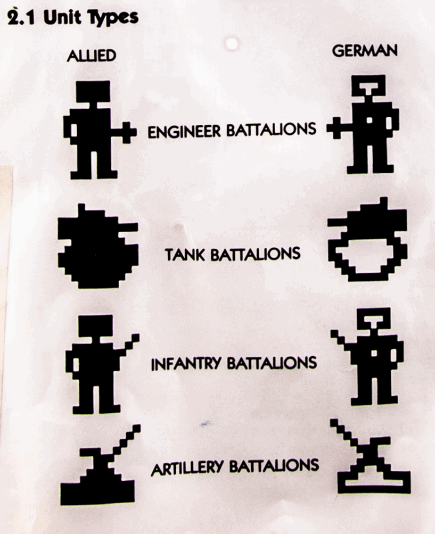
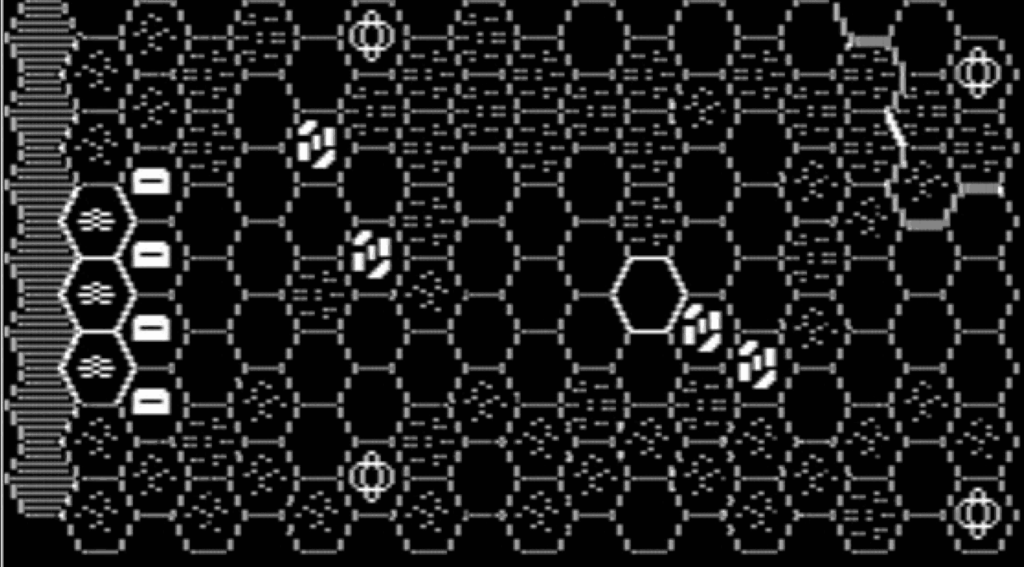
Those are the base units. As you’ll see there are a few other ones.
Invasion
Pearl Harbor ! Iwo Jima ! Stalingrad ! Kursk ! Midway ! The Great Battles of WW2 ! Do we really know all of them ? Do we know everything ? Have some of them been forgotten, or maybe… classified?
The History Channel brings you the latest WW2 novelties with its new program : Classified Battles of WW2 ! Every Thursday night after Ancient Alien Pawnshop Stars !
*** Intro Music ***
D-Day ! June 6th 1944 ! The largest seaborne invasion of history. We all know Utah, Omaha, Gold, Juno and Sword beaches. But have you heard of New Jersey beach ?
Eisenhower is worried. As he observes aerial reconnaissance, it is becoming clear to the allies that this small beach holds the key to a successful landing in Normandy. Without it, the Nazis would have time to develop their wünderwaffen, probably the atomic bomb too, and turn the war around !
*** crossfade ***

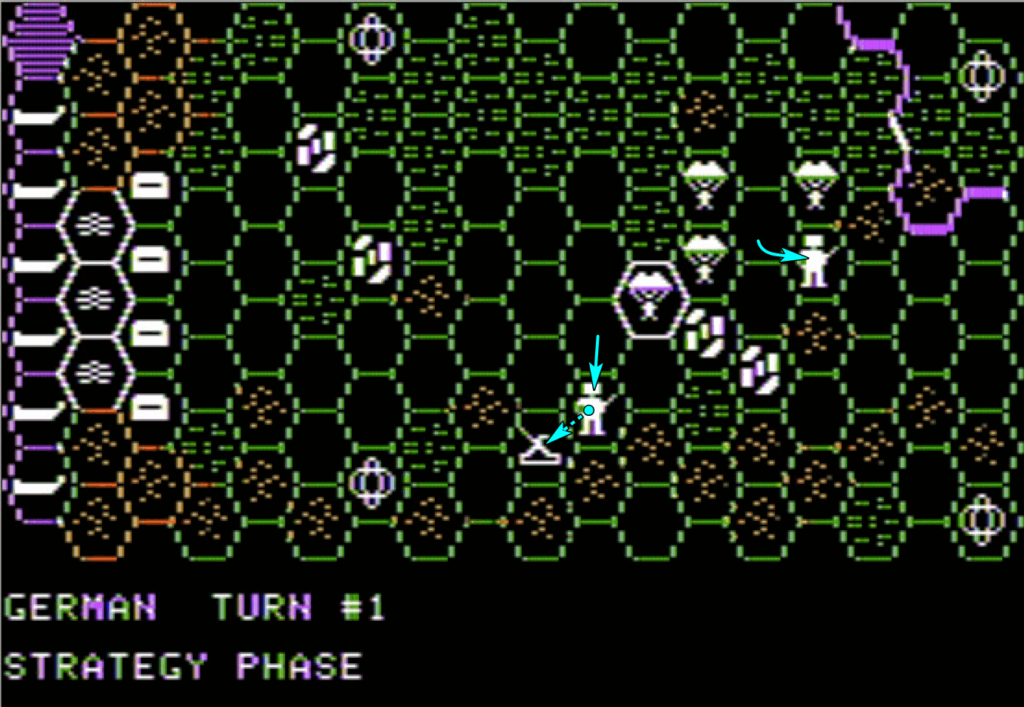
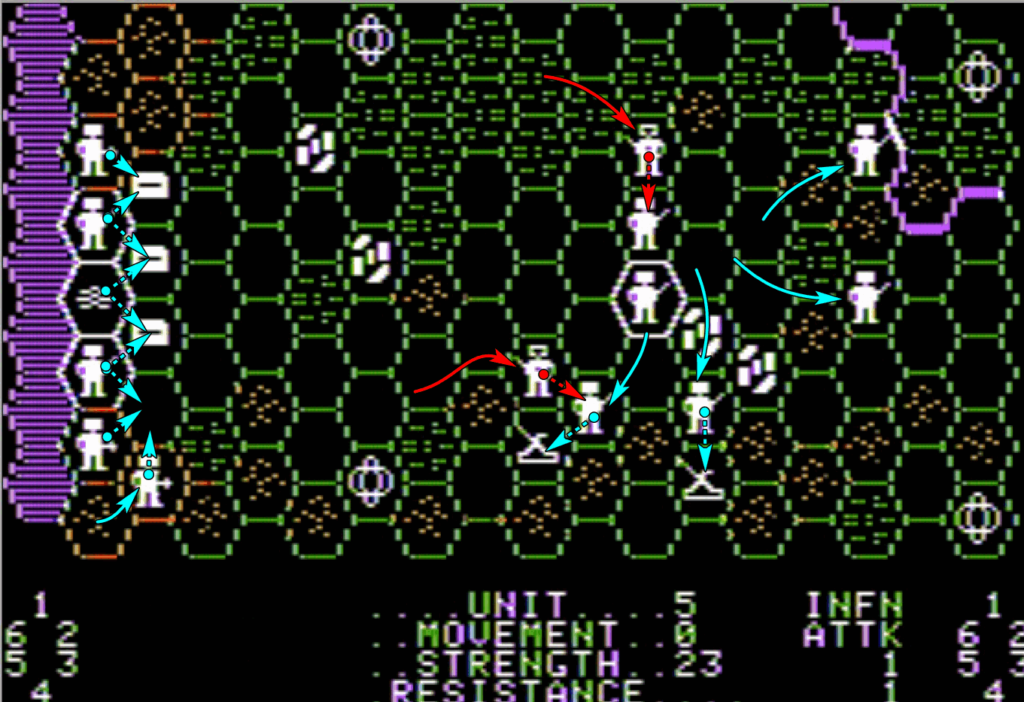
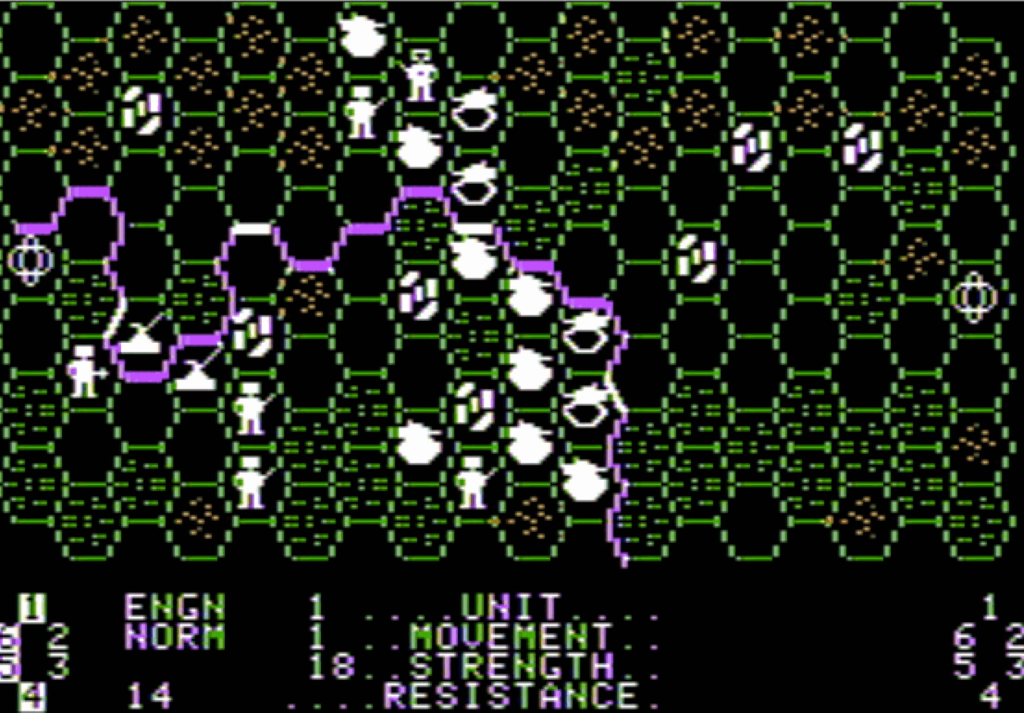
For Captain Eugen Andnjord from Parkville, Missouri, and his 183rd Airborne Division, it was going to be the most important day of their life. Their objectives were :
- occupy the enemy headquarters (in white) by surprise, which would halve the speed of the Germans in the area as long as it remains under allied control,
- destroy the enemy artillery overlooking the beaches
- hold off the enemy reinforcements for as long as possible.
The mission was almost suicidal, but only the best had volunteered for the 183rd Airborne Division.
As for the assault force, led by Colonel Emile Baudouin “Baud” from Lafayette, Louisiana, its objective was to destroy the enemy bunkers and reinforce Utah and Omaha by exiting to the North and South

Note that the exit zones are also enemy reinforcement zones as long as no allied unit evacuated through them.
It would not be easy. The bunkers were equipped with MG-42 machine guns – another proof of the superiority of German engineering, mowers of men at 1 200 bullets per minute- and with 8.8cm Flak guns, those very same guns that the genius Rommel turned against British tanks 4 years prior, and which chewed through both men and tanks like paper.
*** ad break ***
The landing was prepared by intense artillery fire. The Germans cowered in their bunkers as shell after shell fells on them.
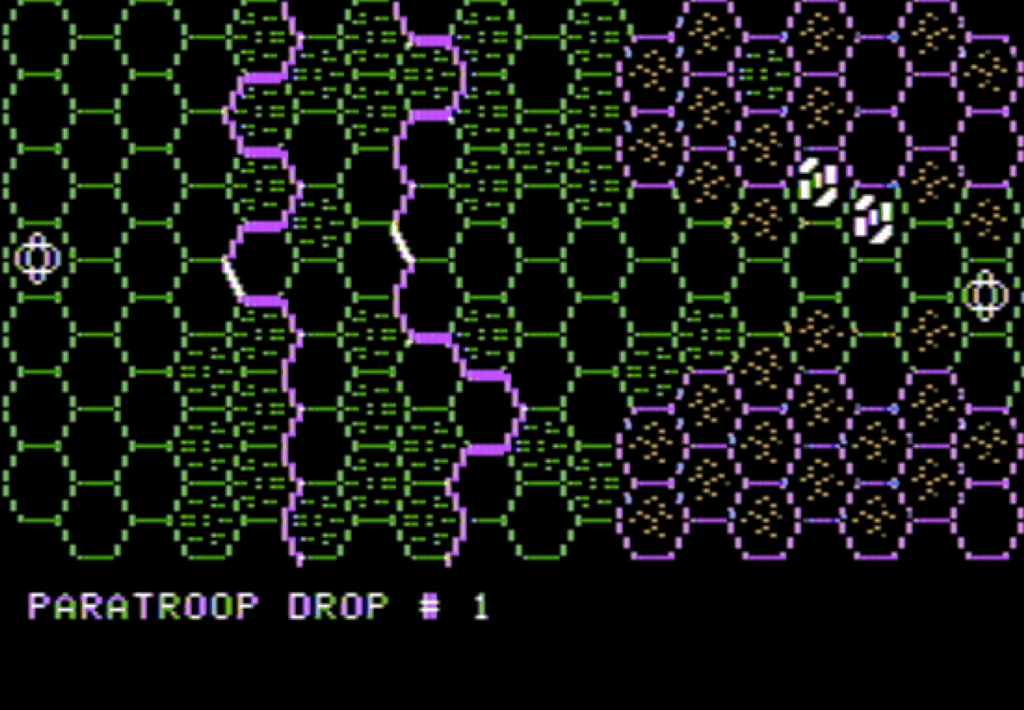
Shivering in their concrete coffins, they could see above them the black shadows of the C-47 Skytrain bringing Captain Andnjord and his men to the battlefield.
Already, it was time to jump.
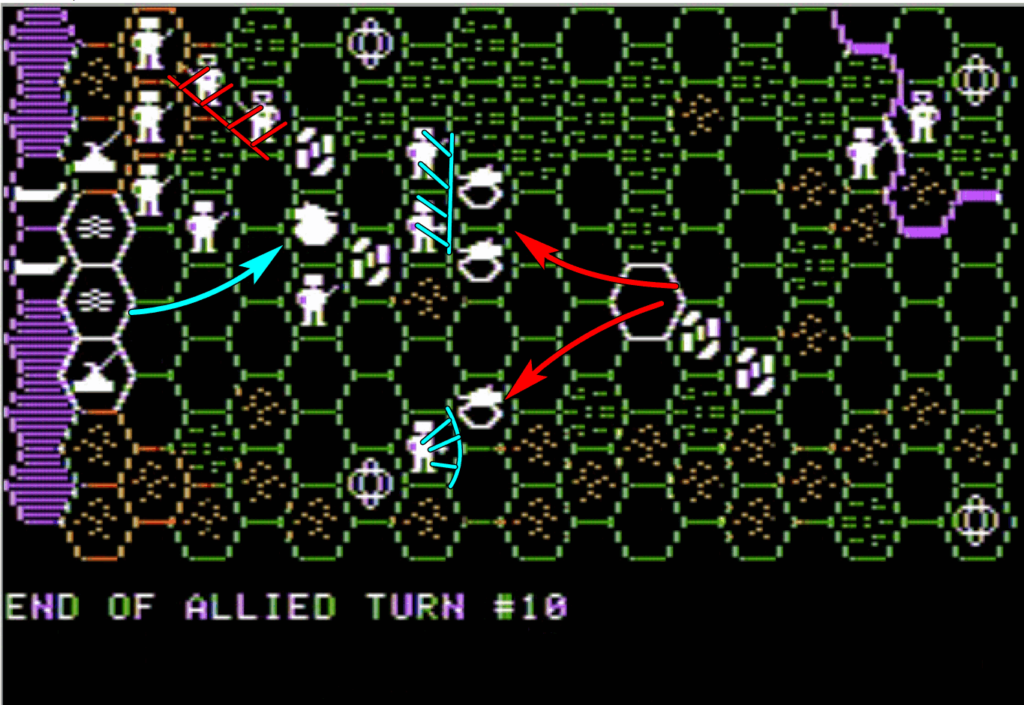
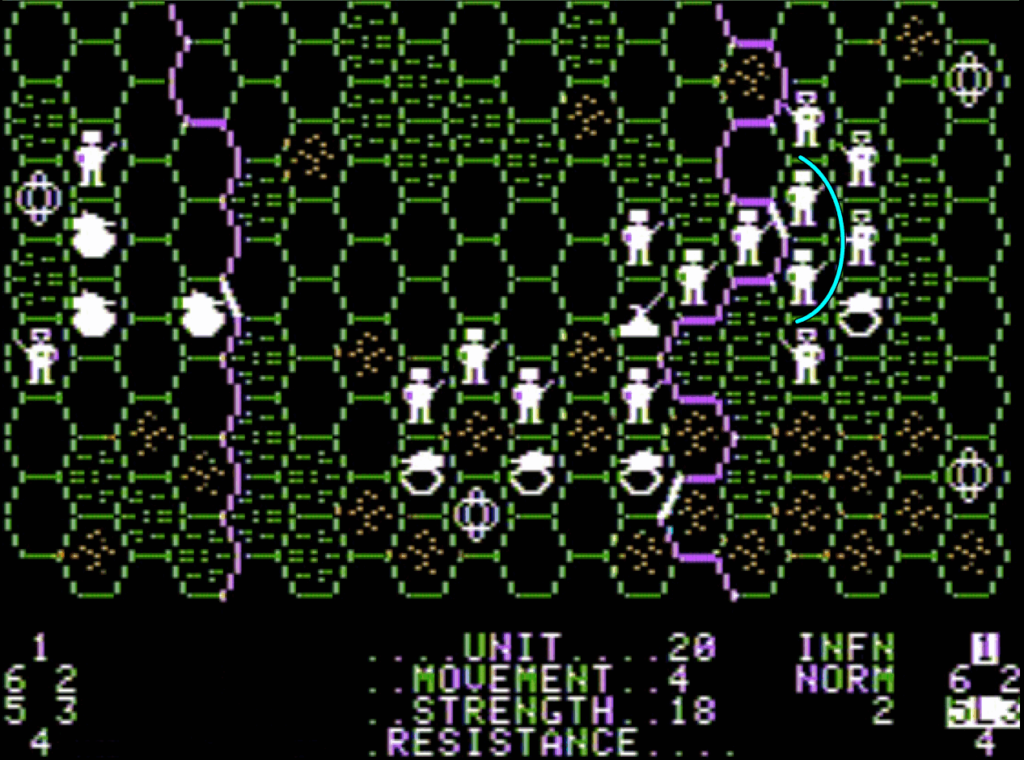
The first men to land, including Captain Andnjord, immediately moved to action, and searched for German artillery.
Andnjord also set up the first line of defense in the forest, which gives a strong advantage in combat.
The alarmed Germans poured in from all sides but all the paratroopers were deployed by now.
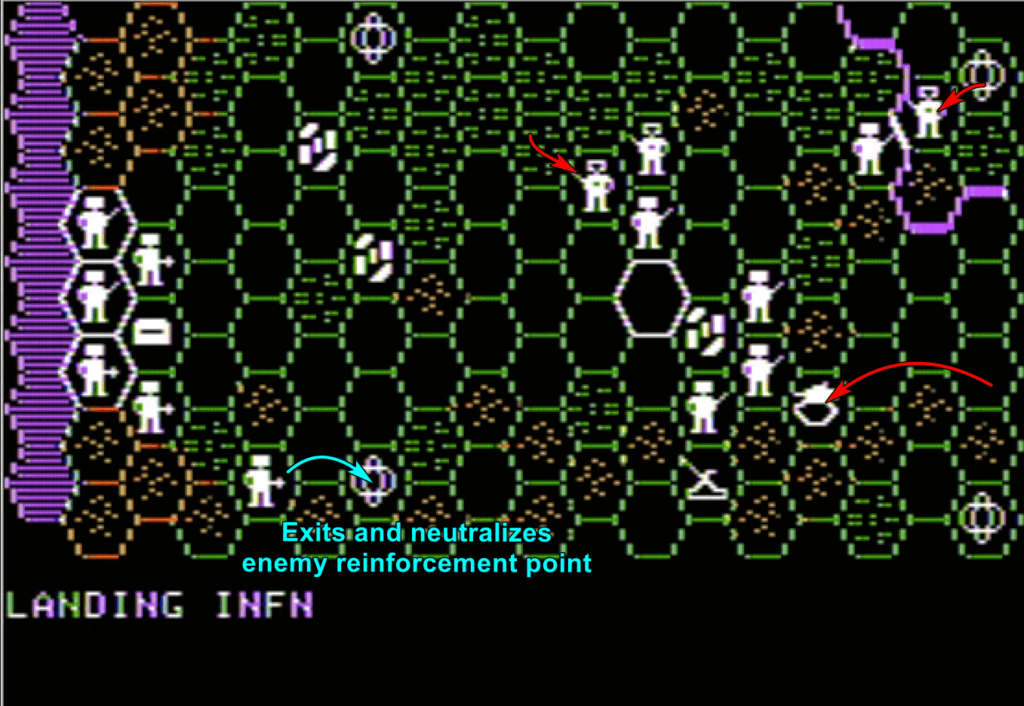
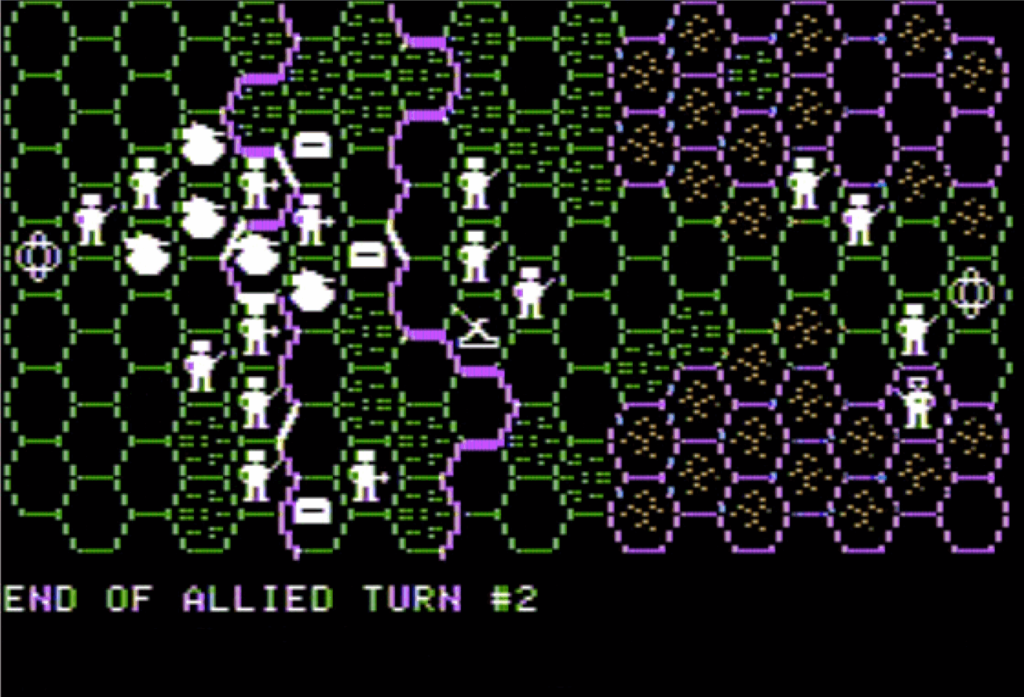
On the beaches, “Baud” had landed, personally leading the first wave. His men were in “attack mode”, which means they would fight better and cause twice as much damage as they normally would, but they would also receive twice as much damage themselves. Manning grenades and flamethrowers, Baud lost no time advancing. Already, the southernmost bunker had been neutralized by combat engineers.
The rest of the bunkers, flanked by the US infantry, did not last much longer, and already some engineers secured the southern exit zone !
Baud let out a sigh of relief. From his point of view, everything was going according to plan.
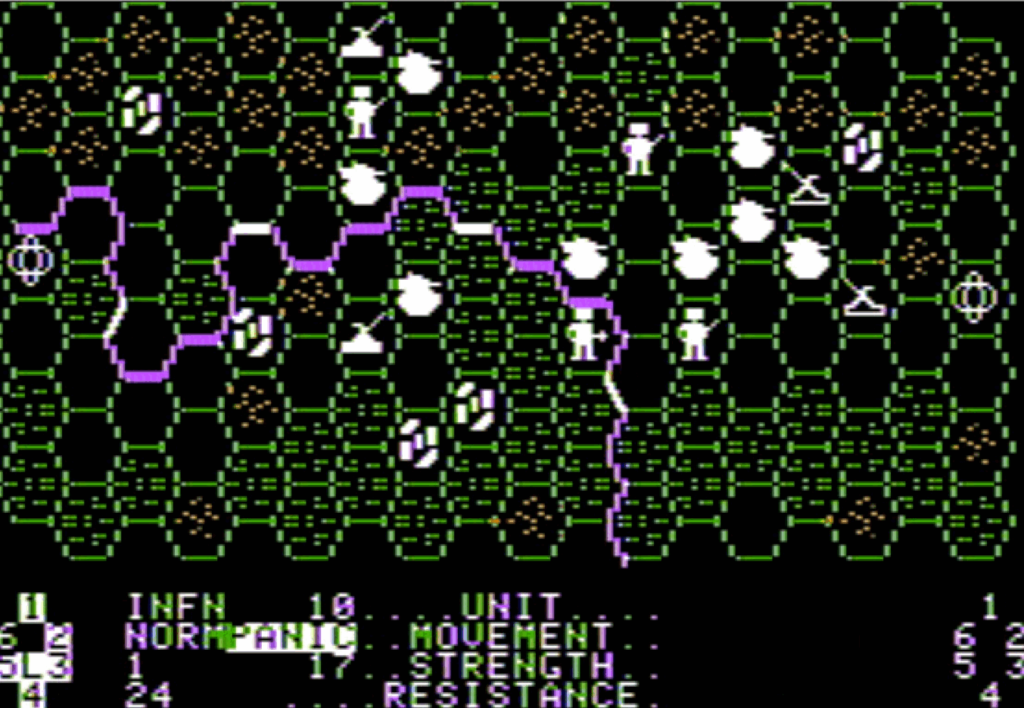
On the other hand, Captain Andnjord was under pressure. German artillery had not been silenced, and enemy tanks were already counter-attacking. Those were not just any tank ! Tiger tanks, the very best tanks in the history of mankind. It took a minimum of nine Shermans to destroy one Tiger because it was that good !
The surrounded paratroopers dug in and hoped for the best. In “defensive mode”, they would not be able to move or counter-attack, but any attempt to dislodge them would be more difficult. It would help compensate the huge advantage tanks have against infantry !
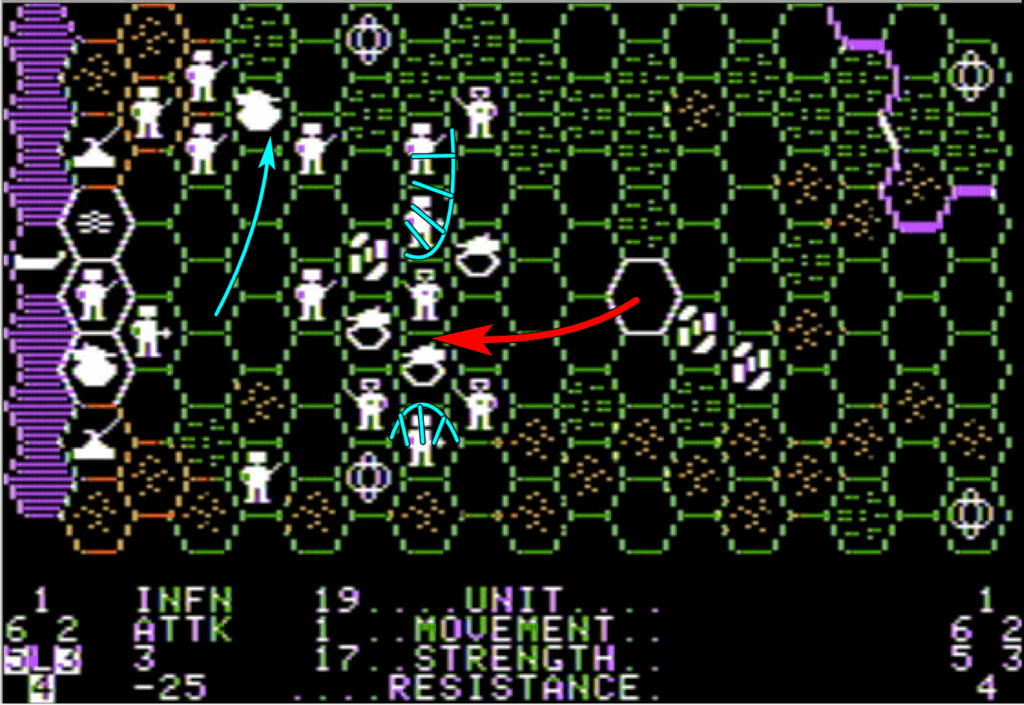
After removing the enemy bunkers, Baud moved to secure the Northern exit, but they were faced by well-entrenched forces, themselves also in defensive mode: the dreaded SS Leibreichkopf division, the very best of Hitler’s elite, each personally chosen by Himmler and trained in a secret base in Antarctica, and they would not break !
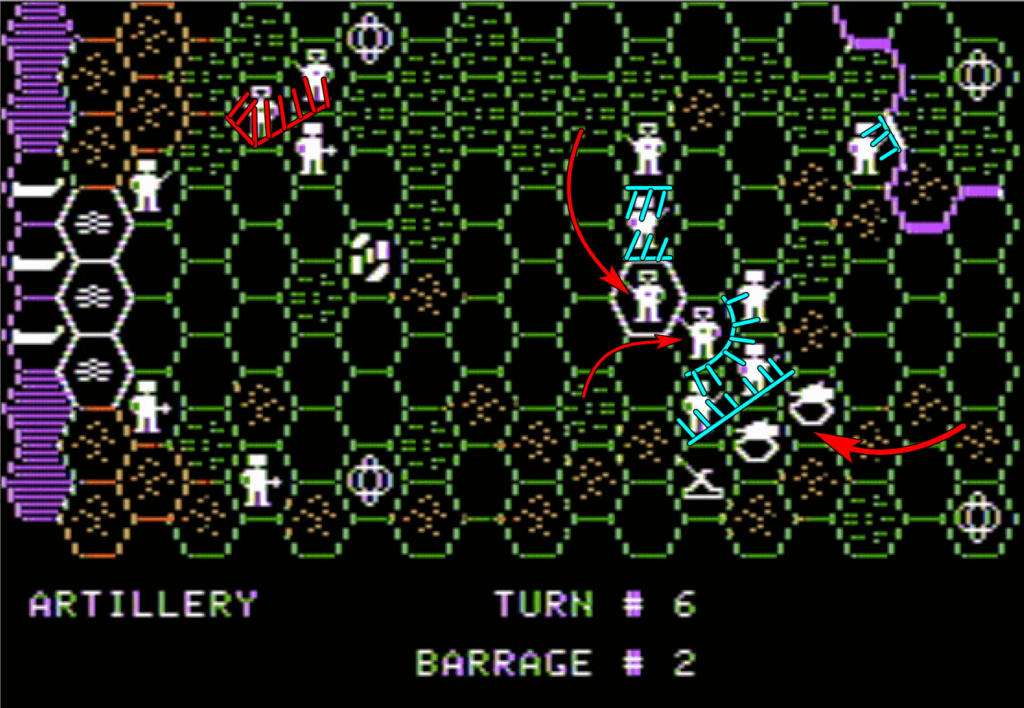
More Americans landed on the beaches, including artillery, but the Germans had consolidated their Northern defence.

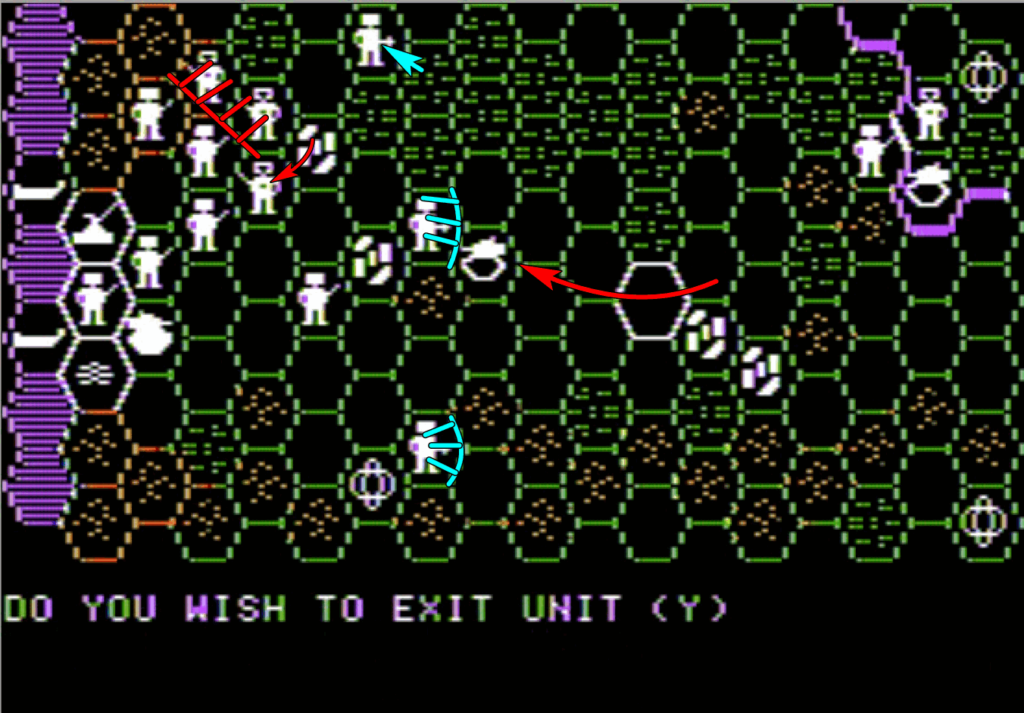
Meanwhile, the Germans had defeated the paratroopers, Captain Andnjord lays dead. He was found clutching his fiancée’s photo to his breast. According to witnesses on the ground, he barely had time to whisper those last few words “Tell Franny I always loved her.”
For Baud, the clock was now ticking but at last some daring combat engineers managed to turn the defenders, evacuate by the Northern exit area, closing this route for German reinforcements.
It is now a race for time : will the Americans manage to remove the remaining defenders from the elite SS Leibreichkopf division before the Tiger tanks arrive ?
*** Ad break ***
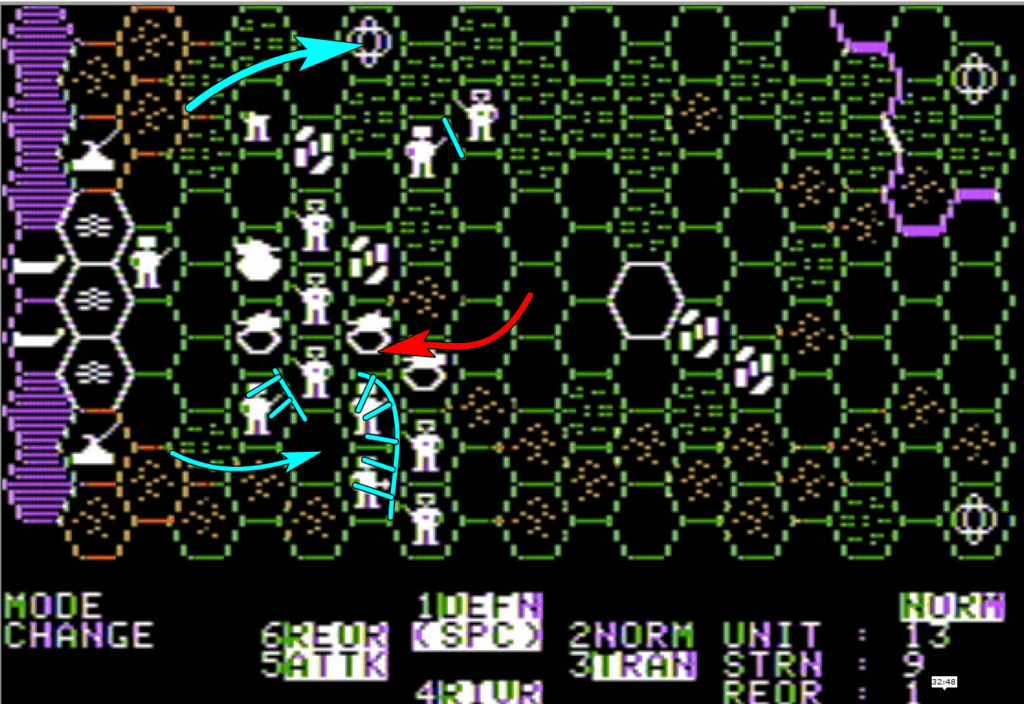
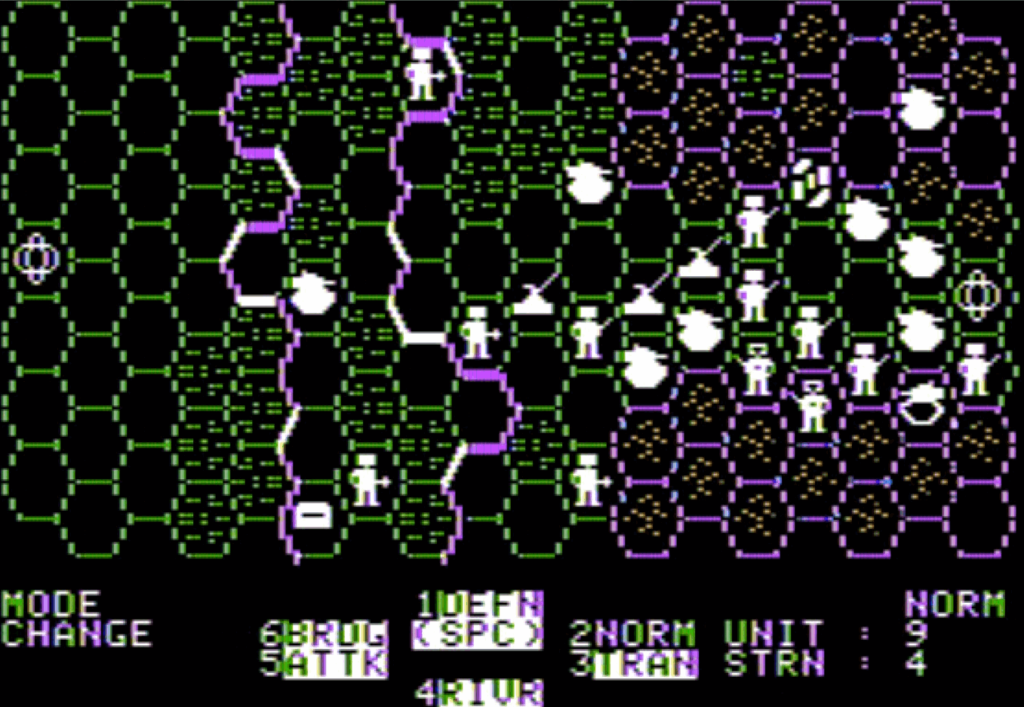
The Americans build up a makeshift defence to stop the German Tigers. To the raw power of German steel factories, the Americans would oppose their grit. The fury of the 58-ton monsters of steel, all guns and armour, was stopped, for a time.
Finally, the Shermans, bringing their guns against the German infantry, open the route to the Northern evacuation zone.
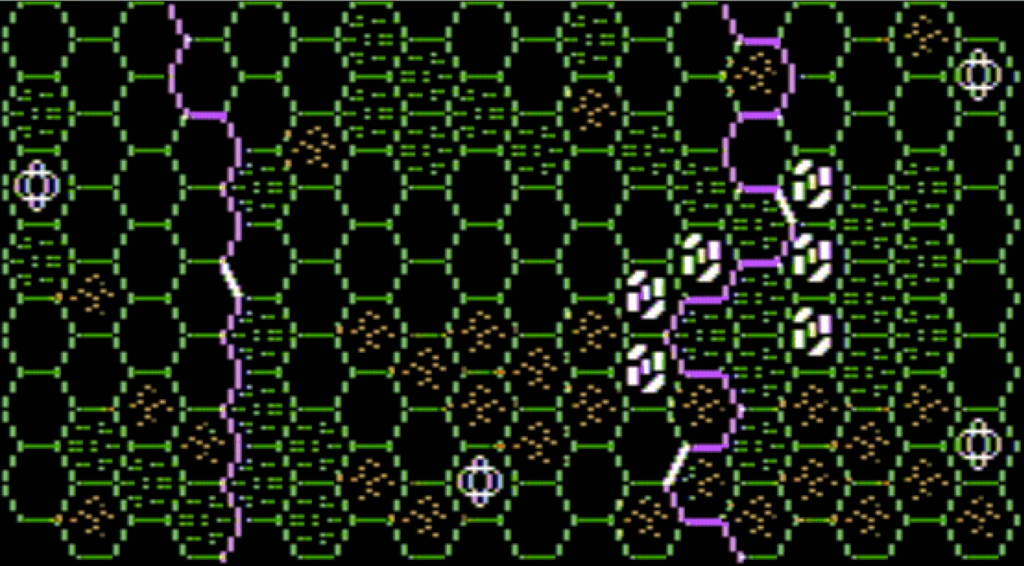
Alas too late ! Using the night [every 5 turns, the night allows to mostly ignore zone of control], the disciplined Wehrmacht veterans, trained by years of combat in the Eastern front, infiltrated the US line, and surrounded their makeshift defence.
Baud orders the units that were depleted against the SS defenders to evacuate through the North. Note that his orders don’t actually say “the companies you evacuate should be in a capacity to actually fight”. Meanwhile, he orders his tank crews to stall by facing the enemy tanks.
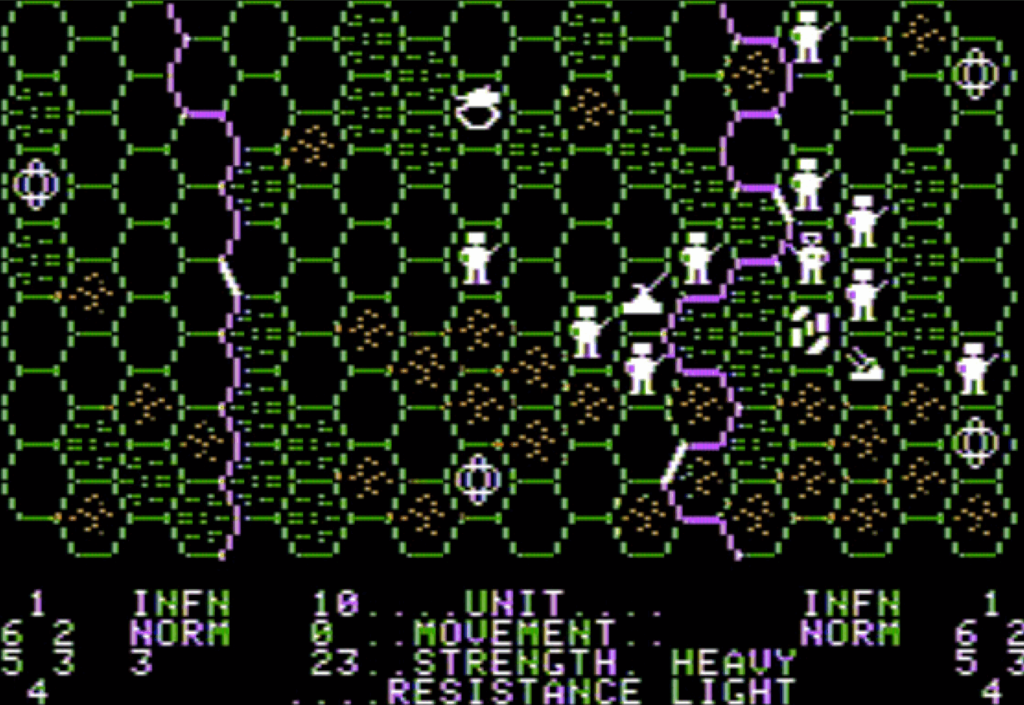
But what could the Shermans, derisively called the “Ronsons” due to their propensity to burn when hit by enemy shells, do against the ogres of Kursk.
A last minute desperate defence is mounted in the South…
Too late, the defence collapses…
… and the Americans are pushed back to the sea by the German armoured force !
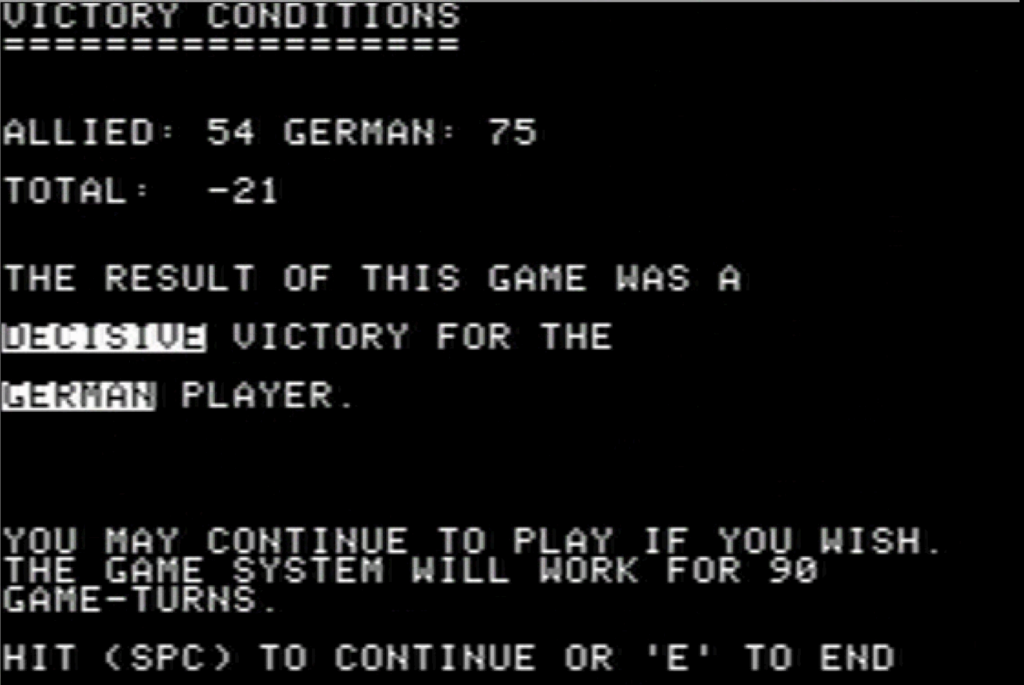
Conclusion :
In our next episode of Classified Battles of WW2 learn everything about the Conquest of New Swabia in 1946.
The game has three other scenarios – so describing them very quickly :
A. Advance to Contact
This scenario is the “default” scenario with no special rules.
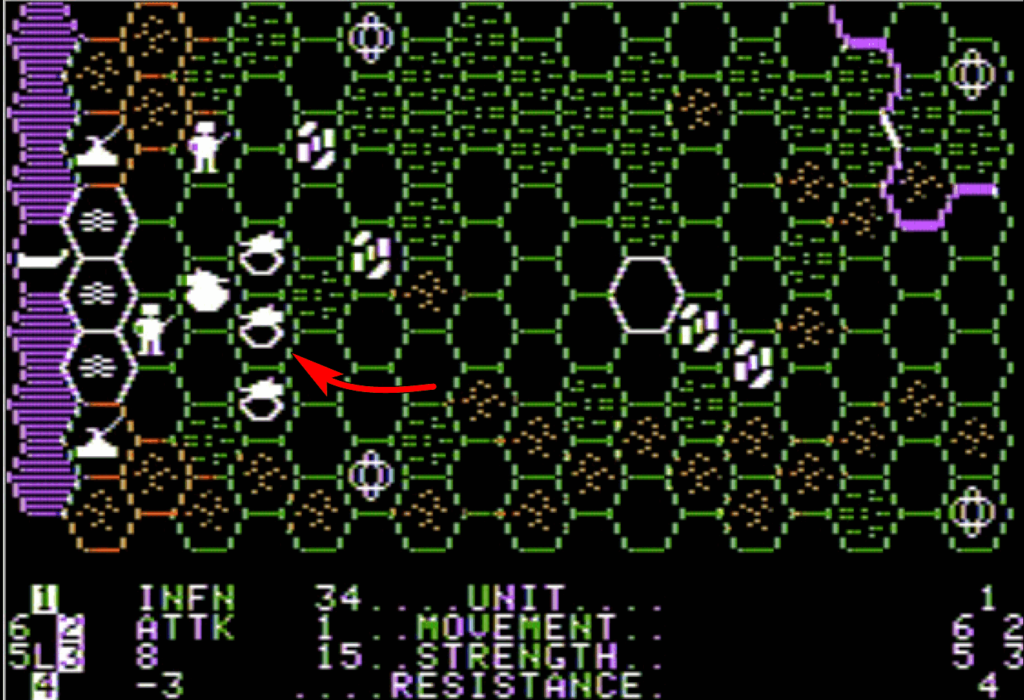
The objective is to have the most points at the end of turn 20, with points only being earned by controlling the city tiles. The Americans start with 3 tank companies, the Germans with 4 tank companies (as they play second), and reinforcements are received by both sides every turn.
Unfortunately for the German AI, my troops come from the left so I have 5 villages on “my” side in addition to a nice defensive position for 4 of them – I just have to protect the bridges.
This allowed me to establish killing zones against which the AI sent its forces to their destruction.
After destroying the AI force, I even had the luxury to push to the right of the map and seize the AI’s villages :
I scored a decisive victory.
B. Bridgehead
This scenario represents the attempt to capture the Arnhem bridges by a force composed of English, Americans and Poles.
The objective is to bring at least one tank unit on the Eastern side of the second river at turn 20. The player can only rely on paratrooper drops until turn 12 – at which point the tanks arrive.
The initial landing went well, and I allocated some soldiers from my initial drop to find and destroy the enemy AA to help future drops.
By Turn 12, I had been attacked and attacked again – my position on the eastern bank was holding by a fingernail :
When the tanks finally approached the second bridge, it was too late :

I did what I could to regain a foothold, but to no avail. It was a strategic defeat.
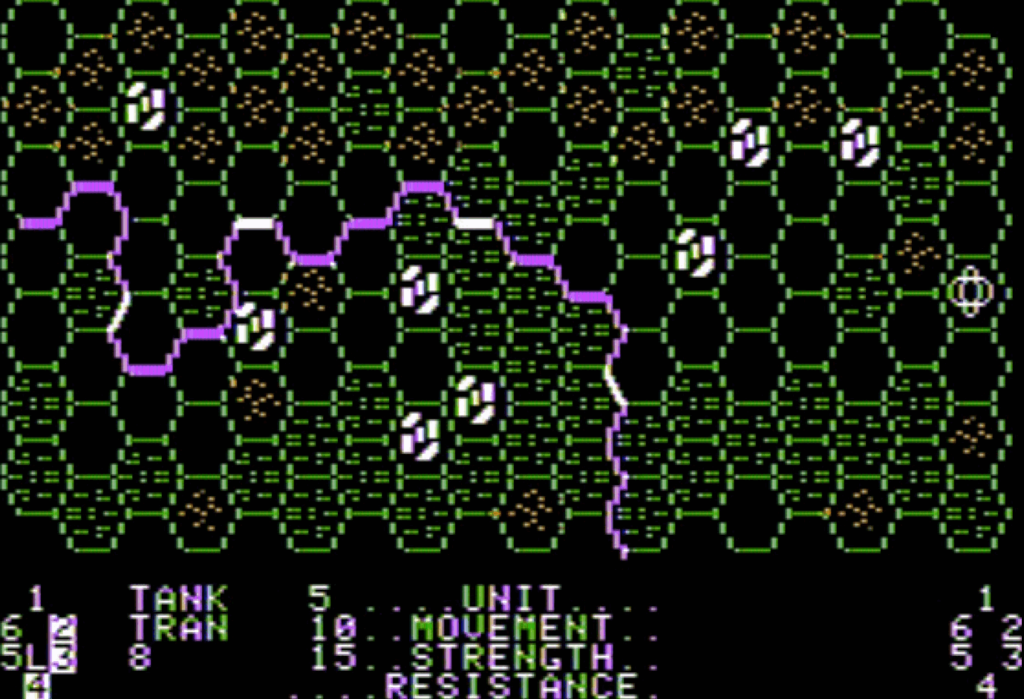
C. Highway
The last scenario is about the progression of the XXX along “Hell’s Highway” to relieve the paratroopers at Arnhem :
In this scenario, the objective is to make as many troops as possible exit from the East.
Of course, the Germans have a line of bunkers between the two rivers, and the marshes in purple have some specific rules : the marsh tiles have “invisible walls” around them (randomly). The German player knows which routes work in the marshes , the American player does not.
On the other hand, as the American, I could use engineers to build pontoons over the river, and I had two paratrooper drops :

This time, the paratroopers quickly opened the way, and removed the enemy artillery. Meanwhile, German pillboxes were assaulted and destroyed by engineers.
This allowed the tanks to very quickly reach the right part of the map.
Decisive victory for the allied player – but of course as I failed the previous scenario in Arnhem, historically it would have been for naught.
My blog crashed early July 2021, and my back-up had not “saved” Operation Apocalypse, so I copy/pasted the comments below from my cache :